Introduction
As the holiday season approaches, the aroma of freshly baked cookies fills homes, creating a sense of warmth and nostalgia. Holiday baking traditions are cherished around the world, where families come together to create delightful treats that not only satisfy sweet cravings but also evoke cherished memories. Among these festive delights, White Chocolate Candy Cane Cookies stand out as a perfect embodiment of the season, combining the rich, creamy taste of white chocolate with the refreshing crunch of peppermint candy canes.
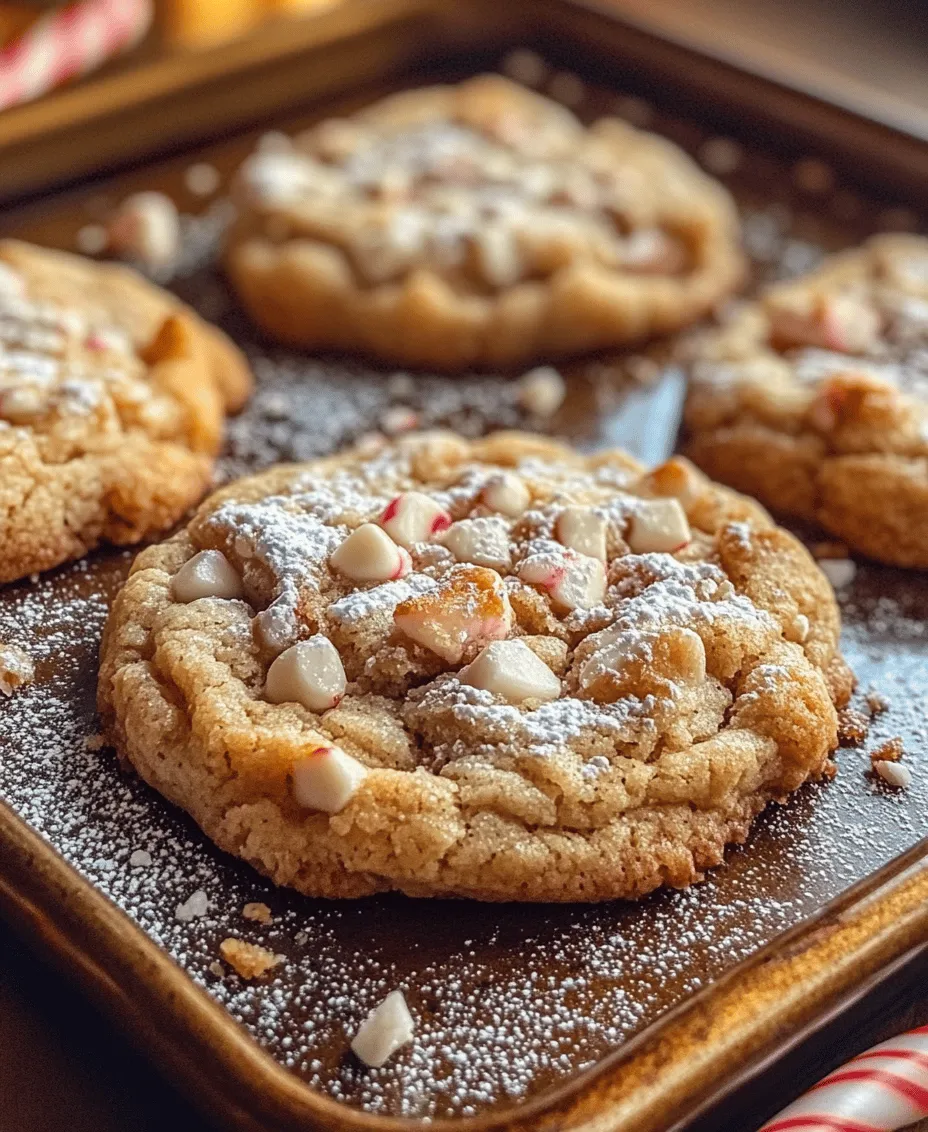
These cookies are not only visually appealing with their flecks of red and white, but they also encapsulate the essence of the holidays. The delightful marriage of flavors and textures in these cookies makes them a must-have for any holiday gathering, whether it’s a cozy family get-together or a lively holiday party. The sweetness of white chocolate balances perfectly with the minty freshness of crushed candy canes, resulting in a treat that is both indulgent and refreshing.
In this article, we will dive into the delightful world of White Chocolate Candy Cane Cookies, exploring the essential ingredients that contribute to their unique flavor profile, step-by-step instructions for creating the perfect batch, and expert tips to ensure your holiday cookies turn out beautifully every time. Get ready to don your apron and embark on a baking adventure that will leave your kitchen smelling heavenly and your friends and family begging for more!
Understanding the Ingredients
Before we begin baking, it’s essential to understand the role of each ingredient in our White Chocolate Candy Cane Cookies. This knowledge not only enhances our appreciation of the baking process but also empowers us to make adjustments and improvements where necessary. Let’s take a closer look at the key ingredients that will bring this festive cookie to life.
All-Purpose Flour: Structure and Texture
All-purpose flour serves as the backbone of our cookie dough, providing the necessary structure and texture. When combined with the other ingredients, flour helps to form gluten, which gives the cookies their chewy texture. It’s crucial to measure the flour accurately to avoid overly dry or crumbly cookies. For the best results, spoon the flour into your measuring cup and level it off with a knife, ensuring you don’t pack it down.
Baking Soda: Leavening Agent
Baking soda is a vital component that acts as a leavening agent in our cookie recipe. When combined with the acidic components of the dough, it produces carbon dioxide bubbles, causing the cookies to rise and become fluffy. The right amount of baking soda will help achieve the perfect texture, ensuring that the cookies are soft yet sturdy enough to hold their shape.
Salt: Enhancing Flavor
While salt may seem like a minor ingredient, it plays a crucial role in enhancing the overall flavor of our cookies. A pinch of salt balances the sweetness of the sugar and brings out the flavors of the white chocolate and peppermint. Additionally, it helps to strengthen the dough, making for a more satisfying bite.
Unsalted Butter: Moisture and Flavor
Unsalted butter is a cornerstone of many cookie recipes, including our White Chocolate Candy Cane Cookies. It contributes both moisture and flavor to the dough, ensuring that the cookies remain tender and rich. Using unsalted butter allows for better control over the overall saltiness of the cookies. Be sure to let the butter soften at room temperature before using it, as this will make it easier to cream with the sugar.
Granulated Sugar: Sweetness and Texture
Granulated sugar adds sweetness and contributes to the texture of our cookies. When creamed with butter, sugar helps to create air pockets that will expand during baking, giving the cookies their light and fluffy texture. The amount of sugar in the recipe can be adjusted slightly to suit your taste, but keep in mind that reducing sugar too much may affect the cookie’s structure and moisture.
Egg: Binding Agent and Moisture
The egg in our recipe serves as a binding agent, bringing the ingredients together and providing moisture to the dough. It also contributes to the cookies’ richness and helps them maintain their shape during baking. For the best results, use large eggs at room temperature, as they incorporate more easily into the dough.
Vanilla and Almond Extracts: Flavor Profile
For a well-rounded flavor profile, we incorporate both vanilla and almond extracts into our cookie batter. Vanilla extract adds a warm, sweet note, while almond extract provides a lovely nutty undertone that complements the white chocolate and peppermint flavors beautifully. Be sure to use pure extracts rather than imitation for the best flavor.
White Chocolate Chips: Sweetness and Creaminess
White chocolate chips are the star of our cookie recipe, adding a luscious creaminess and sweetness that pairs perfectly with the crunchy candy canes. When choosing white chocolate chips, opt for high-quality brands for the best melting and flavor. If you prefer, you can also chop up a white chocolate bar for a richer taste and varied texture.
Candy Canes: Festive Flavor and Crunch
Crushed candy canes give our cookies a festive touch, adding a delightful crunch and peppermint flavor that is synonymous with the holiday season. When preparing the candy canes, ensure they are finely crushed to distribute the flavor evenly throughout the cookie dough. You can easily crush them by placing them in a zip-top bag and using a rolling pin or mallet to break them into small pieces.
Powdered Sugar: Decoration and Finishing Touch
Lastly, powdered sugar is used for dusting our cookies before serving, adding an elegant touch and a hint of sweetness. It creates a beautiful snowy appearance that enhances the festive nature of these cookies. When dusting, use a fine sieve to achieve a light and even coating.
Preparation Steps
Now that we have a solid understanding of the ingredients and their roles, let’s move on to the preparation steps that will guide us in creating these delectable White Chocolate Candy Cane Cookies. Each step is designed to ensure that we achieve the perfect balance of flavors and textures in our cookies.
Preheat the Oven: Importance of Temperature for Baking
The first step in our cookie-making journey is to preheat the oven to 350°F (175°C). Preheating is essential as it ensures that the cookies begin baking immediately upon being placed in the oven. An adequately heated oven will help the cookies rise properly and create a delightful golden-brown exterior.
Combining Dry Ingredients: Techniques for Achieving a Well-Mixed Base
While the oven is heating, we can prepare our dry ingredients. In a medium bowl, combine the all-purpose flour, baking soda, and salt. Whisking these ingredients together ensures even distribution of the leavening agent and salt throughout the flour, which is crucial for consistent baking. Set this mixture aside as we move on to the next step.
Creaming Butter and Sugar: The Science Behind This Crucial Step
In a large mixing bowl, beat the softened unsalted butter and granulated sugar together using an electric mixer on medium speed. This creaming process is vital, as it incorporates air into the butter and sugar mixture, helping to create a light and fluffy texture in our cookies. Continue creaming until the mixture is pale and fluffy, which usually takes about 3-5 minutes. This step also helps dissolve the sugar, contributing to a smoother dough.
Adding Egg and Extracts: Tips for Incorporating Wet Ingredients
Once the butter and sugar are well combined, it’s time to add the egg along with the vanilla and almond extracts. Beat the mixture on low speed until the egg is fully incorporated. Take care not to overmix at this stage; we want to combine the ingredients just enough to create a homogeneous mixture without compromising the airiness we achieved during the creaming process.
Incorporating Dry Ingredients: Best Practices to Avoid Overmixing
Now, gradually add the dry ingredient mixture to the wet ingredients, mixing on low speed. It’s important to mix just until the flour is incorporated. Overmixing can lead to dense cookies, so stop mixing as soon as you no longer see any dry flour.
Folding in White Chocolate and Candy Canes: Ensuring Even Distribution
Finally, using a spatula or wooden spoon, gently fold in the white chocolate chips and crushed candy canes. This step ensures that the chocolate and candy are evenly distributed throughout the dough without deflating it. Be careful not to over-mix at this stage; a few turns of the spatula should be sufficient to achieve even distribution.
With the dough prepared, you’re now ready to scoop and bake your White Chocolate Candy Cane Cookies, creating a festive treat that will delight everyone who tastes them. Stay tuned for the next part of this article, where we will cover the baking process and provide tips for achieving the best results. Happy baking!


