Introduction
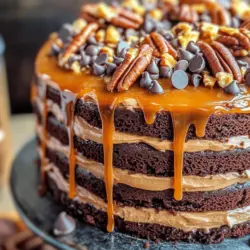
If you’re searching for a showstopper dessert that combines rich flavors with delightful textures, look no further than the Turtle Chocolate Layer Cake. This indulgent creation has earned its place as a favorite among chocolate lovers and dessert enthusiasts alike. What makes this cake truly special is its harmonious blend of layers: moist chocolate cake, luscious caramel sauce, creamy frosting, and an array of toppings that add both flavor and visual appeal.
The Turtle Chocolate Layer Cake derives its name from the classic turtle candies, which feature a combination of chocolate, caramel, and nuts. This cake captures that essence, elevating it into a multi-layered treat that is perfect for special occasions, celebrations, or simply to satisfy your sweet tooth. Each slice offers a delightful experience, with the chocolate cake providing a rich foundation, while the caramel and frosting add sweetness and creaminess. The textural contrast of the toppings, typically including chopped pecans or walnuts, creates a satisfying crunch that complements the cake beautifully.
In this article, we will not only explore the delicious layers that make up this cake but also dive into its key components: the chocolate cake base, homemade caramel sauce, fluffy frosting, and the finishing touches that take it to the next level. Whether you’re an experienced baker or a novice in the kitchen, this Turtle Chocolate Layer Cake recipe will guide you through every step of the process, ensuring that you create a dessert that is both visually stunning and utterly delicious.
Understanding the Ingredients
When it comes to baking, the quality of the ingredients you choose can greatly affect the final outcome of your Turtle Chocolate Layer Cake. Here’s a closer look at the primary ingredients used in this recipe, along with their roles in creating that perfect balance of flavors and textures.
All-Purpose Flour
All-purpose flour serves as the backbone of the cake, providing structure and stability. It contains a moderate amount of protein, which helps to create gluten when combined with liquid and mixed. This gluten formation contributes to the cake’s overall texture, allowing it to rise and hold its shape. For the best results, it’s advisable to scoop the flour into your measuring cup and level it off with a knife, avoiding any compaction that could lead to a dense cake.
Granulated Sugar
Granulated sugar not only sweetens the cake but also plays a crucial role in moisture retention and texture. When sugar is creamed with butter, it creates air pockets that help the cake rise during baking. Additionally, sugar contributes to the cake’s tenderness, ensuring that each bite melts in your mouth. Using the right amount of sugar is vital; too little can result in a dry cake, while too much can lead to an overly sweet and dense creation.
Unsweetened Cocoa Powder
To achieve that deep chocolate flavor that makes this cake irresistible, unsweetened cocoa powder is essential. It adds complexity to the taste profile and enhances the overall chocolate experience. Make sure to choose high-quality cocoa powder for the best flavor. The cocoa powder also contributes to the cake’s color, giving it the rich, dark appearance that is characteristic of a chocolate layer cake.
Eggs and Milk
Eggs and milk are crucial for binding the ingredients together, providing moisture, and enriching the cake’s flavor. Eggs add structure and stability, while milk contributes to the cake’s tenderness and helps create a smooth batter. For the best results, use room temperature eggs and milk, as they incorporate more easily into the batter, resulting in a uniform texture.
Caramel Sauce and Frosting
The caramel sauce and frosting are what elevate this cake from a simple chocolate cake to a decadent Turtle Chocolate Layer Cake. A homemade caramel sauce provides a rich, buttery flavor that complements the chocolate perfectly, while the frosting adds creaminess and sweetness. The combination of these elements creates an explosion of flavors that will leave your taste buds craving more.
Preparing the Cake Batter
Creating the perfect cake batter is key to achieving a moist and delicious Turtle Chocolate Layer Cake. Follow these step-by-step instructions to ensure that your batter is well-prepared and ready for baking.
Mixing Dry Ingredients
Start by gathering your dry ingredients: all-purpose flour, granulated sugar, unsweetened cocoa powder, baking powder, baking soda, and salt. Sifting these ingredients together is an important step that should not be overlooked. Sifting aerates the flour and cocoa powder, helping to break up any lumps and ensuring a smooth, even texture throughout the cake. This process also helps to evenly distribute the leavening agents (baking powder and baking soda) and salt, resulting in a more uniform rise.
Incorporating Wet Ingredients
Once your dry ingredients are combined, it’s time to add the wet ingredients. In a separate bowl, mix together the eggs, milk, and vanilla extract. The vanilla extract adds a lovely aroma and enhances the overall flavor of the cake. When you’re ready, pour the wet mixture into the bowl with the dry ingredients. Using an electric mixer or a whisk, blend the mixture until just combined, being careful not to overmix. Overmixing can lead to a dense cake as it develops the gluten in the flour too much.
The Role of Boiling Water
One unique aspect of this Turtle Chocolate Layer Cake recipe is the addition of boiling water. Once your batter is well-combined, slowly stir in the boiling water. This step may seem unusual, but it plays a crucial role in enhancing the cake’s moisture. The boiling water helps to bloom the cocoa powder, intensifying its flavor and creating a velvety texture in the batter. The result is a cake that is incredibly moist and rich.
Baking the Cakes
Now that you have prepared your cake batter, it’s time to get baking. Proper baking techniques are essential for achieving the perfect cake.
Importance of Oven Temperature Accuracy
Before you pour the batter into your prepared cake pans, preheat your oven to the specified temperature. Oven accuracy is crucial, as baking is a science that requires precise conditions. Use an oven thermometer to ensure your oven is at the right temperature, as many home ovens can be off by several degrees. Preheating the oven allows the cakes to rise properly, resulting in a light and fluffy texture.
How to Check for Doneness
Once your cakes are in the oven, it’s important to monitor their progress. The best way to check for doneness is by using the toothpick test. Insert a toothpick into the center of the cake; if it comes out clean or with a few moist crumbs attached, your cake is ready. If there is wet batter on the toothpick, continue baking and check again in a few minutes. Be cautious not to open the oven door too frequently, as this can cause the cakes to sink.
Cooling Process
After removing the cakes from the oven, allow them to cool in the pans for about 10 minutes. This cooling period helps the cakes to set and makes it easier to remove them from the pans without breaking. Once slightly cooled, carefully invert the cakes onto wire racks to cool completely. Cooling the cakes completely before frosting is essential; if the cakes are still warm, the frosting can melt and slide off, ruining the layers.
Making the Caramel Sauce
While your cakes are cooling, it’s the perfect time to prepare the caramel sauce. Making homemade caramel may seem intimidating, but with the right approach, it’s quite simple.
Detailed Explanation of the Caramelization Process
To start, gather your ingredients: granulated sugar, unsalted butter, and heavy cream. Begin by heating the granulated sugar in a saucepan over medium heat. Stir continuously until the sugar melts and turns a beautiful amber color. Be careful not to let it burn, as burnt sugar will result in a bitter taste. Once the sugar has fully melted, add the unsalted butter and stir until melted and combined. Finally, remove the saucepan from the heat and carefully pour in the heavy cream, stirring constantly to incorporate. The mixture will bubble vigorously, so be cautious during this step.
Once combined, let the caramel sauce cool slightly before using it in your Turtle Chocolate Layer Cake. This homemade caramel sauce will add an incredible depth of flavor, taking your cake to new heights.
With your cake layers cooling and your caramel sauce ready, you’re well on your way to creating a stunning Turtle Chocolate Layer Cake that will be the highlight of any gathering. Stay tuned as we delve deeper into the frosting and assembly of this decadent dessert in the next part of the article!
Importance of Gentle Heating and Stirring
When preparing the caramel sauce for your Turtle Chocolate Layer Cake, the importance of gentle heating and stirring cannot be overstated. Caramelization is a delicate process that requires careful attention. As you heat the sugar, it begins to melt and transform into a golden syrup. Stirring gently helps to ensure that the sugar melts evenly, preventing any hot spots that could lead to burning.
The science behind caramelization involves the breakdown of sugar molecules through a process called pyrolysis, where the sugar is heated to a point where it starts to decompose. This not only changes the sugar’s physical state but also enhances its flavor, creating that rich, deep taste we associate with caramel.
To achieve the perfect caramel sauce, take your time. Use a heavy-bottomed saucepan to distribute the heat evenly, and stir constantly but gently. This will help prevent the sugar from crystallizing and ensure a smooth, silky sauce that will complement the rich chocolate layers of your cake.
Tips for Achieving a Smooth, Creamy Sauce Without Burning
1. Use Quality Ingredients: Start with high-quality granulated sugar and unsalted butter. The better the ingredients, the better your caramel will taste.
2. Monitor Your Heat: Use medium heat rather than high. If you see the sugar starting to bubble too aggressively, lower the heat to prevent burning.
3. Watch for Color Changes: Once the sugar melts, keep a close eye on it. You want it to turn a light amber color; this indicates that it is ready to be removed from the heat.
4. Add Cream Gradually: When incorporating cream, do so slowly and carefully. The mixture will bubble violently, so be prepared for this reaction.
5. Stir Constantly: Use a wooden spoon or a silicone spatula to stir the caramel continuously. This helps to redistribute the heat and prevents burning.
By following these tips, you can create a luscious caramel sauce that will enhance your Turtle Chocolate Layer Cake.
Crafting the Frosting
Now that your caramel sauce is ready, it’s time to turn your attention to the chocolate frosting that will envelop your cake layers. This frosting is an essential component, adding richness and creaminess that perfectly complements the other flavors.
Description of the Making Process for the Chocolate Frosting
To create a decadent chocolate frosting, you’ll need softened butter, cocoa powder, powdered sugar, and heavy cream. Start by beating the softened butter in a mixing bowl until it’s light and fluffy. The softened butter is crucial here; it ensures that your frosting has the right texture and is easy to spread.
Once the butter is creamy, gradually add in the cocoa powder and powdered sugar. Mixing these dry ingredients in slowly will help prevent a cloud of sugar from filling your kitchen. After incorporating the dry ingredients, pour in the heavy cream and beat the mixture until it reaches a fluffy consistency.
Importance of Softened Butter for Texture
Using softened butter is key to achieving that light and airy texture in your frosting. Cold butter can lead to a thick and lumpy frosting that is difficult to spread. By allowing the butter to soften at room temperature, you create a base that will whip up beautifully.
Techniques for Achieving a Fluffy Consistency
To achieve the fluffiest consistency, use an electric mixer on medium-high speed. Start with a lower speed to combine the ingredients, then increase the speed for a few minutes. This aerates the frosting, creating a light and fluffy texture.
If the frosting is too thick, add a little more cream, one tablespoon at a time, until you reach the desired consistency. Conversely, if it’s too thin, add a bit more powdered sugar to thicken it up.
Balancing Sweetness with Cocoa Powder and Cream
Finding the perfect balance of sweetness in your frosting is essential. The cocoa powder adds a rich chocolate flavor, while the powdered sugar provides sweetness. Taste your frosting as you go, and adjust by adding more cocoa powder if you prefer a deeper chocolate flavor or more sugar if you like it sweeter.
Assembling the Cake
Once your cake layers are baked and cooled, it’s time to assemble your Turtle Chocolate Layer Cake. This step is where your masterpiece begins to take shape.
Step-by-Step Guide to Cake Assembly
1. Prepare Your Work Surface: Place one cake layer on a serving plate or cake stand.
2. Add the Frosting: Use an offset spatula to spread a layer of chocolate frosting evenly on top of the first cake layer. Aim for a generous layer to create a flavorful bite.
3. Drizzle the Caramel: Next, drizzle some of your prepared caramel sauce over the frosting. This will add a delicious surprise in every slice.
4. Layer the Next Cake: Place the second cake layer on top and repeat the frosting and caramel drizzling process.
5. Top with the Final Layer: Once all layers are stacked, apply frosting on the top and sides of the cake, smoothing it out for a polished finish.
Layering Technique for Even Distribution of Frosting and Caramel
When layering your cake, it’s essential to ensure even distribution of both frosting and caramel. Use a piping bag for the frosting if you want more control. This method allows you to create a dam of frosting around the edge of each layer, preventing the caramel from spilling out and ensuring it stays in the center.
Tips for Placing and Stacking Cake Layers
– Level Your Cakes: If your cake layers have domed tops, use a serrated knife to level them before stacking. This will help your cake sit evenly and prevent it from toppling over.
– Chill Between Layers: If you’re finding it difficult to stack the layers, consider chilling them for about 15 minutes before assembling. This firms up the cake, making it easier to handle.
Importance of Chilling the Cake Before Cutting for Clean Slices
After assembling your Turtle Chocolate Layer Cake, allow it to chill in the refrigerator for at least 30 minutes before cutting. This chilling period helps the frosting set, making it easier to slice cleanly through the layers. A well-chilled cake will not only look more appealing but also hold its structure when served.
Final Touches and Presentation
A cake is not just about taste; it’s also about presentation. The final touches can elevate your Turtle Chocolate Layer Cake from delicious to truly stunning.
Ideas for Decorating the Cake for Visual Appeal
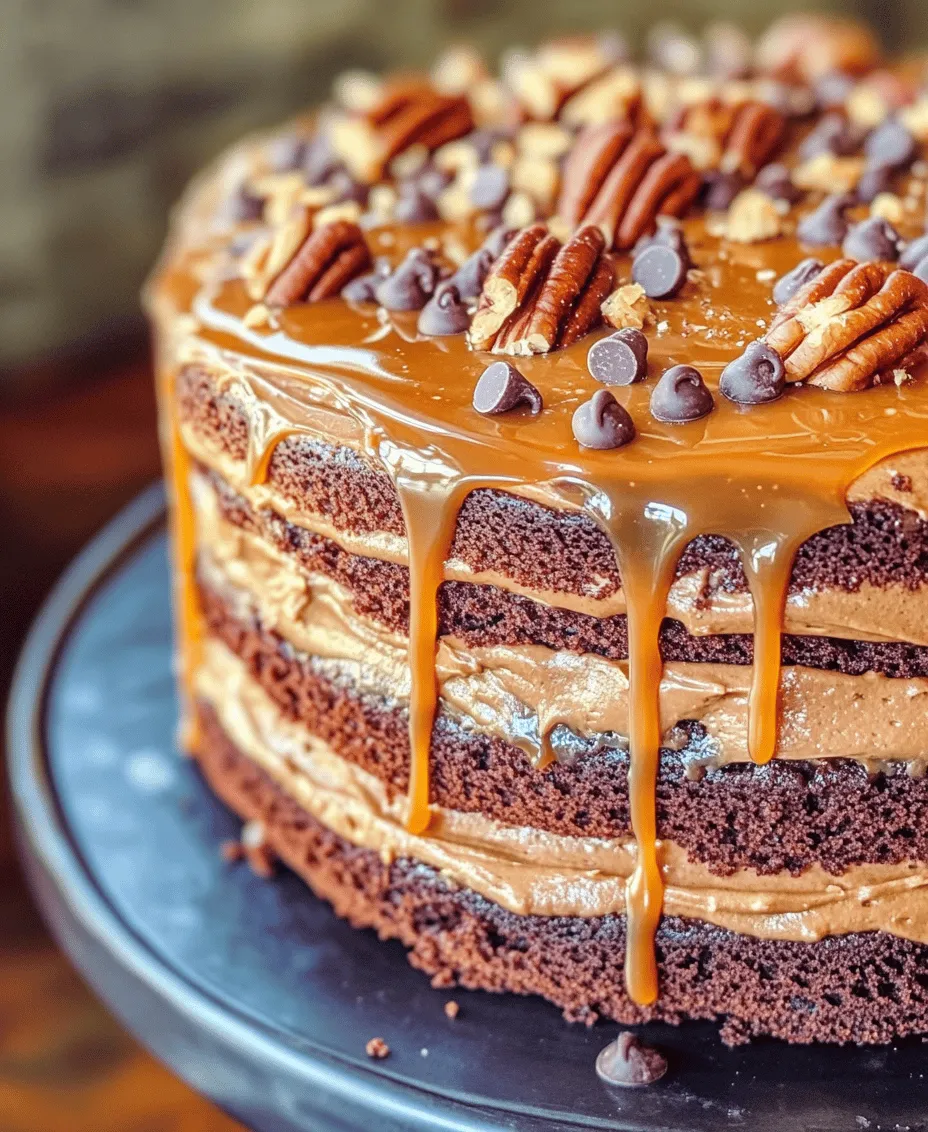
To make your cake visually appealing, consider decorating the top with additional drizzles of caramel and frosting. You can create a rustic look by letting the frosting spill over the sides slightly.
Techniques for Drizzling Caramel Sauce and Frosting
For drizzling, use a spoon or a squeeze bottle to create controlled patterns. Drizzle the caramel sauce first, allowing it to cascade down the sides. Follow with a drizzle of chocolate frosting for contrast.
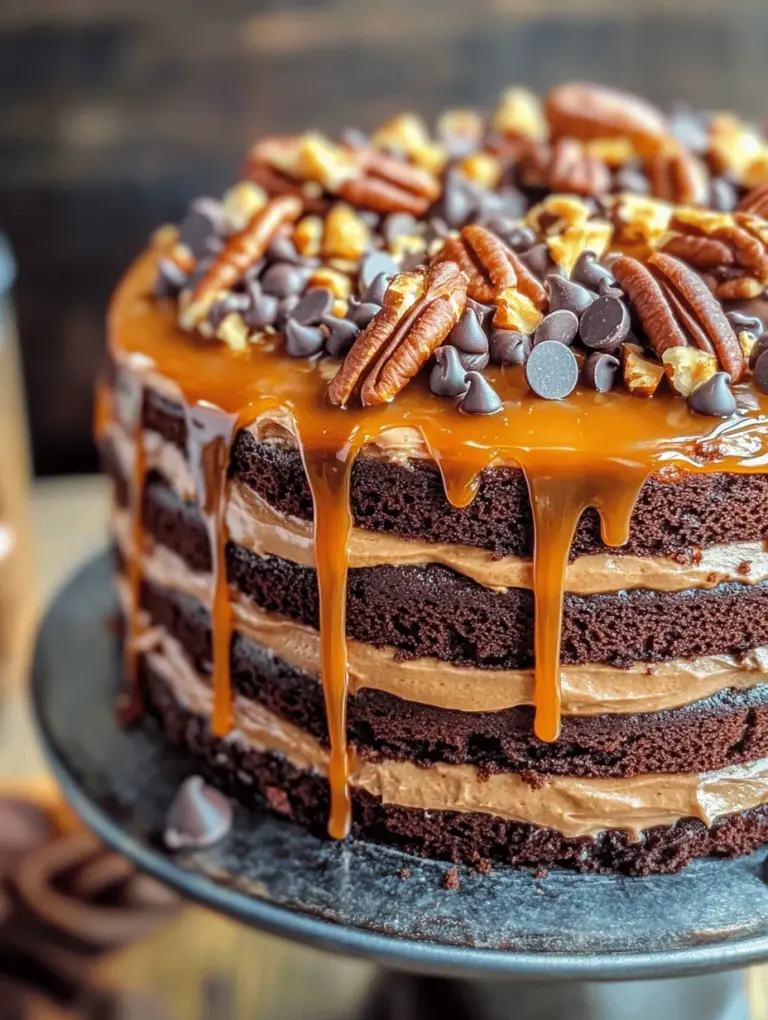
Suggestions for Garnishing: Nuts and Chocolate Chips
To enhance the flavors even further, sprinkle chopped pecans or walnuts on top of the cake. These nuts not only add crunch but also tie into the turtle theme. You can also scatter chocolate chips or shavings over the top for an extra touch of indulgence.
Importance of Presentation in Enhancing the Dessert Experience
A beautifully presented cake not only whets the appetite but also creates a memorable experience for your guests. Investing time in the presentation shows that you care about the dessert you are serving, making it a centerpiece at any gathering.
Serving Suggestions
Now that your Turtle Chocolate Layer Cake is complete, let’s discuss how to serve it to maximize enjoyment.
Ideal Occasions for Serving Turtle Chocolate Layer Cake
This cake is perfect for a range of occasions. Whether you’re hosting a birthday party, holiday gathering, or simply want to treat your family, this cake fits the bill. Its rich flavors make it a great choice for special celebrations or as a delightful ending to a casual dinner.
Pairing Ideas: Beverages or Sides That Complement the Cake
When it comes to drinks, consider pairing your Turtle Chocolate Layer Cake with a rich coffee or espresso. The bitterness of the coffee balances the sweetness of the cake beautifully. Alternatively, a glass of milk or a scoop of vanilla ice cream can provide a delightful contrast to the chocolate and caramel.
Storage Tips for Leftover Cake to Maintain Freshness
If you have any leftovers, store them in an airtight container in the refrigerator. This will help maintain the cake’s moisture and prevent it from drying out. For longer storage, you can freeze individual slices wrapped tightly in plastic wrap and foil. When you’re ready to enjoy a piece, simply thaw it in the refrigerator overnight.
Conclusion
In conclusion, the Turtle Chocolate Layer Cake is a deliciously decadent dessert that combines rich chocolate layers, creamy frosting, and sumptuous caramel sauce. Each component plays a vital role in creating a dessert experience that is both indulgent and satisfying.
We encourage you to try this recipe for yourself and delight your family and friends with this stunning cake. The joy of baking, especially when shared with loved ones, is a rewarding experience. So gather your ingredients, roll up your sleeves, and embark on your baking adventure. Your Turtle Chocolate Layer Cake awaits!