Introduction
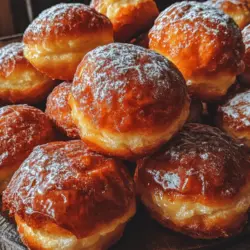
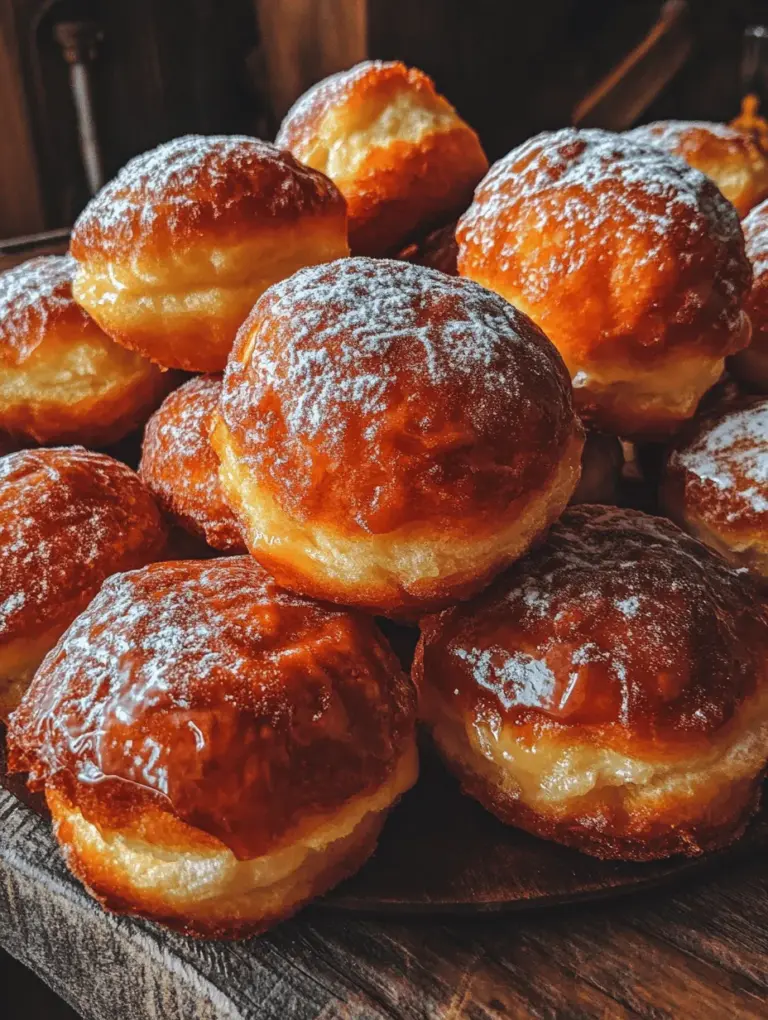
There’s something undeniably magical about the aroma of freshly made doughnuts wafting through your kitchen. The soft, pillowy texture, the slightly crisp exterior, and the sweet, irresistible flavor all come together to create an experience that brings joy to anyone lucky enough to taste them. Homemade doughnuts are a delightful treat that can elevate any occasion, whether it’s a weekend breakfast, a special celebration, or simply a moment of self-indulgence.
Mastering the art of making yeast doughnuts is essential for anyone looking to enjoy these confections at their best. Unlike their cake counterparts, yeast doughnuts are light, airy, and have a lovely chew that makes each bite an experience to savor. In this comprehensive guide, we will walk you through everything you need to know about creating perfect yeast doughnuts, from understanding the role of yeast in baking to step-by-step instructions for making them from scratch.
Prepare to embark on a culinary adventure as we explore the world of yeast doughnuts, learn about the essential ingredients, and master the techniques needed to create these delectable treats in your own kitchen.
Understanding Yeast Doughnuts
To appreciate the beauty of yeast doughnuts, it’s crucial to understand the role of yeast in baking. Yeast is a living organism that ferments sugars, producing carbon dioxide and alcohol in the process. This fermentation is what gives yeast doughnuts their characteristic rise and airy texture. When you mix yeast with warm liquid, sugar, and flour, it begins to feed on the sugars, creating bubbles of carbon dioxide that expand the dough, resulting in a light and fluffy final product.
Yeast doughnuts differ significantly from cake doughnuts, which are typically denser and made using baking powder or baking soda as leavening agents. While cake doughnuts are often rich and sweet, yeast doughnuts have a unique chewiness and a more delicate crumb due to the fermentation process. This difference in preparation and ingredients leads to contrasting textures and flavors, making each type of doughnut special in its own right.
One of the greatest advantages of making doughnuts at home is the ability to customize them to your liking. Store-bought doughnuts often lack the freshness and unique flavors that homemade versions can offer. By making your own yeast doughnuts, you have complete control over the ingredients and can experiment with various flavors, fillings, and toppings. Plus, the satisfaction of creating something delicious from scratch is an experience that cannot be matched.
Essential Ingredients for Perfect Yeast Doughnuts
Before we dive into the step-by-step instructions, let’s take a closer look at the essential ingredients that will help you achieve perfect yeast doughnuts. Understanding the function of each component will not only enhance your baking skills but also improve your overall doughnut-making experience.
1. Active Dry Yeast: This is the star ingredient of your doughnut recipe. Yeast is responsible for the dough rising and creating the light, fluffy texture that sets yeast doughnuts apart. When activated properly, yeast will produce carbon dioxide, which causes the dough to expand.
2. Whole Milk: Milk adds moisture and richness to the dough. The fat content in whole milk contributes to a tender crumb and enhances the overall flavor of the doughnuts.
3. Granulated Sugar: Sugar serves two important purposes in this recipe. It not only sweetens the dough but also provides food for the yeast, aiding in its activation. This results in a well-risen dough that has a hint of sweetness.
4. Salt: While it may seem counterintuitive, salt is crucial in baking. It enhances the overall flavor of the dough and helps to regulate yeast activity, preventing over-fermentation.
5. Eggs: Eggs contribute richness, moisture, and structure to the dough. They also help to create a tender crumb, making the doughnuts more enjoyable.
6. Unsalted Butter: Butter adds flavor and richness to the dough. Using unsalted butter allows you to control the salt content in your recipe, ensuring a balanced flavor profile.
7. All-Purpose Flour: This is the foundation of your doughnut dough. All-purpose flour contains the right amount of protein to create the gluten structure needed for elasticity while still allowing for a tender texture.
8. Oil for Frying: Choosing the right type of oil for frying is important for achieving perfectly cooked doughnuts. Oils with a high smoke point, such as vegetable or canola oil, are ideal for frying, as they can withstand the high temperatures needed without burning.
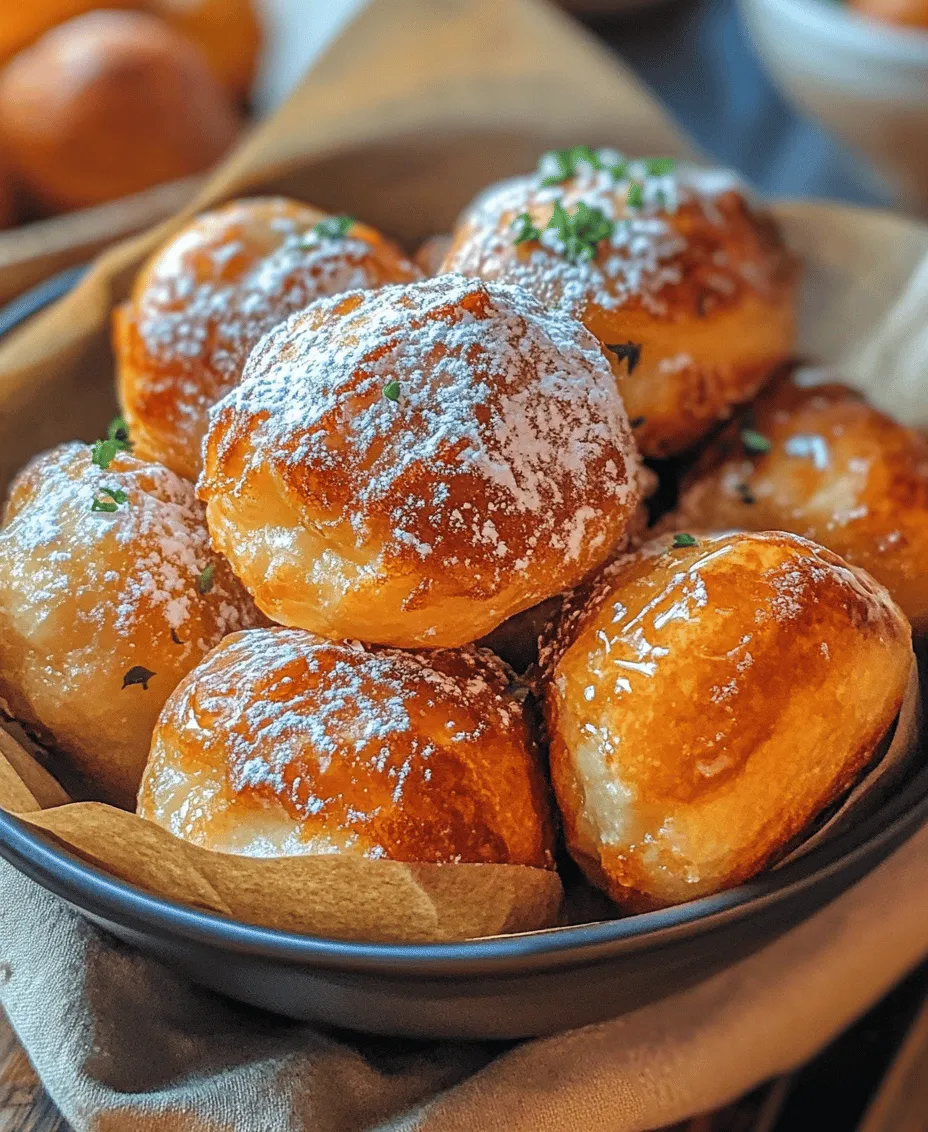
9. Optional Toppings: Once your doughnuts are fried and cooled, you can choose to coat them in powdered sugar, glaze, or even fill them with jam or cream. The toppings you select can elevate your doughnuts and add a personal touch.
With a clear understanding of the essential ingredients, we can now move on to the exciting part – making the yeast doughnuts!
Step-by-Step Instructions for Making Yeast Doughnuts
Preparing the Yeast Mixture
The first step in making perfect yeast doughnuts is to prepare the yeast mixture. Start by measuring out your active dry yeast and placing it in a mixing bowl. To activate the yeast, you will need warm milk and sugar. The ideal temperature for activating yeast is between 100°F to 110°F (37°C to 43°C). If the milk is too hot, it can kill the yeast, while milk that is too cold will not activate it properly.
1. Heat the Milk: Gently warm your whole milk in a saucepan over low heat or in the microwave until it reaches the desired temperature. A food thermometer can be helpful to ensure accuracy.
2. Combine Ingredients: In the bowl with the yeast, add a tablespoon of sugar and pour in the warmed milk. Stir gently to combine.
3. Let it Sit: Allow the mixture to sit for about 5-10 minutes until it becomes frothy and bubbly. This indicates that the yeast is active and ready to be mixed into the dough.
Mixing the Dough
Once your yeast mixture is ready, it’s time to mix the dough. This stage is crucial for incorporating all of the dry and wet ingredients to create a cohesive dough.
4. Combine Dry Ingredients: In a separate large mixing bowl, whisk together the all-purpose flour, remaining sugar, and salt. This ensures that the ingredients are evenly distributed.
5. Add Wet Ingredients: Create a well in the center of the dry ingredients and add the activated yeast mixture, eggs, and melted unsalted butter. Using a spoon or a spatula, gently mix the ingredients together until they begin to form a dough.
6. Knead the Dough: Once the dough is somewhat formed, turn it out onto a floured surface. Knead the dough for about 8-10 minutes, adding flour as needed to prevent sticking. The goal is to achieve a smooth and elastic dough that is soft but not overly sticky. If you press the dough, it should spring back.
Kneading the Dough
Kneading is an essential process that helps develop gluten, giving your doughnuts their structure and texture. The right technique can make a significant difference in the final result.
7. Kneading Techniques: To knead, push the dough away from you with the heel of your hand, then fold it back over itself and give it a quarter turn. Repeat this process, using a rhythmic motion. If the dough feels too sticky, sprinkle a little flour on the surface, but be careful not to add too much, as this can make the dough tough.
8. Check Dough Consistency: After kneading, the dough should be smooth and elastic. When you poke it with your finger, the indentation should fill back in. This indicates that the gluten has developed properly and the dough is ready for the next step.
This brings us to an exciting point in our doughnut-making journey. With the yeast mixture prepared, the dough mixed, and kneaded to perfection, we are on the verge of creating something truly delightful. Stay tuned as we continue our exploration of the remaining steps in crafting perfect yeast doughnuts, where we will discuss the crucial steps of rising, frying, and finishing with delicious toppings.
Perfect Yeast Doughnuts: A Comprehensive Guide to Making Delicious Treats
Signs That the Dough Is Ready for the First Rise
The first rise is a critical step in the yeast doughnut-making process, and recognizing when your dough is ready can make all the difference in achieving that perfect light and fluffy texture. Here are some signs to look for:
1. Dough Size: The dough should roughly double in size. If it hasn’t expanded significantly, it may need more time.
2. Poke Test: Gently poke the dough with a floured finger. If the indentation remains and slowly springs back, the dough is ready. If it springs back too quickly, it needs more time to rise.
3. Smooth Texture: The surface of the dough should appear smooth and elastic, indicating that the gluten has developed properly.
First Rise: The Importance of Proofing
Proofing is the process of allowing the dough to rise and develop flavor. During this time, the yeast ferments, producing carbon dioxide gas that creates air pockets in the dough. This step is essential for achieving the soft, airy texture characteristic of yeast doughnuts. Proper proofing can take anywhere from 1 to 2 hours, depending on the room temperature and the strength of your yeast.
What to Expect During the First Rise
During the first rise, your dough will increase in volume, and you may notice a pleasant smell as the yeast ferments the sugars in the dough. To create an ideal environment for rising, consider the following tips:
– Warm Location: Place the dough in a warm, draft-free area. An oven turned off with the light on can provide a perfect temperature.
– Covering: Use a damp kitchen towel or plastic wrap to cover the dough, preventing it from drying out.
– Humidity: A slightly humid environment can help the dough rise faster, so consider placing a bowl of hot water nearby.
Tips for Checking Dough Readiness
– Timing: Keep track of the time; if your dough hasn’t risen significantly in the expected timeframe, it may need more time.
– Temperature: Ensure your room isn’t too cold, as lower temperatures can slow down yeast activity.
– Visual Cues: Look for a soft, bubbly appearance on the surface of the dough.
Shaping the Doughnuts
Once the dough has completed its first rise, it’s time to shape your doughnuts for the second rise. Shaping is crucial for ensuring all your doughnuts have uniform sizes and maintain their structure during frying.
Techniques for Rolling and Cutting Doughnuts
1. Flour Your Surface: Lightly dust your work surface with flour to prevent sticking.
2. Roll Out the Dough: Using a rolling pin, roll out the dough to about ½ inch thickness. Ensure it’s even to promote uniform frying.
3. Cutting: Use a round cookie cutter (or a glass) to cut out the doughnuts. A smaller cutter will help create the hole in the center of each doughnut.
Options for Doughnut Shapes and Sizes
– Classic Round: The traditional shape, great for any occasion.
– Filled Doughnuts: Cut out the circles and use a pastry bag to fill with cream, jam, or custard after frying.
– Mini Doughnuts: Use a smaller cutter for bite-sized treats perfect for kids or parties.
Second Rise: Why It Matters
The second rise is just as important as the first. This step allows the doughnuts to puff up and develop that airy texture that makes them so delightful.
The Science Behind the Second Rise
During the second rise, the yeast continues to ferment, producing more gas that helps the doughnuts expand. This process improves the flavor and texture, making them light and fluffy. Skipping this step can lead to dense, heavy doughnuts.
Best Practices for Ensuring Doughnuts Puff Up Properly
– Time: Allow the doughnuts to rise for about 30-60 minutes after shaping.
– Covering: Keep the doughnuts covered with a towel or plastic wrap to maintain moisture.
– Gentle Handling: Be careful not to deflate them when moving them to the frying pan.
Frying the Doughnuts
Frying is where the magic happens. Achieving the perfect golden-brown doughnut requires attention to detail.
Perfect Frying Temperatures and Methods
The ideal frying temperature for yeast doughnuts is around 350°F to 375°F (175°C to 190°C). If the oil is too hot, the outside will brown before the inside cooks through. Conversely, if the oil is too cool, the doughnuts will absorb excess oil and become greasy.
1. Use a Deep Fryer or Heavy Pot: Ensure you have enough oil (about 2-3 inches deep) for the doughnuts to float.
2. Fry in Batches: Don’t overcrowd the pan; this can lower the oil temperature and lead to uneven cooking. Fry 2-3 doughnuts at a time, depending on the size of your pot.
3. Monitor Temperature: Use a candy thermometer to maintain the oil temperature.
Safety Precautions When Frying at Home
– Stay Attentive: Never leave hot oil unattended, and keep children and pets away from the cooking area.
– Use Long Utensils: When handling the doughnuts, use a slotted spoon or tongs to avoid splashes of hot oil.
– Have a Fire Extinguisher Handy: Just in case, it’s always good to be prepared when frying.
Finishing Touches: Glazing and Serving Suggestions
Once your doughnuts are perfectly fried, it’s time for the finishing touches that make them irresistible.
Options for Topping Doughnuts
1. Powdered Sugar: A classic choice that’s simple and delightful.
2. Glazes: Create a delicious glaze by mixing powdered sugar with milk or water until smooth. Consider adding flavors like vanilla or almond extract.
3. Sprinkles: Get festive with colorful sprinkles for a fun touch.
Creative Ideas for Flavor Variations
– Chocolate Glaze: Melt chocolate with a bit of butter for a rich, decadent topping.
– Maple Glaze: Combine powdered sugar with maple syrup for a sweet, aromatic finish.
– Cinnamon Sugar: Toss warm doughnuts in a mixture of cinnamon and granulated sugar for a delightful crunch.
Serving Suggestions for Different Occasions
– Breakfast or Brunch: Serve warm doughnuts with coffee or tea for a delightful morning treat.
– Dessert: Pair doughnuts with a scoop of ice cream for an indulgent dessert.
– Celebrations: Create a doughnut tower for special occasions or parties to impress your guests.
Common Mistakes to Avoid When Making Yeast Doughnuts
Creating the perfect doughnut requires attention to detail, and there are common pitfalls to watch out for:
Overview of Frequent Pitfalls and How to Prevent Them
1. Overworking the Dough: Kneading too much can lead to tough doughnuts. Mix just until the dough comes together.
2. Incorrect Frying Temperature: Always monitor oil temperature closely to avoid greasy or burnt doughnuts.
3. Skipping the Second Rise: This can lead to dense doughnuts. Always allow them to rise fully for the best results.
Nutritional Information
While doughnuts are a treat best enjoyed in moderation, it’s good to know what you’re indulging in. On average, a standard yeast doughnut contains:
– Calories: Approximately 250-300 calories per doughnut
– Fat: 12-15 grams
– Carbohydrates: 30-35 grams
– Protein: 3-4 grams
Enjoying treats like doughnuts can be part of a balanced diet when consumed occasionally and in moderation.
Conclusion
Making perfect yeast doughnuts at home is not only a rewarding culinary experience, but it also brings joy to those you share them with. The delightful aroma that fills your kitchen, the satisfaction of watching them rise, and the fun of glazing and decorating are all part of the process. We encourage you to try this recipe, experiment with flavors, and enjoy the process of baking. Homemade doughnuts can bring smiles to breakfast tables, brunch gatherings, or dessert platters. So roll up your sleeves, gather your ingredients, and embark on a sweet journey to doughnut perfection!