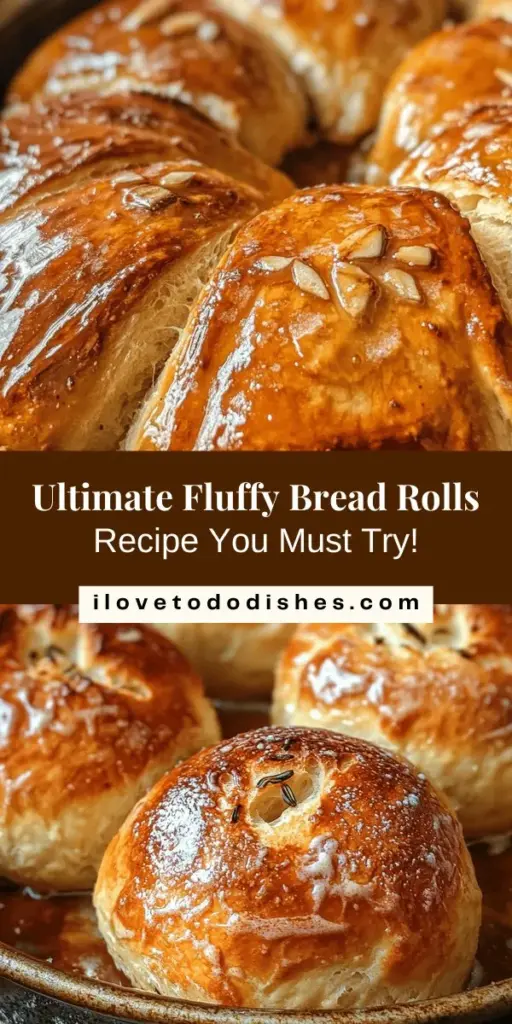
Introduction
Bread rolls are a timeless addition to any meal, bringing warmth and comfort to the table. There’s something magical about the aroma of freshly baked bread wafting through your kitchen, inviting family and friends to gather around. The Fluffiest Bread Rolls You’ll Ever Make is a recipe that promises to elevate your baking game, resulting in soft, light, and incredibly fluffy rolls perfect for any occasion. Whether you’re serving them alongside a hearty stew, as part of a festive spread, or simply enjoying them with a pat of butter, these rolls are sure to impress.
In this article, we’ll delve into the details of this recipe, exploring its ingredients, the baking process, and the science behind achieving the ultimate fluffiness. Baking bread can be a rewarding experience, and with this straightforward approach, even novice bakers can create rolls that look and taste like they came from a professional bakery. Prepare to be amazed as we guide you through each step of the process, ensuring that you have all the know-how to succeed.
Understanding the Ingredients
The foundation of any great bread roll lies in its ingredients. Each component contributes to the texture and flavor, and understanding their roles is key to mastering this recipe. Let’s break down the essential ingredients you’ll need and their significance in creating the fluffiest bread rolls.
Exploring All-Purpose Flour
When it comes to bread-making, the type of flour you choose can significantly impact the final product. All-purpose flour is the go-to choice for this recipe due to its balanced protein content, which typically ranges from 10-12%. This protein is crucial for gluten development, which gives bread its structure and chew.
As you knead the dough, gluten strands begin to form, creating a network that traps air bubbles produced by yeast. This process is critical in achieving the light and airy texture characteristic of fluffy bread rolls. If you’re looking for even more fluffiness, you can consider using bread flour, which has a higher protein content, allowing for more gluten development. However, all-purpose flour will still yield excellent results, making it accessible for all bakers.
The Role of Sugar in Bread Rolls
Sugar may seem like a simple additive, but its role in bread-making is multifaceted. In this recipe, sugar not only provides a hint of sweetness but also acts as a food source for the yeast. When yeast ferments, it consumes sugar and produces carbon dioxide gas, which is essential for the leavening process that makes the rolls rise.
Additionally, sugar contributes to the browning of the crust through the Maillard reaction, enhancing flavor and appearance. A touch of sweetness balances the flavors in the bread rolls, making them enjoyable on their own or as a complement to savory dishes.
Instant Yeast: The Fast-Acting Leavening Agent
Yeast is a vital ingredient in any bread recipe, and for The Fluffiest Bread Rolls, we’ll be using instant yeast. What sets instant yeast apart from active dry yeast is its fast-acting nature. Instant yeast can be mixed directly with dry ingredients without needing to be activated in water first, which simplifies the process.
When it comes to baking, using instant yeast can save you time and lead to quicker rises, allowing you to enjoy your rolls sooner. Its ability to produce carbon dioxide swiftly ensures that your dough will rise effectively, resulting in light and fluffy rolls that are a joy to eat.
The Significance of Milk in Baking
Milk is a crucial ingredient in this bread roll recipe, and its role cannot be understated. Warm milk is used to activate the yeast, helping it to wake up and start fermenting. The warmth of the milk creates an ideal environment for yeast activity, leading to a more vigorous rise.
Moreover, milk contributes to the softness and richness of the rolls. The fats and proteins present in milk help to tenderize the dough, resulting in a softer crumb. For those who prefer an alternative, non-dairy milk can also be used in this recipe, though the final texture may vary slightly.
Butter and Eggs: Enhancing Flavor and Texture
Both unsalted butter and eggs are essential for enriching the dough. Unsalted butter not only adds flavor but also enhances the overall texture of the rolls. The fat in butter coats the flour particles, leading to a more tender crumb and contributing to the fluffiness of the rolls.
Eggs play an equally important role; they add moisture and richness to the dough while also providing structure through their proteins. Including eggs in your dough helps improve elasticity, allowing the rolls to rise beautifully without collapsing. The combination of butter and eggs elevates the flavor profile, making these bread rolls irresistible.
The Touch of Vanilla Extract
Lastly, a splash of vanilla extract adds an unexpected yet delightful depth of flavor to your bread rolls. While it may seem unconventional, vanilla complements the sweetness and enriches the overall taste. This subtle addition can elevate the rolls from ordinary to extraordinary, making them memorable for anyone who tries them.
The Step-by-Step Process
Baking bread rolls is a rewarding experience, but it requires attention to detail. Here’s a comprehensive breakdown of each step in the recipe, starting with the preparation and mixing of the dough.
Preparation and Mixing the Dough
Before you begin, gather all your ingredients and ensure you have the necessary tools: a mixing bowl, measuring cups and spoons, a whisk, a rolling pin, and a baking sheet. Proper preparation will streamline the process and make your baking experience enjoyable.
1. Whisking Dry Ingredients: Start by measuring out your all-purpose flour, sugar, and instant yeast into a large mixing bowl. Whisk them together until well combined. This ensures that the yeast and sugar are evenly distributed throughout the flour, which is crucial for consistent rising.
2. Combining Wet Ingredients: In a separate bowl, mix your warm milk, melted unsalted butter, and eggs. It’s important to use warm milk (about 110°F or 43°C) to activate the yeast effectively. If the milk is too hot, it could kill the yeast, so make sure it’s warm but not scalding.
Once combined, create a well in the center of the dry ingredients and pour in the wet mixture. Gently stir with a wooden spoon or spatula until the dough begins to come together. This step is important as it forms the foundation for your rolls.
Kneading to Perfection
Kneading is a crucial step in bread-making that develops gluten and ensures your rolls have the right texture. Here’s how to knead effectively:
1. Kneading Techniques: Turn the dough out onto a lightly floured surface. Using the palms of your hands, push the dough away from you, then fold it back over itself. Rotate the dough a quarter turn and repeat this process. Continue kneading for about 8-10 minutes until the dough is smooth and elastic. If the dough is too sticky, add a little more flour as needed, but be careful not to add too much, as it can make the rolls dense.
2. Signs of Well-Kneaded Dough: A well-kneaded dough should be smooth, elastic, and spring back when gently poked. You can also perform the “windowpane test” by stretching a small piece of dough—if it forms a thin, translucent membrane without tearing, it’s perfectly kneaded.
First Rise: The Importance of Fermentation
Once your dough is kneaded to perfection, it’s time for the first rise. This step is crucial for developing flavor and texture.
1. Preparing for Rising: Lightly grease a large bowl with oil or cooking spray. Place the kneaded dough into the bowl, turning it to coat all sides with oil to prevent sticking. Cover the bowl with a clean kitchen towel or plastic wrap to keep the moisture in.
2. Letting the Dough Rise: Allow the dough to rise in a warm, draft-free place for about 1 to 2 hours, or until it has doubled in size. The ideal temperature for rising dough is around 75°F to 80°F (24°C to 27°C). If your kitchen is cooler, you can place the dough in a slightly warmed oven (turn it off before placing the dough inside) to create a cozy environment.
During this time, the yeast will continue to ferment and produce carbon dioxide, causing the dough to rise. This fermentation process not only leavens the dough but also develops complex flavors that enhance the final product.
With these initial steps completed, you are well on your way to creating the fluffiest bread rolls imaginable. In the next section, we will explore the shaping of the rolls and the subsequent rising, ensuring that each roll is perfectly formed and ready for baking. Stay tuned as we continue this delicious journey into the world of bread-making!
What Happens During the Rise
The rising of dough, also known as fermentation, is a crucial step in bread-making that transforms a simple mixture of flour, water, yeast, and salt into a light and fluffy dough. During this process, yeast consumes the sugars present in the dough and produces carbon dioxide and alcohol as byproducts. The carbon dioxide gets trapped in the gluten structure, causing the dough to expand and rise. This not only contributes to the final texture of the bread rolls but also enhances the flavor through the development of organic acids and alcohols.
As the dough rises, it also undergoes several physical and chemical changes. The gluten proteins in the flour become more elastic and interconnected, forming a network that can hold the gas produced by the yeast. This is why it’s essential to knead the dough properly before allowing it to rise. Kneading develops the gluten, ensuring that your bread rolls will be both airy and chewy.
Ideal Conditions for Dough Rising
For optimal dough rising, certain conditions must be met. Yeast thrives in warm, moist environments, so it’s essential to create the perfect atmosphere for your dough. The ideal temperature for rising dough is between 75°F to 85°F (24°C to 29°C). If your kitchen is too cool, consider placing the dough in a warm, draft-free area. You can also use an oven with the light on or a microwave (without the power on) to maintain warmth.
Humidity plays an equally important role. A dry environment can hinder the yeast’s activity and produce a denser roll. To combat this, consider covering your dough with a damp cloth or plastic wrap to retain moisture. Alternatively, you can place a bowl of hot water in the oven with the dough to create a humid atmosphere, promoting an effective rise.
Shaping and Second Rise
Techniques for Shaping Rolls
Once the first rise is complete, it’s time to shape your dough into rolls. This step is where your rolls begin to take their final form. Start by gently deflating the dough to release some of the trapped gas. Divide the dough into equal pieces, typically around 2 to 3 ounces each, depending on your desired roll size.
To shape each piece, gently stretch the edges towards the center, tucking them underneath to create a smooth top. This technique helps maintain tension on the outer surface of the roll, contributing to a beautiful rise during the second fermentation. If you’re feeling adventurous, you can also experiment with different shapes, such as knots or spiral rolls, for a fun presentation.
The Significance of the Second Rise in Achieving Fluffiness
The second rise, also known as proofing, is critical in achieving that coveted fluffiness in your bread rolls. This step allows the shaped rolls to rest and rise again, letting the gluten relax and the yeast continue to produce carbon dioxide. During this time, the rolls will expand further, creating air pockets that result in light and fluffy texture once baked.
It’s essential to ensure that rolls are covered during this second rise to prevent the surface from drying out. A light dusting of flour on the surface before covering can help, or you can use a damp cloth to retain moisture. Aim for a rise of about 30 to 60 minutes, or until the rolls have nearly doubled in size.
Baking the Rolls
Understanding the baking process can make a significant difference in your final product. The right technique can elevate your rolls from good to extraordinary.
Preheating the Oven
Proper temperature control is vital when baking bread rolls. Preheat your oven to 375°F (190°C) at least 30 minutes before baking. This ensures that the oven reaches a consistent temperature, allowing for even baking and proper crust formation. An oven thermometer can be a helpful tool to monitor the actual temperature, as many home ovens can be off by a few degrees.
For the best results, position a rack in the center of the oven to promote even heat distribution. If you have a baking stone, placing it in the oven while preheating will help maintain heat, contributing to a better rise and crust.
Baking to Perfection
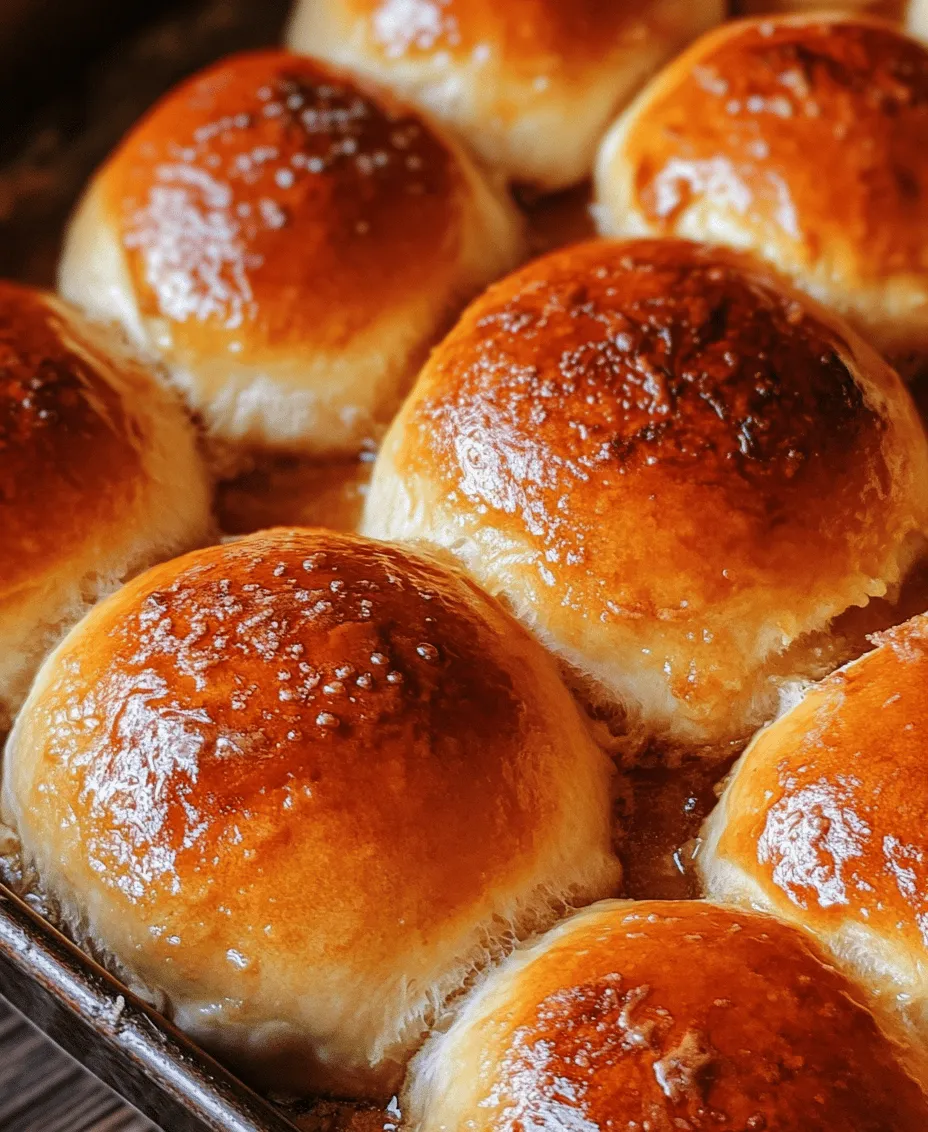
To determine when your rolls are done, look for a golden-brown color on the crust and a hollow sound when tapped on the bottom. This auditory cue is a reliable indicator that your rolls have baked through properly. The internal temperature of the rolls should ideally reach around 190°F (88°C) for full doneness.
Additionally, the texture of the rolls plays a significant role in assessing doneness. The crust should be crisp yet tender, while the interior should be soft and pillowy. If you find that the tops are browning too quickly, consider placing a sheet of aluminum foil over them during the last few minutes of baking.
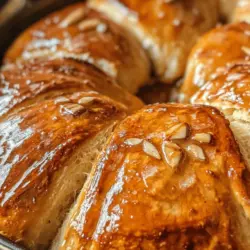
The Final Touch: Brushing with Butter
Adding a finishing touch to your rolls can elevate their flavor and appearance. Brushing the tops with melted butter right after they come out of the oven not only adds a rich flavor but also enhances the golden color of the crust. This step creates a slight sheen that makes the rolls look irresistibly appetizing.
The butter also helps to keep the crust tender, preventing it from becoming overly hard as the rolls cool. If you want to add an extra layer of flavor, consider mixing herbs or garlic into the melted butter for a delightful twist.
Serving Suggestions
The fluffiest bread rolls are incredibly versatile and can be enjoyed in various ways.
Pairing with Spreads
These rolls are perfect for pairing with a range of spreads. For a classic choice, simply slather your rolls with butter and add a dollop of your favorite jam or preserves. The combination of warm bread with sweet or tangy spreads is a comforting delight.
If you’re looking for something more adventurous, try honey drizzled over warm rolls or homemade garlic butter for a savory kick. A herb-infused butter can also add a gourmet touch, giving your rolls a flavor boost that will impress your guests.
Incorporating Rolls into Meals
These bread rolls can shine as a side dish for lunch or dinner. Serve them alongside soups and salads, where their fluffy texture can soak up delicious broth or dressing. You can also utilize them for sliders or sandwiches, filling them with your choice of meats, cheeses, or veggies to create a satisfying meal.
For a unique twist, consider making a bread bowl by hollowing out the center of a roll and filling it with soup or chili, creating a delightful edible container that is both functional and delicious.
Storing Leftovers
To enjoy these rolls beyond the initial bake, proper storage techniques are essential.
Best Practices for Keeping Rolls Fresh
To keep your leftover rolls fresh, allow them to cool completely before storing them. Place them in an airtight container or a resealable plastic bag, which will help retain moisture. For longer storage, you can freeze the rolls. Wrap each roll tightly in plastic wrap and place them in a freezer-safe bag, ensuring to remove as much air as possible to prevent freezer burn.
When you’re ready to enjoy the rolls again, simply thaw them at room temperature or heat them in a 350°F (175°C) oven for about 10-15 minutes to restore their fluffiness.
Reheating Methods to Maintain Fluffiness
To maintain the light and fluffy texture, avoid microwaving the rolls, as this can make them tough and chewy. Instead, opt for the oven method. Preheat your oven to 350°F (175°C) and place the rolls on a baking sheet. Cover them loosely with aluminum foil to retain moisture, and bake for about 10 minutes, or until warmed through.
Conclusion
Baking the fluffiest bread rolls is not only achievable but also incredibly satisfying. With the right ingredients, attention to detail in the process, and an understanding of the science behind baking, anyone can create rolls that are a hit at any gathering. This recipe serves as a perfect introduction to the world of bread-making, inviting both novice and experienced bakers to enjoy the delightful experience of homemade bread.
Embrace the warmth, the aroma, and the joy that comes with sharing freshly baked rolls with friends and family. Whether enjoyed alone or as part of a meal, these rolls are a testament to the beauty of home baking and the happiness it can bring. So gather your ingredients, follow the steps, and dive into the rewarding world of fluffy bread rolls. Your kitchen will be filled with the delightful aroma of freshly baked bread, and your loved ones will be eagerly awaiting the first delicious bite.