Introduction
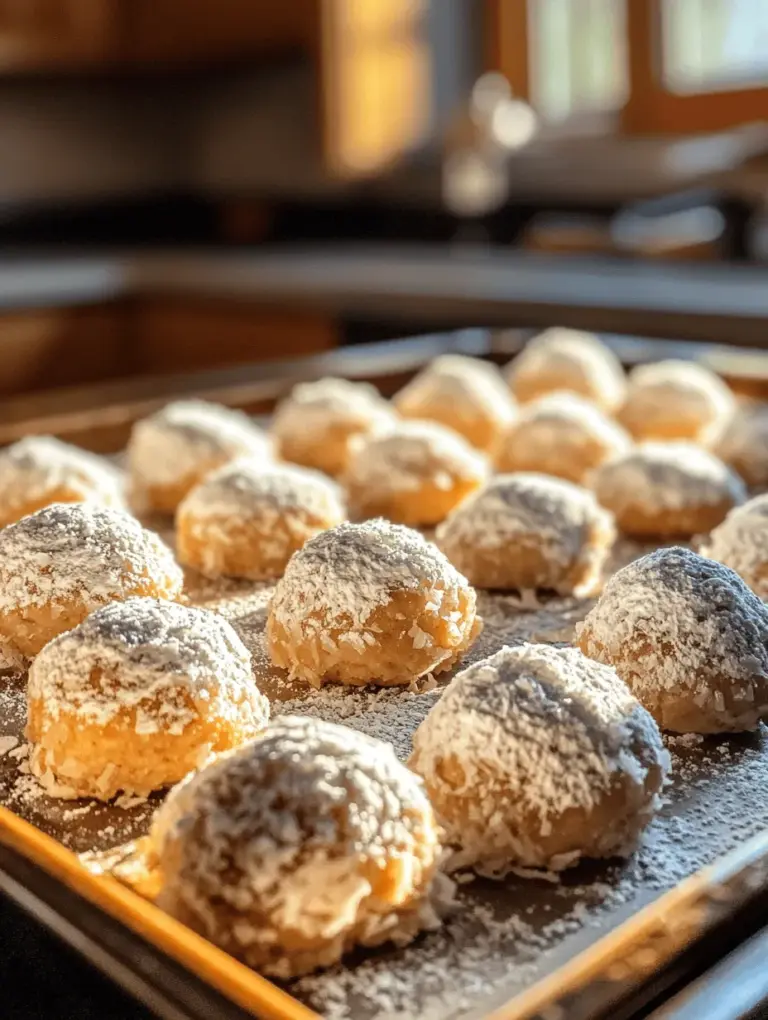
If you’re looking for a delightful treat that evokes the warmth of the holiday season, look no further than Sweetened Condensed Milk Snowballs. These bite-sized confections are not only delicious but also incredibly easy to make, making them a favorite among both novice and experienced bakers. With their snowy white appearance and rich, sweet flavor, these snowballs are perfect for festive gatherings, holiday parties, or simply as a special treat for yourself.
The appeal of Sweetened Condensed Milk Snowballs lies in their simplicity. Made with just a handful of ingredients, this no-bake dessert allows you to whip up a batch in no time. Whether you’re preparing for a holiday celebration or just want to indulge in a sweet snack, these snowballs are sure to impress your family and friends.
The Joy of No-Bake Treats
No-bake desserts have surged in popularity in recent years, and for good reason. In our fast-paced world, finding time to bake can be a challenge, yet everyone craves something sweet. No-bake treats, like Sweetened Condensed Milk Snowballs, fit perfectly into this busy lifestyle, allowing you to create mouthwatering desserts without the need for an oven.
One of the greatest benefits of no-bake desserts is their convenience. They typically require minimal preparation time and don’t involve complicated steps or lengthy baking times. This makes them an ideal choice for last-minute gatherings or when you’re simply not in the mood to heat up the kitchen. The Sweetened Condensed Milk Snowballs are a prime example of this convenience; they come together quickly and can be stored in the refrigerator, making them accessible for whenever a sweet craving strikes.
Ingredients Overview
Sweetened Condensed Milk
The star of the show in Sweetened Condensed Milk Snowballs is, of course, the sweetened condensed milk itself. This thick, creamy ingredient is made by removing most of the water from regular milk and adding sugar, resulting in a rich, sweet product that serves as the base for many desserts. Its role in this recipe is crucial, as it not only adds sweetness but also provides moisture and helps bind the ingredients together. The resulting texture is soft yet firm enough to roll into balls, making it perfect for our snowball treats.
Shredded Coconut
Next, we have shredded coconut, which brings a delightful texture and a tropical flavor to the snowballs. Coconut adds a chewy element that contrasts beautifully with the creaminess of the sweetened condensed milk. You can choose between sweetened and unsweetened shredded coconut depending on your preference. Sweetened coconut will enhance the overall sweetness of the dessert, while unsweetened coconut can provide a more balanced flavor profile.
Powdered Sugar
Powdered sugar, also known as confectioners’ sugar, plays a pivotal role in sweetening the mixture and ensuring a smooth, creamy consistency. When combined with the other ingredients, powdered sugar helps to create a dough that is easy to handle and shape. It dissolves quickly, allowing for a uniform blend that results in a delightful snowball texture. Additionally, it can be used for dusting the finished snowballs, adding to their snowy appearance.
Flavor Extracts
To elevate the flavor of your Sweetened Condensed Milk Snowballs, you can incorporate flavor extracts such as vanilla and, for those who enjoy a hint of nuttiness, almond extract. Vanilla extract is a classic addition that enhances the overall flavor without overpowering the other ingredients, while almond extract adds a unique twist that can make your snowballs even more special. Just a few drops of either extract will complement the sweetness of the condensed milk and the coconut beautifully.
Optional Ingredients: Nuts and Cocoa Powder
While the basic recipe is absolutely delightful on its own, you can easily customize your Sweetened Condensed Milk Snowballs with optional ingredients. Chopped nuts, such as almonds, walnuts, or pecans, add an extra crunch and depth of flavor. If you’re feeling adventurous, consider adding a bit of cocoa powder for a chocolatey variation. By mixing in these extras, you can tailor the snowballs to suit your taste preferences and create your own unique spin on this classic treat.
Step-by-Step Instructions
Creating Sweetened Condensed Milk Snowballs is a straightforward process that requires minimal effort. To help you navigate through the preparation, here’s a quick overview of the steps involved:
1. Prepare the Mixture: Start by mixing the wet and dry ingredients separately to ensure a well-blended dough.
2. Combine Ingredients: Gradually mix the wet ingredients with the dry ingredients until a cohesive dough forms.
3. Roll the Dough: Once the dough is ready, use your hands to roll it into small balls.
4. Chill and Coat: After shaping, chill the snowballs in the refrigerator to set, then roll them in shredded coconut or powdered sugar for the finishing touch.
Mixing Wet Ingredients
The first step in creating your Sweetened Condensed Milk Snowballs is to properly mix the wet ingredients. In a large mixing bowl, combine the sweetened condensed milk with your chosen flavor extracts. It’s important to blend these ingredients thoroughly to ensure that the flavors are evenly distributed throughout the mixture. Use a spatula or a whisk to combine the ingredients until smooth, making sure there are no lumps.
Combining Dry Ingredients
In a separate bowl, measure out your dry ingredients, which include shredded coconut and powdered sugar. If you’re using nuts or cocoa powder, you can add them at this stage as well. Mix the dry ingredients together until everything is well combined. This step is crucial, as it helps to ensure that the coconut and other dry elements are evenly distributed in the final dough.
Forming the Dough
Once your wet and dry ingredients are prepared, it’s time to combine them. Gradually add the dry mixture to the wet mixture, stirring gently until a cohesive dough forms. The dough should be slightly sticky but manageable. If it feels too sticky, you can add a bit more powdered sugar or shredded coconut to adjust the consistency.
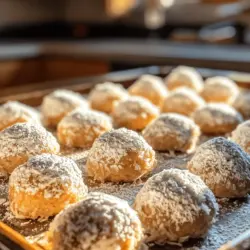
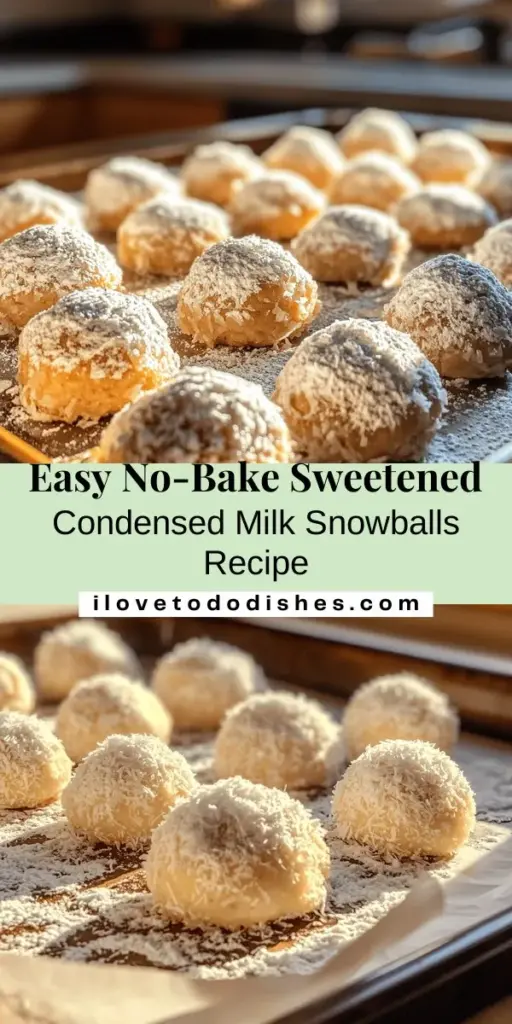
When the dough is ready, dampen your hands slightly to prevent sticking, then take small portions of the mixture and roll them into balls, about 1 inch in diameter. As you shape each ball, be gentle but firm to ensure they hold their shape. Place the formed snowballs on a parchment-lined baking sheet, allowing enough space between each ball for chilling.
As you can see, making Sweetened Condensed Milk Snowballs is a simple yet rewarding process. With just a few key ingredients and some basic steps, you can create a festive treat that’s sure to be a hit at any gathering. Stay tuned for the next part of the article, where we will explore additional tips for achieving the best results and answer some common questions about this delightful recipe.
Coating the Snowballs: Achieving the Perfect Snowy Finish
Once your Sweetened Condensed Milk Snowballs have been formed into delightful bite-sized treats, it’s time to give them their signature snowy coat. To achieve this, you’ll need shredded coconut, which not only adds a beautiful appearance but also enhances the flavor. Here’s how to coat your snowballs for that perfect finish:
1. Prepare Your Coating Station: Set out a shallow bowl filled with shredded coconut. If you prefer a bit more flavor, consider toasting the coconut lightly in a dry skillet over medium heat until golden brown. This will give your snowballs a delicious nutty aroma and taste.
2. Coat Each Snowball: Take one of your snowballs and gently roll it in the bowl filled with shredded coconut. Ensure that it is evenly coated on all sides. You can lightly press the coconut onto the surface to help it adhere better. Repeat this process for each of the snowballs.
3. Set Aside: Once coated, place the snowballs on a parchment-lined baking sheet. This will prevent them from sticking and make cleanup easier. Continue until all snowballs are coated and arranged neatly.
Chilling: Why It’s Crucial for Texture and Flavor Enhancement
After coating your Sweetened Condensed Milk Snowballs, chilling them is an essential step that significantly impacts their texture and flavor. Here’s why chilling is crucial:
1. Firming Up: The chilling process allows the sweetened condensed milk mixture to set properly. This helps the snowballs hold their shape and gives them a firmer texture that is delightful to bite into.
2. Flavor Development: Chilling enhances the flavors as the ingredients meld together. The coconut and sweetened condensed milk have time to marry, resulting in a richer taste.
3. Timeframe: Typically, you should chill the coated snowballs in the refrigerator for at least 30 minutes to an hour. However, if you can wait longer, even overnight chilling allows for maximum flavor infusion.
Serving Suggestions: Ideal Occasions for These Treats
Sweetened Condensed Milk Snowballs are incredibly versatile treats that can be enjoyed on various occasions. Here are some ideal serving suggestions:
– Holiday Gatherings: These snowballs make an excellent addition to holiday dessert tables. Their festive appearance and sweet flavor will impress guests and children alike.
– Birthday Parties: Serve these delightful bites at children’s birthday parties. Their small size makes them perfect for little hands, and the fun, snowy look adds a whimsical touch to the celebration.
– Picnics and Outdoor Events: Pack these treats for a picnic. They are easy to transport and can withstand warm weather, making them a perfect sweet snack while enjoying the outdoors.
– Gifts and Favors: Consider packaging snowballs in decorative boxes or jars as gifts or party favors. Their unique appearance makes them a thoughtful and charming gift.
Exploring Variations
While the classic Sweetened Condensed Milk Snowballs are delicious on their own, there are several variations to explore that can cater to different tastes and preferences.
Chocolate Version: How to Incorporate Cocoa Powder
For chocolate lovers, transforming your snowballs into a chocolate version is simple:
– Ingredients Adjustment: Add 2-3 tablespoons of unsweetened cocoa powder to the mixture of sweetened condensed milk and coconut. This will give a rich chocolate flavor to your snowballs.
– Coating: You can roll the chocolate snowballs in cocoa powder instead of shredded coconut for a unique twist, or stick with coconut for the contrast in flavor and texture.
Nutty Snowballs: Using Different Nuts for Added Texture and Taste
Enhancing your snowballs with nuts can add a delightful crunch and flavor:
– Incorporate Nuts: Finely chop your choice of nuts (such as almonds, pecans, or walnuts) and mix them into the sweetened condensed milk mixture. About half a cup of nuts will suffice.
– Coating Options: Use chopped nuts instead of shredded coconut for coating, or combine both for an exciting texture.
Vegan and Dairy-Free Adaptations: Suggestions for Alternatives
For those following a vegan or dairy-free diet, adaptations can be made without sacrificing flavor:
– Substitute Ingredients: Use a vegan sweetened condensed milk alternative. There are several brands available or you can make your own by simmering coconut milk with sugar until thickened.
– Plant-Based Fats: Ensure that any butter or dairy products are replaced with plant-based options to make the recipe fully vegan.
Nutritional Information
Understanding the nutritional benefits of Sweetened Condensed Milk Snowballs can help you enjoy them guilt-free.
– Ingredient Breakdown: These treats mainly consist of sweetened condensed milk, coconut, and optional additions like nuts. Sweetened condensed milk offers a rich source of energy, while coconut provides healthy fats and fiber.
– Healthier Substitutions: For a lighter version, consider using unsweetened shredded coconut and reducing the amount of sweetened condensed milk. You can also opt for a natural sweetener like maple syrup or honey, keeping in mind that it will alter the texture slightly.
– Dietary Considerations: These snowballs can be made gluten-free by ensuring all ingredients are certified gluten-free. For nut-free options, simply omit the nuts and increase the quantity of coconut.
Storage and Shelf Life
Knowing how to store your Sweetened Condensed Milk Snowballs properly will help you enjoy them at their best.
– Best Practices for Storing: Store the snowballs in an airtight container in the refrigerator. This will keep them fresh for up to a week.
– Freezing and Thawing: If you want to extend the shelf life, freeze the snowballs in a single layer on a baking sheet before transferring them to an airtight container. They can last up to three months in the freezer. When ready to enjoy, thaw them in the refrigerator for a few hours or at room temperature for about 30 minutes.
– Signs of Freshness: Always check for any off smells or significant texture changes. If the snowballs appear dry or hard, it’s best to discard them.
Cultural Significance and Occasions
Sweetened Condensed Milk Snowballs are not only delicious but also carry cultural significance in various regions.
– Cultural Context: In many cultures, sweetened condensed milk is a beloved ingredient, especially in desserts. The snowball treat is reminiscent of festive celebrations in Latin American and Asian cuisines, where coconut-based desserts are prevalent.
– Popular Occasions: These treats are perfect for celebrations such as Christmas, birthdays, and weddings. Their delightful presentation and sweet taste make them a crowd-pleaser at any gathering.
– Holiday Celebrations: Incorporating Sweetened Condensed Milk Snowballs into holiday traditions can create joyful memories. They can also serve as a delightful dessert option for potlucks and family gatherings.
Conclusion
In summary, making Sweetened Condensed Milk Snowballs is a straightforward and rewarding process that results in a delightful treat for any occasion. With their snowy appearance and sweet flavor, they are sure to be a hit with friends and family.
Whether you stick to the classic version or explore the various adaptations, these no-bake desserts offer versatility and ease that any home cook can appreciate. So gather your ingredients, follow the steps, and indulge in the deliciousness of these sweet coconut snowballs. Enjoy the process as much as the result, and don’t hesitate to share your creations with others. The world of no-bake desserts is waiting for you to explore!