Introduction
There’s an undeniable joy that comes with creating homemade desserts. The aroma that fills your kitchen, the anticipation of a sweet treat, and the satisfaction of sharing your culinary masterpiece with loved ones are all part of the experience. Among the myriad of delightful desserts, donut holes stand out as a beloved favorite. These bite-sized morsels are not only easy to make but also offer an explosion of flavor in every bite, making them a perfect indulgence for any occasion.
In this recipe, we’ll explore how to make sweet maple-glazed donut holes that are incredibly easy to prepare yet undeniably delicious. Whether you’re hosting a brunch, celebrating a special occasion, or simply treating yourself, these donut holes will surely impress. With a warm, fluffy interior and a luscious maple glaze, they are bound to become a staple in your dessert repertoire.
The Allure of Donut Holes
Donut holes have carved out a special place in the hearts of dessert lovers everywhere. Their popularity can be traced back to their versatile nature; they are the perfect size for snacking and sharing. Whether you’re enjoying them at a family gathering, a picnic, or simply as an afternoon pick-me-up, donut holes have a way of bringing people together.
Moreover, there’s a nostalgic connection many of us share with donut holes. For some, they evoke memories of childhood visits to the local bakery, where the sight of freshly fried treats was enough to elicit excitement. For others, they might remind them of cozy mornings spent with family, sipping coffee and indulging in sweet bites. No matter the memory, donut holes have a unique ability to create moments of joy and togetherness that are cherished.
Understanding the Ingredients
To achieve the perfect sweet maple-glazed donut holes, it’s essential to understand the role of each ingredient in the recipe. This knowledge not only helps in creating a delightful treat but also empowers you to make informed substitutions if necessary.
All-Purpose Flour
All-purpose flour is the cornerstone of our donut holes, providing the necessary structure and texture. It creates a light and airy base that gives these treats their characteristic fluffiness. When measuring flour, it’s crucial to avoid packing it down, as this can lead to dense donut holes.
For those looking for gluten-free options, alternatives like almond flour or a gluten-free all-purpose blend can be used. However, keep in mind that these substitutions may alter the texture and flavor slightly, so adjustments in other ingredients may be needed.
Granulated Sugar and Powdered Sugar
In our recipe, both granulated sugar and powdered sugar play pivotal roles. Granulated sugar is essential for sweetness and helps achieve a lovely golden color during frying. It also aids in the browning process, giving the donut holes a beautiful appearance.
On the other hand, powdered sugar is primarily used for the maple glaze. Its fine texture allows it to dissolve easily, creating a smooth and glossy finish. The combination of these two sugars provides the perfect balance of sweetness and presentation.
Baking Powder and Baking Soda
Leavening agents like baking powder and baking soda are crucial in ensuring our donut holes rise properly and achieve the desired texture. Baking powder is a double-acting leavener, meaning it works both when mixed into the batter and when exposed to heat. This ensures that our donut holes will be light and fluffy.
Baking soda, on the other hand, requires an acidic ingredient to activate. In this recipe, the buttermilk provides the necessary acidity, allowing the baking soda to contribute to the leavening process. Together, these agents create the perfect lift for our donut holes.
Buttermilk
Buttermilk is a key ingredient in our donut holes, contributing both flavor and moisture. Its tangy profile enhances the overall taste and helps create a tender texture by breaking down gluten in the flour.
If you don’t have buttermilk on hand, fear not! You can easily make a substitute by mixing one cup of milk with one tablespoon of vinegar or lemon juice. Let it sit for about five minutes, and you’ll have a perfect buttermilk replacement ready for use.
Unsalted Butter
When it comes to baking, unsalted butter is preferred for a few reasons. Firstly, it allows for better control over the overall saltiness of the recipe. Since different brands of salted butter can vary in sodium content, using unsalted butter ensures consistent flavor. Additionally, butter adds richness and moisture, resulting in a tender and flavorful donut hole.
Eggs and Vanilla Extract
Eggs serve a dual purpose in our recipe. They act as a binding agent, helping to hold the ingredients together, and they contribute to the overall flavor and richness of the donut holes. The addition of vanilla extract enhances the sweetness and adds a lovely aroma, making each bite even more enjoyable.
Vegetable Oil
Frying is a crucial step in creating perfectly golden and crispy donut holes. When it comes to choosing an oil, vegetable oil is an excellent option due to its high smoke point, which allows for deep frying without burning. Other oils like canola or peanut oil can also be used, but ensure the oil is heated to the right temperature (around 350°F or 175°C) to achieve that perfect golden color and texture.
Pure Maple Syrup
To achieve an authentic flavor in our glaze, using high-quality pure maple syrup is essential. Unlike imitation maple syrup, which can be overly sweet and artificial, pure maple syrup offers a rich, complex flavor that enhances the overall taste of the donut holes. The sweetness from the syrup, combined with the powdered sugar, creates a luscious glaze that is simply irresistible.
As we prepare to dive into the steps of making these delightful sweet maple-glazed donut holes, it’s clear that each ingredient plays a vital role in creating a delicious end product. From the fluffy texture to the flavorful glaze, understanding these components will enhance your baking experience and ensure that your homemade donut holes are a hit!
Step-by-Step Guide to Making Sweet Maple-Glazed Donut Holes
Preparing the Dough
To start your journey to sweet maple-glazed donut holes, begin with the preparation of the dough. In a large mixing bowl, combine the dry ingredients: all-purpose flour, baking powder, salt, and sugar. Whisk them together until well mixed. This step is crucial as it ensures that the baking powder is evenly distributed, which helps the donut holes rise uniformly during frying.
Next, in a separate bowl, prepare your wet ingredients. Beat together an egg, vanilla extract, and buttermilk until they are fully combined. The buttermilk adds moisture and a subtle tang, enhancing the flavor of the donut holes. Once your wet ingredients are ready, pour them into the bowl containing the dry ingredients.
Gently mix the combination using a spatula or wooden spoon until just combined. Be careful not to overmix; doing so can lead to tough donut holes. The goal is to incorporate the ingredients until there are no dry patches, but a few lumps are perfectly acceptable. The dough should be soft and slightly sticky, making it easier to handle once shaped.
Shaping the Donut Holes
Shaping your donut holes is a fun and straightforward process. Flour your work surface lightly to prevent sticking. Using your hands, take small portions of the dough and roll them into balls, about 1 inch in diameter. For uniformity, consider using a scoop or measuring spoon to ensure each donut hole is the same size. This will help them cook evenly in the oil.
Once you’ve formed all the dough into balls, place them on a parchment-lined baking sheet. This will prepare them for frying and make cleanup easier. It’s essential to handle the dough gently, as excessive pressure can flatten the balls, resulting in denser donut holes.
Heating the Oil
Now that your donut holes are shaped, it’s time to prepare for frying. In a deep skillet or heavy-bottomed pot, heat about 2 to 3 inches of vegetable oil over medium heat. Use a frying thermometer to monitor the temperature, aiming for around 350°F (175°C). Maintaining the correct frying temperature is vital; if the oil is too hot, the donut holes will brown too quickly on the outside while remaining raw inside. Conversely, oil that is too cool will result in greasy, soggy donuts.
Safety is also a priority when frying at home. Be sure to keep a close eye on the oil and never leave it unattended. Have a lid nearby to smother any potential flare-ups, and consider using a splatter guard to minimize mess and protect yourself from hot oil splashes.
Frying the Donut Holes
Once your oil is at the right temperature, it’s time to fry. Carefully drop a few donut holes into the hot oil, being cautious not to overcrowd the pan. Fry them in batches of about four or five, depending on the size of your skillet. Cook the donut holes for approximately 2-3 minutes per side, or until they turn a beautiful golden brown.
Using a slotted spoon, gently turn the donut holes halfway through cooking to ensure even browning. Once they are done, remove them from the oil and place them on a plate lined with paper towels to drain the excess oil. This step is crucial as it helps keep your donut holes light and fluffy, preventing them from becoming overly greasy.
Making the Maple Glaze
While your donut holes are cooling, it’s time to whip up the delicious maple glaze. In a medium bowl, combine powdered sugar, maple syrup, and a splash of milk or water. Whisk the mixture until it reaches a smooth and pourable consistency. The glaze should be thick enough to coat the back of a spoon but thin enough to easily dip your donut holes. If needed, adjust the consistency by adding more powdered sugar for thickness or more milk for a thinner glaze.
For those looking to mix things up, consider adding variations to the glaze. A pinch of cinnamon or a dash of vanilla extract can elevate the flavor. For a touch of decadence, melted butter can be incorporated for a richer glaze. Taste as you go to find your perfect blend.
Glazing the Donut Holes
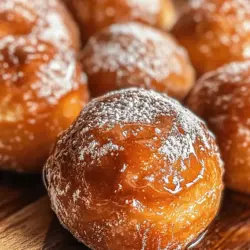
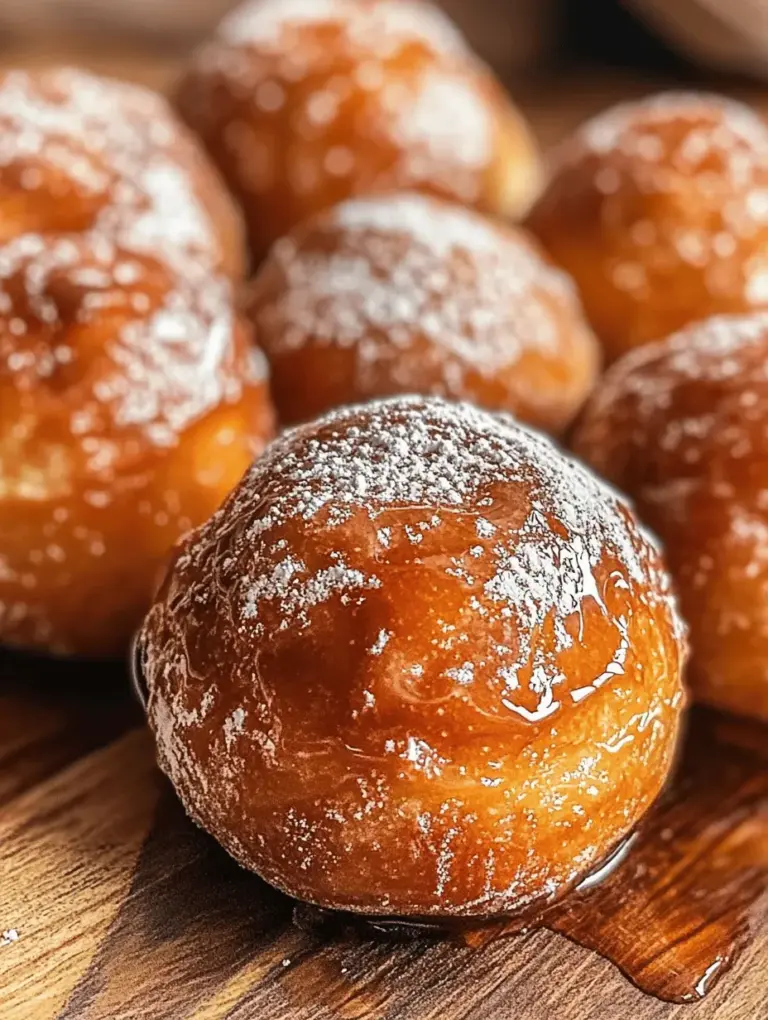
Once your donut holes are adequately cooled and your glaze is ready, it’s time for the exciting part—glazing! You can choose to dip the donut holes directly into the glaze for a generous coating or drizzle the glaze over them for a more artistic presentation. If you opt for dipping, simply hold each donut hole by the bottom and dunk it into the glaze, allowing the excess to drip back into the bowl.
For those who prefer drizzling, you can use a spoon to create beautiful patterns over the donut holes. Regardless of your chosen method, let the glazed donut holes sit on a wire rack for a few minutes. This allows the glaze to set properly, creating a delightful finish.
Serving Suggestions
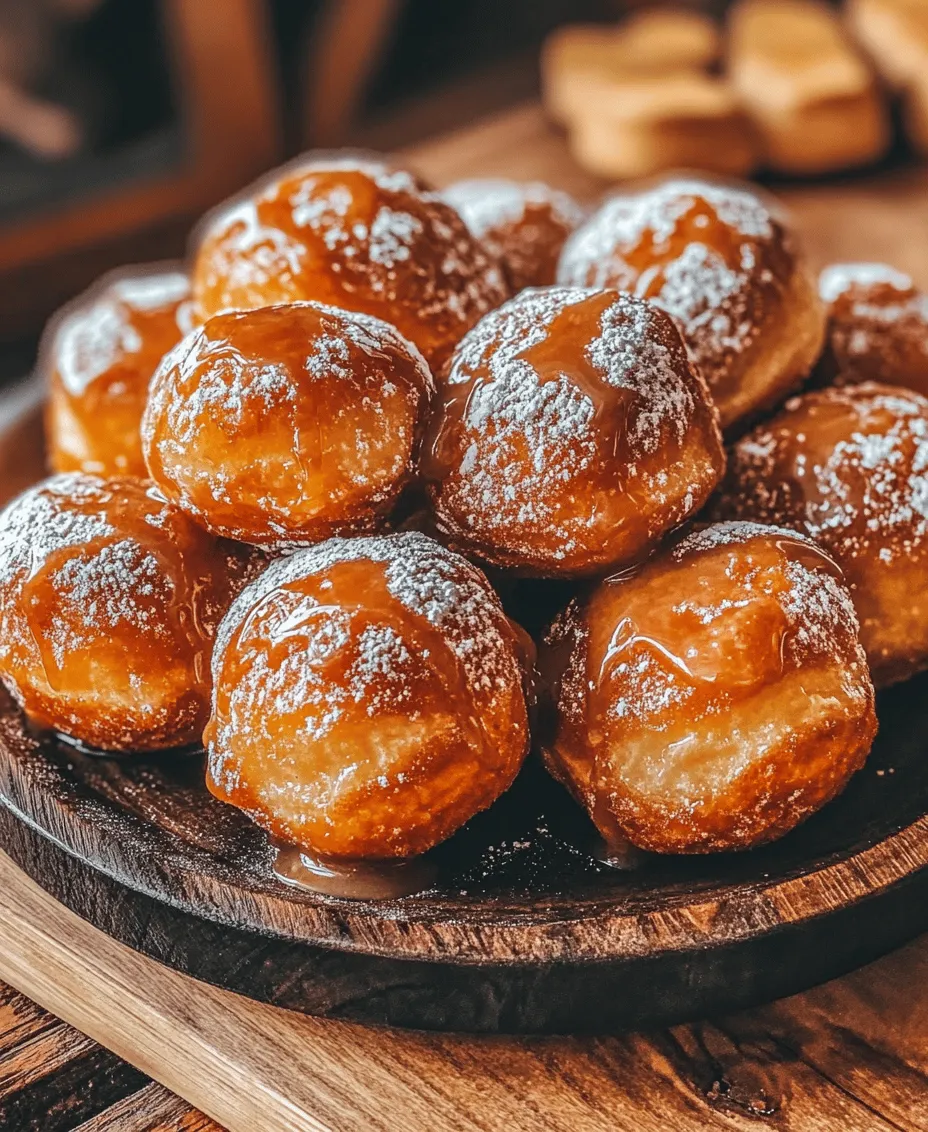
These sweet maple-glazed donut holes are perfect for a variety of occasions. For a cozy morning treat, serve them alongside freshly brewed coffee or a steaming cup of tea. The rich flavors of the maple glaze complement the warmth of your favorite morning beverage beautifully.
If you’re looking to impress guests at a gathering or party, consider presenting these donut holes on a decorative platter, perhaps garnished with fresh fruit or a dusting of powdered sugar. They also make a delightful addition to a brunch spread or dessert table, attracting attention with their golden color and sweet aroma.
For any leftovers, store your donut holes in an airtight container at room temperature for up to two days. If you want to enjoy them later, reheat them in a microwave for a few seconds or in a preheated oven at 350°F (175°C) for about 5 minutes, restoring their delightful texture.
Nutritional Information
Each serving of these sweet maple-glazed donut holes contains approximately 120 calories, with key nutrients including carbohydrates, sugars, and small amounts of protein and fat. While they are undoubtedly a treat, moderation is key. Enjoy these indulgent delights as part of a balanced diet, and savor the joy they bring to your taste buds.
Conclusion
Making homemade sweet maple-glazed donut holes brings joy and satisfaction to both the baker and those lucky enough to enjoy them. The process of combining simple ingredients to create delightful treats can be incredibly rewarding. Each bite offers a perfect blend of sweetness and flavor, making them a favorite among friends and family.
We hope this recipe inspires you to try your hand at these delicious donut holes. Enjoy the process of baking, the aroma that fills your kitchen, and the pleasure of sharing these treats with your loved ones. Indulge in the delightful experience of creating and sharing your very own sweet maple-glazed donut holes; they are sure to become a beloved addition to your recipe collection.