
Introduction
Delight in the refreshing taste of homemade Super Easy Lemon Bars—a quintessential dessert that elevates any occasion. With their perfect balance of sweet and tangy flavors, these bars not only tantalize your taste buds but are also incredibly simple to make. Whether you’re hosting a summer barbecue, celebrating a birthday, or just craving a delightful treat, lemon bars offer a bright and cheerful addition to your dessert table.
Originating in the United States in the early 20th century, lemon bars have become a beloved dessert across the globe. Their popularity can be attributed to their versatility; they are equally at home served alongside afternoon tea as they are at a festive family gathering. In this article, we’ll dive deep into the recipe, exploring its origins, ingredient benefits, and step-by-step instructions to ensure your baking experience is as enjoyable as the end result.
The Allure of Lemon Bars
Understanding the Popularity of Lemon Bars
Lemon bars are more than just a dessert; they are a celebration of flavor and simplicity. Their unique combination of sweetness and tartness makes them a standout choice among a plethora of desserts. The bright yellow filling, contrasted with a buttery crust, offers a visual appeal that is as enticing as the taste. Furthermore, lemon bars have a nostalgic quality that harkens back to family gatherings and sunny afternoons, making them a comforting choice for many.
The Classic Dessert That Transcends Seasons
While lemon bars are often associated with spring and summer due to their refreshing citrus flavor, they can be enjoyed year-round. Their lightness makes them a perfect palate cleanser after a heavy meal, while their zesty flavor can brighten up even the coldest winter day. This versatility ensures that lemon bars remain a timeless favorite, cherished by both young and old alike.
Why Homemade Lemon Bars Are a Must-Try
Homemade lemon bars offer a level of freshness and flavor that store-bought versions simply cannot match. When you make them from scratch, you have the opportunity to customize the sweetness and tartness to your liking. Plus, there’s a certain satisfaction that comes with creating something delicious from just a few simple ingredients. With our Super Easy Lemon Bars recipe, you’ll discover just how simple it can be to make this delightful treat in your own kitchen.
Ingredient Breakdown
Highlighting the Key Ingredients
Before we dive into the preparation process, let’s take a closer look at the key ingredients that make these lemon bars a success. Understanding the role of each component will not only enhance your baking skills but also elevate the final product.
All-Purpose Flour: The Foundation of the Crust
All-purpose flour serves as the foundation for the crust of our lemon bars. It provides the necessary structure and stability, ensuring that the bars hold together once baked. The right amount of flour is crucial; too much can result in a dry crust, while too little can lead to a crumbly texture.
The Role of Sugar: Balancing Sweetness and Tartness
Sugar is essential in this recipe for two primary reasons: it sweetens the lemon filling and adds a pleasant crunch to the crust. The balance of sugar with the tartness of the fresh lemon juice is what makes lemon bars truly irresistible. You can adjust the sugar to cater to your personal preference, making them as sweet or as tart as you like.
Unsalted Butter: Enhancing Flavor and Texture
Unsalted butter is a key player in achieving a rich and flavorful crust. The fat content in the butter provides moisture and tenderness, while the unsalted variety allows you to control the overall saltiness of the dessert. When melted and combined with the flour and sugar, it creates a crumbly mixture that forms the perfect base for your lemon bars.
Eggs: The Binding Agent for the Filling
Eggs are crucial in the filling of lemon bars, serving as the binding agent that holds everything together. They contribute to the smooth texture of the filling and help it set during the baking process. The proteins in the eggs coagulate when heated, providing stability to the lemon curd-like filling.
The Star of the Show: Fresh Lemon Juice and Zest
The true essence of lemon bars lies in their star ingredient: fresh lemon juice and zest. The acidity of the juice provides that signature tangy flavor, while the zest adds an aromatic quality that enhances the overall citrus experience. Using fresh lemons is vital, as bottled lemon juice can lack the brightness and complexity that freshly squeezed juice offers.
Baking Powder: Ensuring a Light, Fluffy Filling
Baking powder plays a subtle yet important role in this recipe. It helps to create a light and fluffy texture in the lemon filling, allowing it to rise slightly during baking. This contributes to the overall mouthfeel of the bars, making each bite a delightful experience.
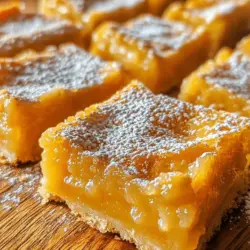
The Optional Touch: Powdered Sugar Dusting
While not required, a light dusting of powdered sugar on top of the cooled lemon bars adds an elegant finishing touch. It not only enhances the visual appeal but also adds a touch of sweetness that complements the tartness of the lemon filling. This simple step can elevate your lemon bars from homemade to gourmet.
Preparation and Baking Process
Now that we’ve explored the ingredients, let’s move on to the preparation and baking process. Follow these simple steps to create your very own batch of Super Easy Lemon Bars.
Step-by-Step Guide to Making Lemon Bars
Prepping the Oven: The Importance of Temperature
Before you begin mixing your ingredients, preheat your oven to 350°F (175°C). Preheating ensures that your lemon bars bake evenly and helps achieve that desired golden-brown crust. A well-prepared oven is crucial for consistent results.
Creating the Crust: Mixing Dry Ingredients with Melted Butter
In a mixing bowl, combine 1 cup of all-purpose flour, 1/4 cup of granulated sugar, and a pinch of salt. Whisk these dry ingredients together until they are well mixed. Next, melt 1/2 cup of unsalted butter and pour it into the dry mixture. Stir until the butter is fully incorporated, and the mixture resembles coarse crumbs. This forms the base for your lemon bars.
Baking the Crust: Achieving the Perfect Golden Finish
Transfer the crust mixture into an 8×8-inch baking dish, pressing it down firmly to create an even layer. Bake the crust in the preheated oven for about 15 minutes, or until it is lightly golden. Keep an eye on it to ensure it does not overbake, as a perfectly baked crust is key to the overall success of your lemon bars.
Crafting the Filling: Combining Flavors for a Delightful Experience
While the crust is baking, prepare the lemon filling. In a separate mixing bowl, beat together 2 large eggs until they are frothy. Add 1 cup of granulated sugar and whisk until combined. Next, incorporate 1/4 cup of fresh lemon juice and the zest of 1 lemon into the mixture. Finally, add 2 tablespoons of all-purpose flour and 1/2 teaspoon of baking powder, whisking until smooth.
Once the crust has finished baking, remove it from the oven and pour the lemon filling evenly over the hot crust. Return the baking dish to the oven and bake for an additional 20-25 minutes or until the filling is set and slightly golden around the edges.
—
As you follow these steps, you’ll find that making Super Easy Lemon Bars is not only straightforward but also incredibly rewarding. The combination of zesty lemon and buttery crust is sure to become a favorite in your baking repertoire. Stay tuned for more insights, tips, and tricks to help you perfect this delightful dessert in the following sections.
Baking the Bars: Timing and Visual Cues for Success
Once you have prepared your lemon bar mixture, it’s time to pop it into the oven. Preheat your oven to 350°F (175°C) if you haven’t already done so. The baking phase is crucial for achieving that perfect balance of a firm crust and a creamy filling.
Timing is Key: Bake the lemon bars for about 20-25 minutes. Keep a close eye on them around the 20-minute mark. You will know they are ready when the edges are slightly puffed, and the center appears set but still has a slight jiggle. If the top begins to brown too much, you can cover it lightly with aluminum foil to prevent over-baking.
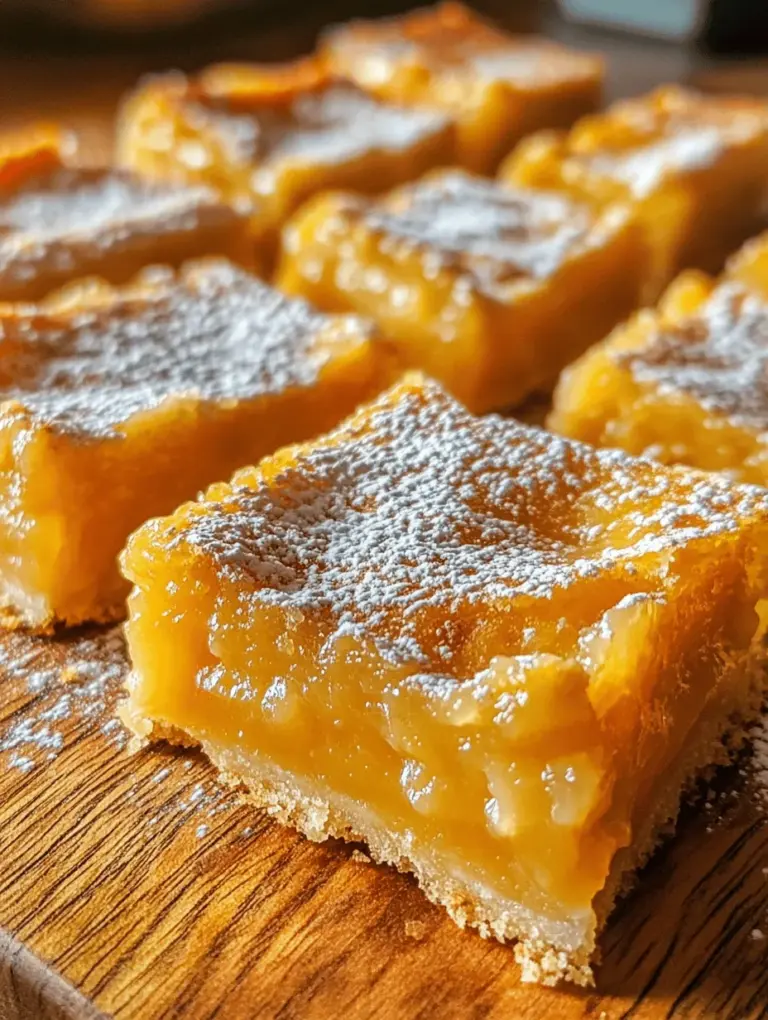
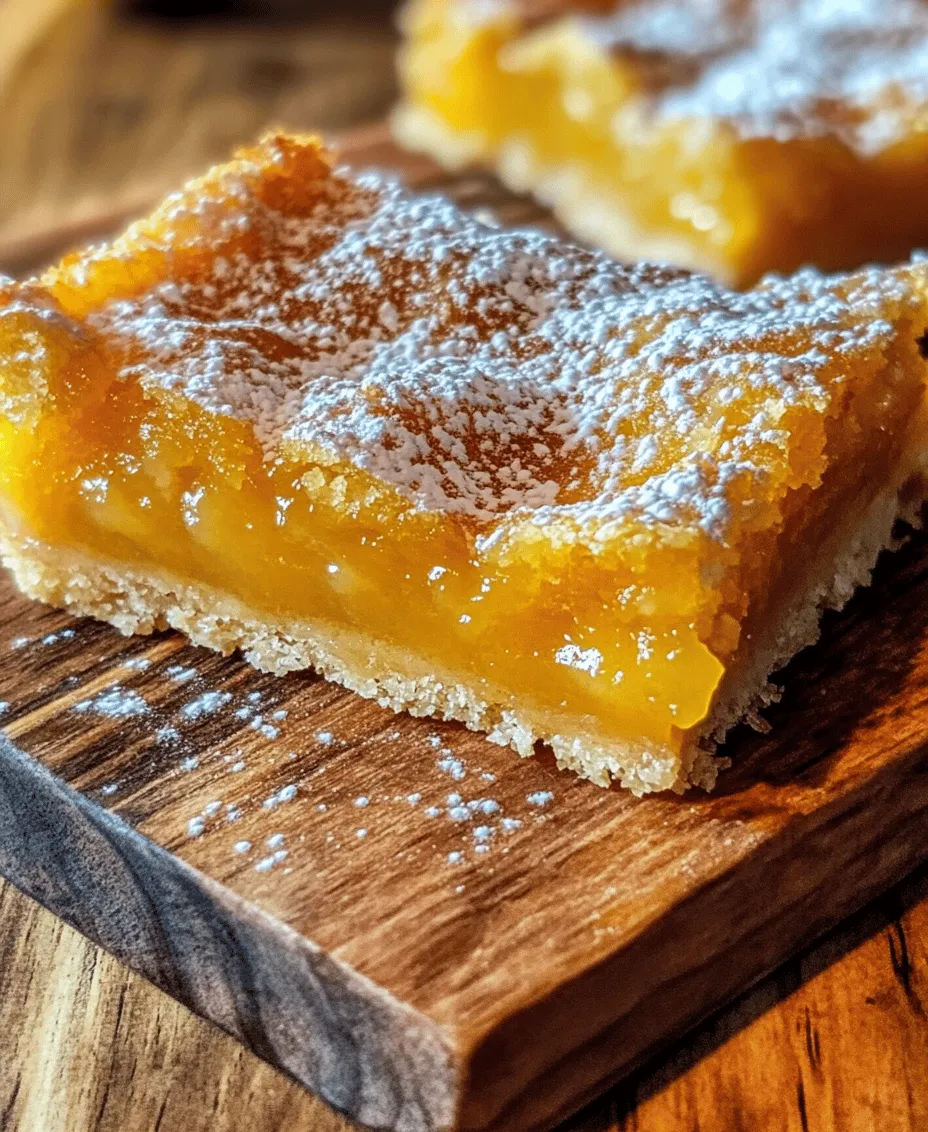
Visual Cues: The filling should have a glossy appearance, and the edges should slightly pull away from the sides of the pan. Once you notice these signs, remove the pan from the oven and let it cool in the pan on a wire rack for at least 30 minutes before transferring it to the refrigerator.
Tips for Perfect Lemon Bars
Creating the ultimate lemon bars can be a delightful adventure when you follow these tips:
Common Mistakes to Avoid:
1. Overmixing the Filling: Be gentle when whisking the eggs and sugar. Overmixing can introduce air, leading to a less dense filling.
2. Inaccurate Measurements: Baking is a science, so use precise measurements for both the crust and the filling to ensure a consistent texture.
3. Skipping the Cooling Process: Allow the bars to cool completely before cutting. This helps them set properly and keeps the filling from oozing out.
How to Achieve the Ideal Crust Texture:
For a perfect crust, it should be golden brown and slightly firm to the touch. Use chilled butter, as it helps create a flaky texture. After baking, let the crust cool slightly before adding the lemon filling to prevent it from becoming soggy.
Ensuring a Smooth Filling Without Lumps:
To achieve a velvety smooth filling, always sieve the lemon juice before adding it to the mixture. This removes any pulp or seeds that can create a lumpy texture. Additionally, whisk the eggs and sugar until completely combined before introducing the lemon juice and zest.
Cooling and Cutting: The Best Practices:
After baking, let the lemon bars cool in the pan for about an hour. Then, refrigerate them for at least two hours. This cooling period is essential for the filling to firm up, making them easier to cut. Use a sharp knife dipped in hot water for clean cuts, wiping it with a towel between slices for pristine edges.
Variations and Customizations
Once you have mastered the classic lemon bars, feel free to get creative! Here are some fun variations and customizations you can try:
Creative Twists on the Classic Recipe:
– Berry Lemon Bars: Add fresh or frozen berries (like blueberries or raspberries) to the filling for a fruity twist. Simply fold them in gently before pouring the filling over the crust.
– Coconut Lemon Bars: Incorporate shredded coconut into the crust for added texture and a hint of tropical flavor.
Incorporating Different Citrus Fruits:
– Experiment with other citrus fruits for a unique flavor profile:
– Lime Bars: Substitute lime juice for lemon juice for a zesty alternative.
– Orange Bars: Use fresh orange juice and zest for a sweeter, fragrant treat.
– Grapefruit Bars: Add a touch of sophistication with grapefruit juice, balancing sweetness and tartness.
Adding Herbs for an Unexpected Flavor Profile:
– Fresh herbs can elevate your lemon bars to new heights. Consider adding finely chopped basil or mint to the filling for a refreshing hint of flavor. Just a teaspoon can transform your lemon bars into a gourmet dessert.
Exploring Gluten-Free Options:
– For those with gluten sensitivities, substitute traditional flour with gluten-free options such as almond flour or a gluten-free all-purpose blend. This adjustment will maintain the integrity of the bars while catering to dietary needs.
Serving Suggestions
Lemon bars are a versatile dessert that can be served in various ways to enhance the overall experience:
Pairing Lemon Bars with Beverages:
– Lemon bars have a bright, zesty flavor that pairs beautifully with a variety of drinks. Consider serving them with:
– Tea: A classic black or herbal tea complements the citrus flavors perfectly.
– Coffee: The rich, bold taste of coffee balances the tartness of the bars.
– Refreshing Lemonade: For a cohesive flavor profile, serve with a glass of homemade lemonade or sparkling water.
Perfect Matches for Special Occasions:
– Lemon bars can be a showstopper at gatherings. Serve them during brunch with mimosas or at a summer picnic with iced tea. Their bright flavor makes them a delightful addition to any festive occasion.
Garnishing Ideas for an Elegant Touch:
– Elevate your presentation with simple garnishes:
– Powdered Sugar: Dust the cooled bars with powdered sugar for a classic look.
– Lemon Zest: Add a sprinkle of lemon zest on top for a pop of color and an extra citrus kick.
– Herbs: A small sprig of mint or basil on top can add an elegant touch.
Storing and Freezing Lemon Bars
To enjoy your lemon bars well beyond the initial bake, proper storage is essential:
Best Practices for Storage:
– Store the lemon bars in an airtight container in the refrigerator. This will keep them fresh for up to a week. Ensure they are completely cooled before covering, as this can trap moisture and affect texture.
Understanding Shelf-Life: How Long Do They Last?:
– When stored properly, lemon bars can last in the fridge for about 5-7 days. If you notice any change in smell or appearance, it’s best to discard them.
Freezing Tips: Preserving Freshness for Later Enjoyment:
– For longer storage, freeze your lemon bars. Cut them into individual squares, wrap each piece tightly in plastic wrap, and place them in a freezer-safe container. They can be frozen for up to three months. When ready to enjoy, thaw them in the refrigerator overnight before serving.
Conclusion
Super Easy Lemon Bars represent more than just a dessert; they embody the joy of baking and sharing with loved ones. By following our detailed guide, you’ll not only create a delicious treat but also experience the satisfaction of mastering a beloved classic. Whether enjoyed on a sunny afternoon or at a festive gathering, these lemon bars are sure to bring a smile to everyone’s face. Embrace the simplicity and flavor of this delightful recipe, and let it become a staple in your baking repertoire.
Dive into this zesty adventure, and don’t forget to experiment with flavors and combinations. Happy baking!