Indulging in a classic campfire treat can be a delightful experience, and S’mores Bars Delight perfectly encapsulates that nostalgic flavor in a convenient and easily shareable format. Imagine the rich, chocolatey goodness paired with sweet, toasted marshmallow topping, all layered neatly into bars. These bars are not only a perfect dessert for gatherings and potlucks but also an ideal treat for a cozy night in. The beauty of S’mores Bars lies in their simplicity and the way they transport you back to summer nights spent around a crackling fire. This article will guide you through the process of making these delectable S’mores Bars, while also exploring their origins, variations, and suggestions for serving.
The Origin of S’mores: A Brief History
The beloved s’mores treat has a rich history that reflects its status as a quintessential American dessert. The name “s’mores” is a contraction of “some more,” a hint at how addictive these treats can be. The first recorded recipe for s’mores appeared in a 1927 publication called “Tramping and Trailing with the Girl Scouts.” The recipe showcased the simple combination of graham crackers, chocolate, and toasted marshmallows, which has since become a staple at campfires across the United States.
S’mores transitioned from outdoor campfire enjoyment to kitchen convenience, allowing dessert lovers to recreate this iconic treat any time of the year. As homes evolved into spaces for casual gatherings, the s’mores concept adapted to include variations that could suit different palates and occasions. From s’mores cupcakes to s’mores dip, the classic combination of chocolate, marshmallow, and graham crackers remains a beloved flavor profile. Cultural significance aside, s’mores have become synonymous with childhood memories and family bonding, making them a cherished part of American tradition.
Ingredients Breakdown: What Makes S’mores Bars Delightful?
To create the perfect S’mores Bars Delight, understanding the key ingredients is essential. Each element contributes distinct flavors and textures that culminate in a delicious dessert.
– Graham Cracker Crumbs: The foundation of any s’mores-inspired recipe, graham cracker crumbs provide a sweet, slightly nutty flavor and a crunchy texture that mirrors the traditional s’mores base. They serve as the perfect vehicle for the rich chocolate and gooey marshmallows.
– Cocoa Powder: Adding rich chocolate essence, cocoa powder deepens the chocolate flavor profile of the bars. It complements the sweetness of the marshmallows while enhancing the overall taste experience.
– Granulated Sugar: This ingredient balances the sweetness of the s’mores bars. It helps create a chewy texture and ensures that the final product is sweet enough to satisfy any dessert craving.
– Unsalted Butter: The secret to a moist texture, unsalted butter enriches the bars and helps bind the ingredients. Its creamy richness elevates the overall flavor, making each bite melt-in-your-mouth delicious.
– Egg: Acting as a binding agent, the egg helps hold the ingredients together, ensuring that the bars maintain their structure when cut. It also adds a subtle richness to the mixture.
– Vanilla Extract: This ingredient enhances flavor complexity, infusing the bars with a warm, aromatic quality that complements the chocolate and graham flavors beautifully.
– Baking Powder and Salt: Baking powder contributes to the texture, ensuring the bars rise slightly and remain soft. A pinch of salt balances out the sweetness, enhancing the overall flavor.
Preparing Your Kitchen: Essential Tools and Equipment
Before diving into the baking process, it’s crucial to prepare your kitchen with the necessary tools and equipment for an efficient baking experience. Having everything on hand will make the process smoother and more enjoyable:
– Mixing Bowls and Spatula: You’ll need a couple of mixing bowls for combining ingredients and a spatula for mixing and spreading the batter evenly in the pan.
– Measuring Cups and Spoons: Accurate measurements are key to baking success, so ensure you have reliable measuring cups and spoons for all the ingredients.
– Baking Pan and Parchment Paper: A 9×9 inch baking pan is ideal for this recipe. Lining the pan with parchment paper makes for easy removal of the bars once baked.
– Oven Thermometer: Baking is a science, and accurate oven temperatures are crucial. An oven thermometer ensures that your oven is set to the right temperature for perfect baking.
Step-by-Step Instructions to Create S’mores Bars
Once your kitchen is prepped and your ingredients are gathered, it’s time to start creating your S’mores Bars Delight. Follow these detailed preparation steps to ensure clarity and precision:
1. Preheat the Oven: Begin by preheating your oven to 350°F (175°C). This step is crucial as it ensures your bars bake evenly and achieve the right texture.
2. Prepare the Baking Pan: Line your 9×9 inch baking pan with parchment paper, allowing some overhang on the sides. This will make it easier to lift the bars out once they’ve cooled.
3. Combine Dry Ingredients: In a mixing bowl, combine the graham cracker crumbs, cocoa powder, granulated sugar, baking powder, and salt. Whisk these together until they are well mixed.
4. Melt the Butter: In a microwave-safe bowl, melt the unsalted butter. Allow it to cool slightly before adding it to the dry mixture to avoid cooking the egg in the next step.
5. Mix Wet Ingredients: In a separate bowl, whisk together the egg and vanilla extract. Once the butter has cooled a bit, pour it into the egg mixture and stir to combine.
6. Combine Wet and Dry Ingredients: Gradually add the wet mixture to the dry ingredients. Use a spatula to fold everything together until just combined, being careful not to overmix.
7. Spread the Mixture into the Pan: Pour the batter into the prepared baking pan and use the spatula to spread it evenly across the bottom.
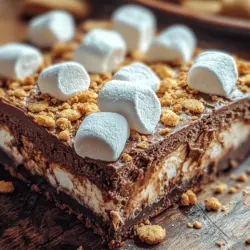
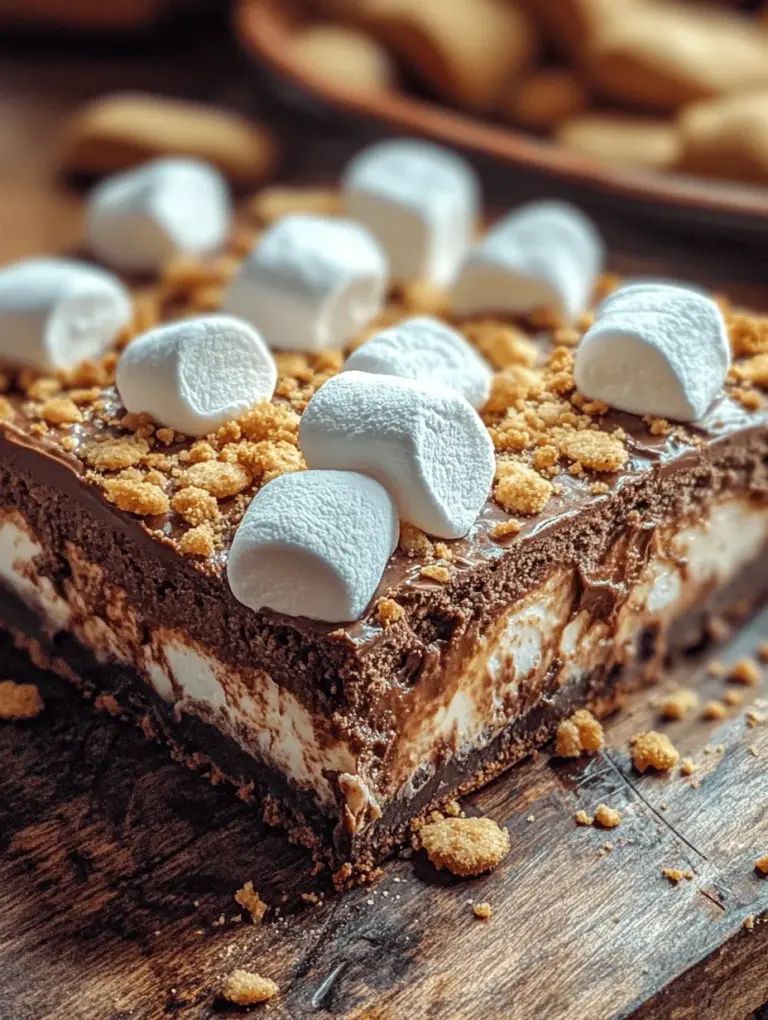
8. Layer the Chocolate and Marshmallows: After spreading the batter, sprinkle a layer of chocolate chips evenly over the top, followed by a generous layer of mini marshmallows.
9. Bake: Place the pan in the preheated oven and bake for 20-25 minutes, or until the edges are golden brown and the marshmallows are puffed and slightly toasted. Keep an eye on the bars to prevent burning.
With these steps, you’re well on your way to creating S’mores Bars Delight. The aroma that fills your kitchen as they bake will undoubtedly build anticipation for the deliciousness that is about to come. In the next part of this article, we will explore tips for achieving the best results, variations on the recipe, and answers to common questions about these scrumptious bars. Stay tuned for a deeper dive into the world of S’mores Bars!
Prepping the Oven and Baking Pan
Before diving into the delightful process of making S’mores Bars, it’s essential to prepare your workspace effectively. Start by preheating your oven to 350°F (175°C). This temperature is perfect for achieving a golden-brown crust while ensuring the marshmallows melt beautifully without burning.
Next, take a 9×13-inch baking pan and line it with parchment paper, allowing some overhang on the sides to make it easier to lift out the bars later. This step not only simplifies cleanup but also helps prevent sticking. If you don’t have parchment paper, generously grease the pan with butter or cooking spray to ensure a smooth release.
Mixing Dry Ingredients: A Crucial First Step
Now that your oven is ready, it’s time to focus on the dry ingredients. In a large mixing bowl, combine 1 ½ cups of all-purpose flour, 1 teaspoon of baking powder, and a pinch of salt. Whisk these together until well-blended. This step is crucial because it ensures that the baking powder is evenly distributed, which will help your S’mores Bars rise perfectly during baking.
For an added layer of flavor, consider adding ½ cup of graham cracker crumbs to the dry mixture. This will enhance the classic S’mores taste and contribute to the overall texture of the bars. Set this bowl aside as you prepare the wet ingredients.
Incorporating Wet Ingredients for a Smooth Batter
In another bowl, beat together ½ cup of unsalted butter (softened to room temperature) and 1 cup of packed brown sugar until the mixture is light and fluffy. This may take about 2-3 minutes with a hand mixer or stand mixer, and it’s essential to incorporate air into the batter for a nice rise.
Next, add in 2 large eggs, one at a time, mixing well after each addition. Finally, stir in 1 teaspoon of pure vanilla extract for a warm, inviting aroma. The wet ingredients should now be smooth and cohesive, ready to meet the dry ingredients.
Folding Chocolate Chips: Tips for Even Distribution
With both mixtures prepared, it’s time to combine them. Gradually add the dry ingredient mixture to the wet ingredients, stirring gently with a spatula or wooden spoon. Be careful not to overmix; just blend until no flour streaks remain. This technique ensures the bars remain tender.
Now for the best part—fold in 1 cup of semi-sweet chocolate chips. This step is where you can get creative; you can use milk chocolate, dark chocolate, or even a mix of different kinds. Ensure the chocolate chips are evenly distributed throughout the batter, as this will create delightful pockets of melted chocolate in every bite.
Baking the Base: Understanding the Timing and Visual Cues
Once your batter is ready, pour it into the prepared baking pan and spread it evenly using a spatula. Bake in the preheated oven for about 20-25 minutes, or until the edges are lightly browned and a toothpick inserted in the center comes out with a few moist crumbs. Keep a close eye on the bars in the last few minutes of baking to avoid overcooking; they should not be dry.
The visual cues to look for include a slightly puffed surface and a golden edge, signaling that the bars are on the right track. Once baked, remove the pan from the oven and allow it to cool for a few minutes before adding the marshmallows and graham cracker topping.
Adding Marshmallows and Crushed Graham Crackers for the Final Touch
While the bars are still warm, sprinkle 2 cups of mini marshmallows evenly over the surface. Then, take ½ cup of crushed graham crackers and sprinkle them generously on top of the marshmallows. This combination not only enhances the s’mores flavor but also adds a delightful texture.
Return the pan to the oven for an additional 5-7 minutes, or until the marshmallows are puffed and golden brown. Keep a close watch, as marshmallows can go from perfectly toasted to burnt in a matter of seconds. Once done, remove from the oven and allow the bars to cool completely in the pan.
Cooling and Slicing: Achieving the Perfect Texture
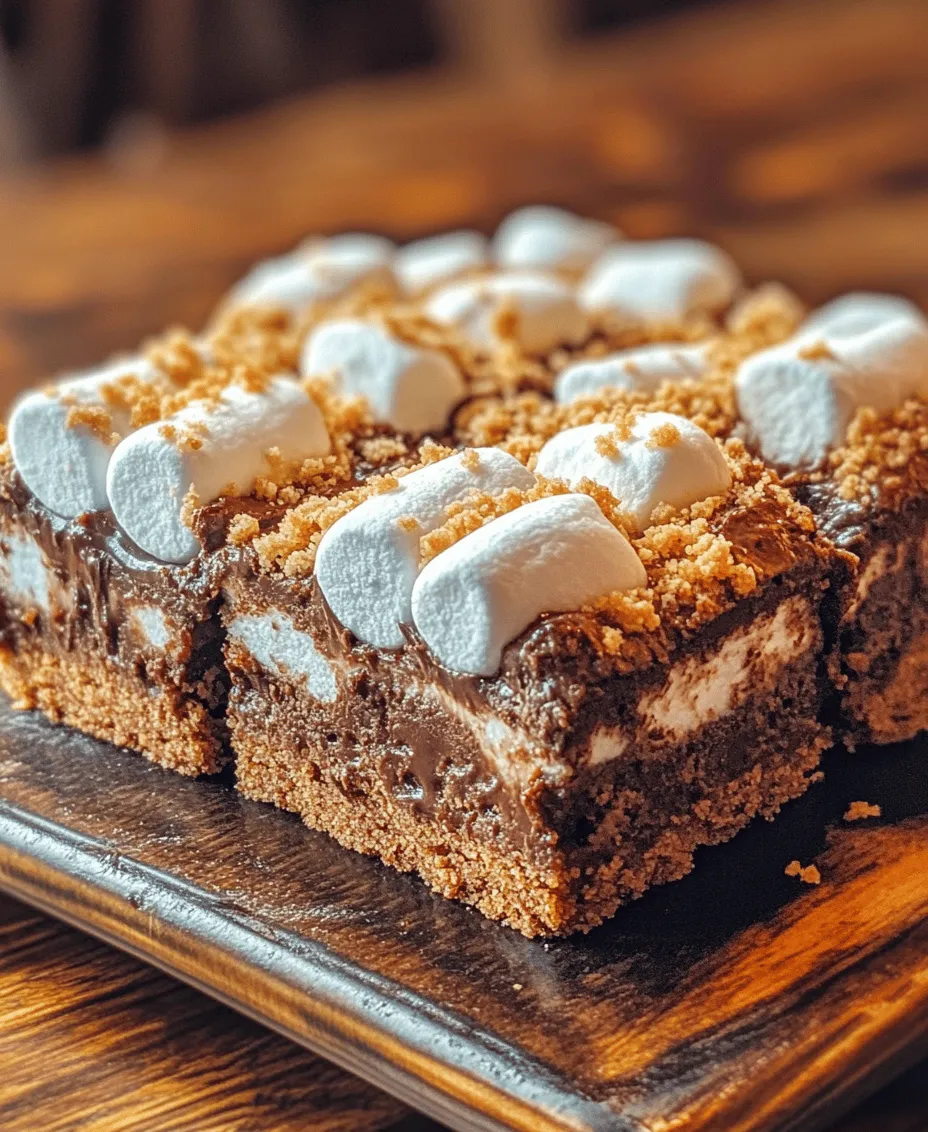
After the bars have cooled for about 20-30 minutes, it’s time to slice them. Use the overhanging parchment paper to lift the entire slab out of the pan and place it on a cutting board. For clean cuts, use a sharp knife and wipe it between slices to ensure the chocolate and marshmallow layers don’t stick to the blade.
Aim for bars that are about 2 inches wide for easy handling. Allow the bars to cool completely at room temperature if you prefer a firmer texture, or you can enjoy them slightly warm for a gooey experience.
Serving Suggestions: Enhancing Your S’mores Bars Experience
Now that your S’mores Bars are ready, it’s time to think about how to serve them for maximum enjoyment. Here are some creative ideas to enhance your S’mores Bars experience:
– Pairing with Beverages: These bars pair wonderfully with a warm cup of hot chocolate or a cold glass of milk. For adults, consider serving them alongside a rich coffee or even a glass of dessert wine. The flavors meld beautifully and create a comforting treat.
– Serving at Gatherings: When entertaining, presentation is key. Consider cutting the bars into smaller bite-sized pieces and arranging them on a decorative platter. You can garnish with additional chocolate drizzle or sprinkle some extra graham cracker crumbs on top for an eye-catching effect.
– Personalizing with Toppings: Encourage guests to customize their S’mores Bars! Set up a topping station with options like crushed nuts, caramel sauce, or flavored chocolate chips. This interactive experience can elevate your gathering and make it more memorable.
Variations on the Classic S’mores Bars Recipe
While the classic S’mores Bars recipe is delicious on its own, there are many ways to explore alternative ingredients and styles to cater to different dietary preferences or flavor profiles.
– Gluten-Free Options: For those with gluten sensitivities, substitute the all-purpose flour with a gluten-free flour blend. Make sure your graham crackers are also gluten-free, or use crushed gluten-free cookies to maintain that classic s’mores flavor.
– Vegan Adaptations: To create a vegan version of S’mores Bars, replace the butter with coconut oil or a plant-based butter alternative. Use flax eggs (1 tablespoon of ground flaxseed mixed with 3 tablespoons of water per egg) as a substitute for regular eggs. Ensure that your chocolate chips are dairy-free as well.
– Flavor Twists: Feel free to experiment with different flavors! Incorporate ingredients like creamy peanut butter into the batter or sprinkle shredded coconut on top before baking. You can also add fruit like sliced strawberries or bananas for a fresh twist.
Nutritional Information: Understanding the Ingredients
Understanding the nutritional profile of your S’mores Bars can help you enjoy them more mindfully. A typical serving (one bar) contains approximately:
– Calories: 200-250 calories (varies based on ingredients)
– Carbohydrates: 30-35 grams
– Fats: 10-12 grams
– Proteins: 2-3 grams
Portion control is essential, especially if you intend to enjoy these bars as a dessert or treat. By considering alternatives like using less sugar or substituting some ingredients for healthier options, you can modify the caloric content while still indulging in this delightful dessert.
Conclusion
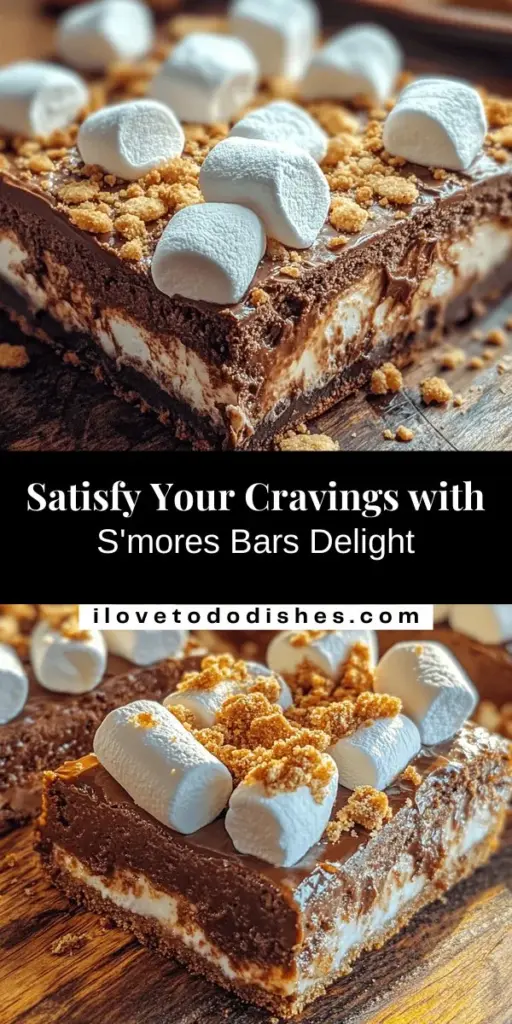
S’mores Bars Delight offers a fun and flavorful way to enjoy the classic combination of chocolate, marshmallow, and graham cracker, all in a convenient bar format. Whether you are revisiting a cherished childhood treat or introducing it to a new generation, this recipe is sure to bring joy and satisfaction. By understanding the origins, mastering the preparation, and exploring creative variations, you can elevate your baking experience and create memories with every bite.
With the tips provided, you can craft the perfect batch of S’mores Bars that not only satisfy your sweet tooth but also impress family and friends. So gather your ingredients, unleash your creativity, and dive into this deliciously nostalgic treat. Enjoy!