Introduction
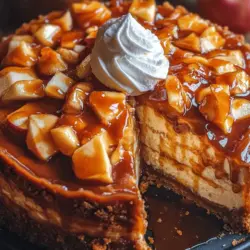
Desserts have a unique way of bringing people together, and few can do it quite like a Salted Caramel Apple Pie Cheesecake. This indulgent dessert is a celebration of flavors and textures, combining the beloved classic apple pie with the creamy richness of cheesecake, all drizzled with a luscious salted caramel sauce. Imagine a flaky crust, a spiced apple filling, a smooth cheesecake layer, and a sweet-salty topping that tantalizes your taste buds. This dessert is not just a treat; it’s an experience.
The allure of the Salted Caramel Apple Pie Cheesecake lies in its intricate blend of flavors. Each bite offers a symphony of sweetness from the caramel, tartness from the apples, and creaminess from the cheesecake, making it a delightful choice for any occasion. Whether you’re hosting a holiday gathering, celebrating a special milestone, or simply looking to impress friends and family, this dessert is guaranteed to be a showstopper.
As the seasons change and the leaves begin to fall, there’s no better time to embrace the flavors of autumn with a dessert that embodies the spirit of cozy gatherings. This cheesecake is perfect for Thanksgiving, Christmas, or any family get-together. It’s a dessert that invites laughter, conversation, and, most importantly, deliciousness.
Understanding the Ingredients
To create the perfect Salted Caramel Apple Pie Cheesecake, it’s essential to understand the role of each ingredient in the recipe. This knowledge will not only help you in the preparation process but will also enhance your appreciation of the final product.
Crust
The foundation of any great cheesecake is its crust. In this recipe, we use graham cracker crumbs as the base, which provides a delightful crunch and buttery richness. The sweetness of the graham crackers complements the tartness of the apple filling and balances the creaminess of the cheesecake.
When selecting your graham crackers, opt for a high-quality brand for the best flavor. You’ll also need melted butter to bind the crumbs together. The right ratio is crucial; too much butter can make the crust soggy, while too little can lead to a crumbly texture. A well-prepared crust will hold its shape and provide a sturdy base for the layers above.
Apple Pie Filling
The apple filling is the heart of this dessert. Choosing the right apples is critical for achieving the perfect flavor and texture. For this cheesecake, we recommend using a blend of Granny Smith and Honeycrisp apples. Granny Smith apples are tart and firm, providing a nice contrast to the sweetness of the caramel and cheesecake. Meanwhile, Honeycrisp apples add a touch of sweetness and juiciness, creating a well-rounded filling.
In addition to apples, you’ll need spices like cinnamon and nutmeg to enhance the overall flavor. These warm spices evoke the essence of apple pie and elevate the dessert to new heights. Don’t forget to incorporate a splash of lemon juice; it not only brightens the flavor of the apples but also helps prevent browning.
Cheesecake Layer
The cheesecake layer is where the magic truly happens. Cream cheese is the star ingredient, providing that rich and creamy texture we all love. For a velvety smooth batter, it’s essential to use room temperature cream cheese, which blends more easily and reduces the risk of lumps. Sour cream is another key player in this layer, adding tanginess and a luxurious creaminess that elevates the cheesecake.
When mixing the cheesecake batter, it’s important to avoid overmixing, as this can incorporate too much air, leading to cracks during baking. Instead, blend the ingredients just until smooth for a dense and creamy consistency.
Salted Caramel Sauce
No Salted Caramel Apple Pie Cheesecake would be complete without its crowning glory: the salted caramel sauce. This sweet and salty topping is what ties all the components together. The balance of sweetness from the caramel and the savory notes of salt creates a harmonious flavor profile that enhances each layer of the cheesecake.
When preparing the caramel sauce, patience is key. Allowing sugar to melt slowly over low to medium heat ensures a smooth and rich caramel. Adding a pinch of sea salt enhances the flavor and takes the sauce to another level. You can make the caramel ahead of time and store it in the refrigerator until you’re ready to assemble your cheesecake, making it a convenient option for busy bakers.
Creating the Perfect Crust
Now that we understand the ingredients, let’s dive into the first crucial step: creating the perfect graham cracker crust. The crust is not just a vehicle for the filling; it contributes significantly to the overall flavor and texture of the cheesecake.
Detailed Steps for Preparing the Graham Cracker Crust
1. Gather Your Ingredients: To make the crust, you’ll need 1 ½ cups of graham cracker crumbs, ½ cup of granulated sugar, and 1/3 cup of melted unsalted butter.
2. Combine the Dry Ingredients: In a mixing bowl, combine the graham cracker crumbs and granulated sugar. The sugar not only adds sweetness but also helps to create a slightly caramelized flavor when baked.
3. Add the Melted Butter: Slowly pour the melted butter into the crumb mixture. Use a fork to mix everything together until the crumbs are evenly coated and the mixture resembles wet sand.
4. Press the Mixture into the Pan: Transfer the crumb mixture into a 9-inch springform pan. Use the back of a measuring cup or your fingers to press the mixture firmly and evenly into the bottom and up the sides of the pan. This step is crucial for achieving a sturdy crust that holds its shape during baking and when serving.
5. Chill the Crust: Once the crust is pressed into the pan, place it in the refrigerator for about 30 minutes. Chilling the crust helps it set and makes it easier to handle when you pour in the filling.
6. Pre-bake the Crust: Preheat your oven to 350°F (175°C). Remove the crust from the refrigerator and bake it for 8-10 minutes, or until it is lightly golden and fragrant. Allow it to cool completely before adding the cheesecake layer.
Tips for Ensuring a Sturdy Base
– Use Fresh Ingredients: Ensure your graham crackers are fresh for the best flavor and consistency. Stale crackers can result in a less-than-ideal crust.
– Don’t Overmix the Crust: When combining the crumbs with the butter, mix just until incorporated. Overmixing can lead to a dense crust that lacks the desired texture.
– Consider Adding Nuts: For added flavor and crunch, consider mixing in finely chopped nuts, such as pecans or walnuts, to the crumb mixture.
Baking Tips
– Use the Correct Temperature: Preheat your oven to 350°F (175°C) for the best results. This temperature allows the crust to firm up without burning.
– Watch the Time: Keep an eye on the crust while it bakes. It should be lightly golden brown but not overly dark. If it starts to brown too quickly, you can cover the edges with foil to prevent burning.
With a perfect crust ready to go, you’re one step closer to creating a Salted Caramel Apple Pie Cheesecake that will impress everyone at your gathering.
Crafting the Apple Pie Filling
Now that we have our crust prepared, it’s time to turn our attention to the apple pie filling. This layer adds the signature flavor of apple pie to our cheesecake, creating a delightful fusion that will have everyone asking for seconds.
Selecting the Best Apples
The choice of apples plays a vital role in the flavor and texture of your filling. As previously mentioned, a combination of Granny Smith and Honeycrisp apples works beautifully.
– Granny Smith Apples: These apples are tart and firm, providing a nice contrast to the sweetness of the cheesecake and caramel. Their firmness ensures that they hold their shape during baking, preventing a mushy filling.
– Honeycrisp Apples: Known for their juicy and sweet flavor, Honeycrisp apples add a lovely balance to the tartness of the Granny Smith apples. Their crisp texture enhances the overall mouthfeel of the filling.
When selecting apples, look for firm, unblemished ones. Avoid overly ripe apples, as they can become mushy when cooked.
Step-by-Step Instructions for Preparing the Apple Mixture
1. Peel and Slice the Apples: Begin by peeling the apples and cutting them into thin slices. Aim for uniform thickness to ensure even cooking.
2. Toss with Lemon Juice: In a large mixing bowl, toss the sliced apples with 1 tablespoon of lemon juice. This step not only adds brightness but also helps prevent the apples from browning.
3. Add Spices and Sugar: Sprinkle in ¾ cup of granulated sugar, 1 teaspoon of cinnamon, ½ teaspoon of nutmeg, and a pinch of salt. Toss everything together until the apple slices are evenly coated.
4. Thicken the Filling: To achieve the right consistency, add 2 tablespoons of all-purpose flour to the apple mixture. The flour will help absorb excess moisture released by the apples during baking.
5. Let It Sit: Allow the apple mixture to sit for about 10-15 minutes. This resting period allows the apples to release some of their juices, which will combine with the sugar and spices, creating a flavorful filling.
6. Cook the Apples (Optional): For a softer filling, you can cook the apples on the stovetop over medium heat for about 5-7 minutes, stirring occasionally. This step is optional but can enhance the flavor of the apples and reduce the baking time.
With the apple filling prepared, you are well on your way to creating a Salted Caramel Apple Pie Cheesecake that will be a hit at any gathering.
Mastering the Cheesecake Layer
Finally, we arrive at the cheesecake layer, the star of this dessert. This layer is where you can truly showcase your baking skills, as it requires a delicate balance of ingredients and techniques to achieve the perfect creamy texture.
Importance of Room Temperature Ingredients
Before beginning, ensure that all your ingredients, particularly the cream cheese and sour cream, are at room temperature. Room temperature ingredients blend more easily, resulting in a smoother batter without lumps.
Detailed Mixing Instructions to Avoid Lumps
1. Beat the Cream Cheese: In a large mixing bowl, beat 16 ounces of room temperature cream cheese with an electric mixer on medium speed until smooth and creamy. Scrape down the sides of the bowl as needed to ensure even mixing.
2. Add the Sugar: Gradually add in 1 cup of granulated sugar, mixing until fully incorporated. The sugar will help to aerate the mixture, creating a light and fluffy texture.
3. Incorporate the Sour Cream: Next, add in ½ cup of sour cream and 1 teaspoon of vanilla extract. Continue mixing until the batter is smooth and creamy.
4. Add the Eggs: Finally, add in 3 large eggs, one at a time, mixing on low speed just until combined. Be careful not to overmix at this stage, as too much air can lead to cracks in the cheesecake during baking.
5. Scrape the Bowl: After incorporating the eggs, give the mixture a final scrape down the sides of the bowl to ensure everything is well combined.
With the cheesecake layer prepared, it’s time to assemble your Salted Caramel Apple Pie Cheesecake, combining all the delicious components you have created. This dessert promises to be a crowd-pleaser, blending the comforting flavors of apple pie with the rich creaminess of cheesecake and the delightful contrast of salted caramel.
Stay tuned for the next part, where we will detail the assembly and baking process, ensuring your cheesecake turns out perfect every time!
Incorporating Eggs and the Role of Sour Cream
When crafting the perfect Salted Caramel Apple Pie Cheesecake, the incorporation of eggs is crucial for achieving that creamy texture we all crave in a cheesecake. Begin by ensuring that your eggs are at room temperature; this allows them to blend smoothly into the batter, preventing any lumps. As you add each egg to the mixture, do so one at a time, mixing on low speed after each addition. This gradual incorporation helps maintain the airiness of the batter while ensuring a uniform consistency.
Sour cream plays an integral role in this cheesecake, enhancing its richness and providing a slight tang that balances the sweetness of the caramel and apples. After adding the eggs, fold in the sour cream gently, taking care not to over-mix. The goal is to maintain that light, fluffy texture that makes this cheesecake irresistible.
Tips for Achieving the Perfect Cheesecake Texture
To create a cheesecake that is velvety and smooth, there are a few tricks you should keep in mind:
1. Temperature is Key: Ensure all your ingredients, especially the cream cheese and sour cream, are at room temperature before starting. Cold ingredients can lead to a lumpy batter.
2. Mixing Technique: Use a stand mixer or hand mixer on a low speed to avoid incorporating too much air, which can cause cracks during baking.
3. Avoid Overmixing: Once you add the eggs and sour cream, mix just until combined. Overmixing can introduce excess air, which is a common culprit for cracking.
4. Water Bath Method: Consider using a water bath (bain-marie) during baking. This technique helps maintain a moist environment, preventing the cheesecake from drying out and cracking.
Assembling the Cheesecake
Now that your batter is ready, it’s time to assemble the layers of this decadent dessert. Proper assembly is vital for visual appeal and flavor balance.
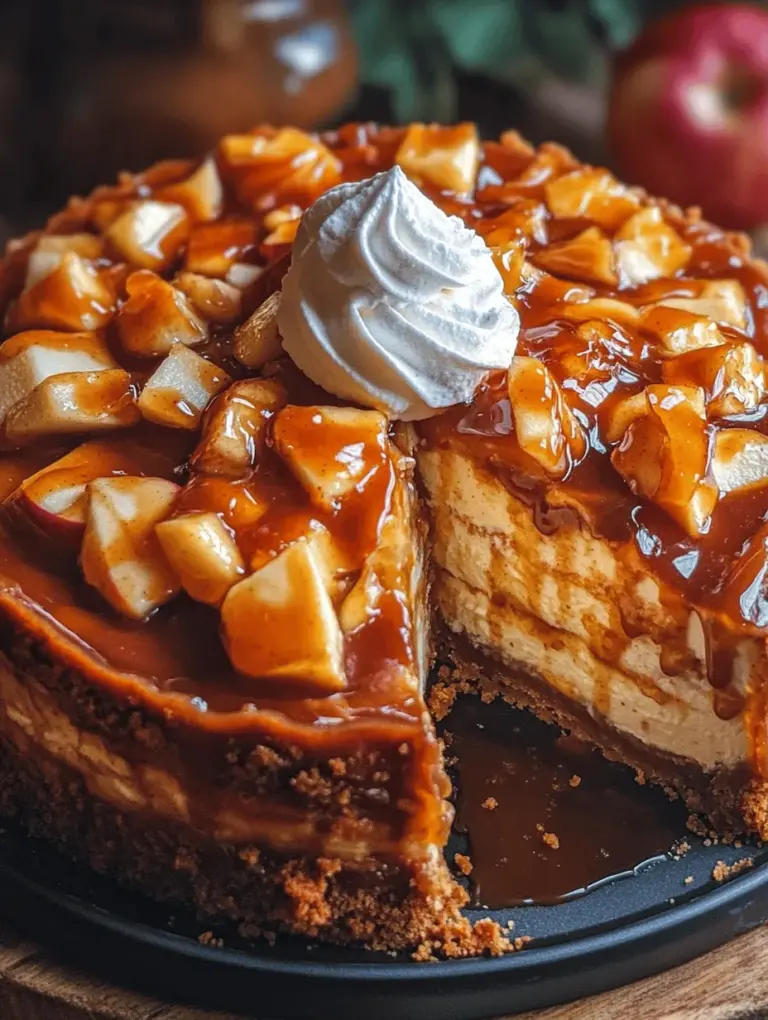
1. Layering the Cheesecake and Apple Filling: Start by pouring half of the cheesecake batter into the prepared crust. Spread it evenly across the base. Next, spoon a generous layer of the apple filling over the batter, allowing it to sink slightly without disturbing the cheesecake layer beneath. Follow this with the remaining cheesecake batter, carefully spreading it over the apple filling. This method ensures each slice showcases the beautiful layers.
2. Smoothing the Top for Presentation: After layering, use a spatula to gently smooth the top of the cheesecake batter. This step is essential for a polished look. A well-smooth top not only enhances the presentation but also helps the caramel sauce pour evenly later.
Baking the Cheesecake to Perfection
Baking your cheesecake properly is crucial to achieving that perfect texture without unsightly cracks.
1. Baking Process and Techniques to Avoid Cracking: Preheat your oven to 325°F (165°C). Place the cheesecake in the center of the oven and bake for about 60-70 minutes. The edges should be set while the center remains slightly jiggly. This is normal; it will continue to firm up as it cools.
2. Oven Door Technique Post-Baking: Once the baking time is complete, turn off the oven, but do not open the door immediately. Allow the cheesecake to sit in the oven for about an hour. This gradual cooling helps prevent sudden temperature changes that can cause cracks.
3. Checking for Doneness: To check if your cheesecake is done without cutting into it, gently shake the pan. The center should have a slight jiggle, while the edges appear firm. If the center wobbles excessively, give it a few more minutes in the oven.
Creating Salted Caramel Sauce
No cheesecake is complete without a luscious salted caramel sauce. Here’s how to make it perfectly:
1. Melting the Sugar: Start by placing granulated sugar in a medium saucepan over medium heat. Stir constantly until the sugar melts and turns a deep amber color. Be patient, as this process can take around 10-15 minutes. It’s essential to avoid burning the sugar, so keep a close eye on it.
2. Adding Butter and Cream: Once the sugar reaches the perfect color, carefully add in cubed butter. The mixture will bubble vigorously, so stand back to avoid splatter. Stir until the butter has melted completely. Next, slowly pour in heavy cream while stirring continuously. Again, expect some bubbling; just keep stirring until smooth.
3. Balancing Sweetness with Sea Salt: After the sauce is well combined, remove it from the heat and stir in sea salt to taste. The salt not only enhances the caramel flavor but also balances the sweetness, making it irresistibly delicious.
Cooling and Serving the Cheesecake
After baking, cooling is a crucial step in the cheesecake process.
1. Importance of Chilling the Cheesecake: Once your cheesecake has cooled in the oven, transfer it to the fridge and chill for at least 4 hours, preferably overnight. This chilling period allows the flavors to meld and the texture to set properly.
2. Effects of Refrigeration: A properly chilled cheesecake will be firmer, making it easier to slice. The refrigeration also enhances the flavors, allowing the caramel and apple filling to shine through.
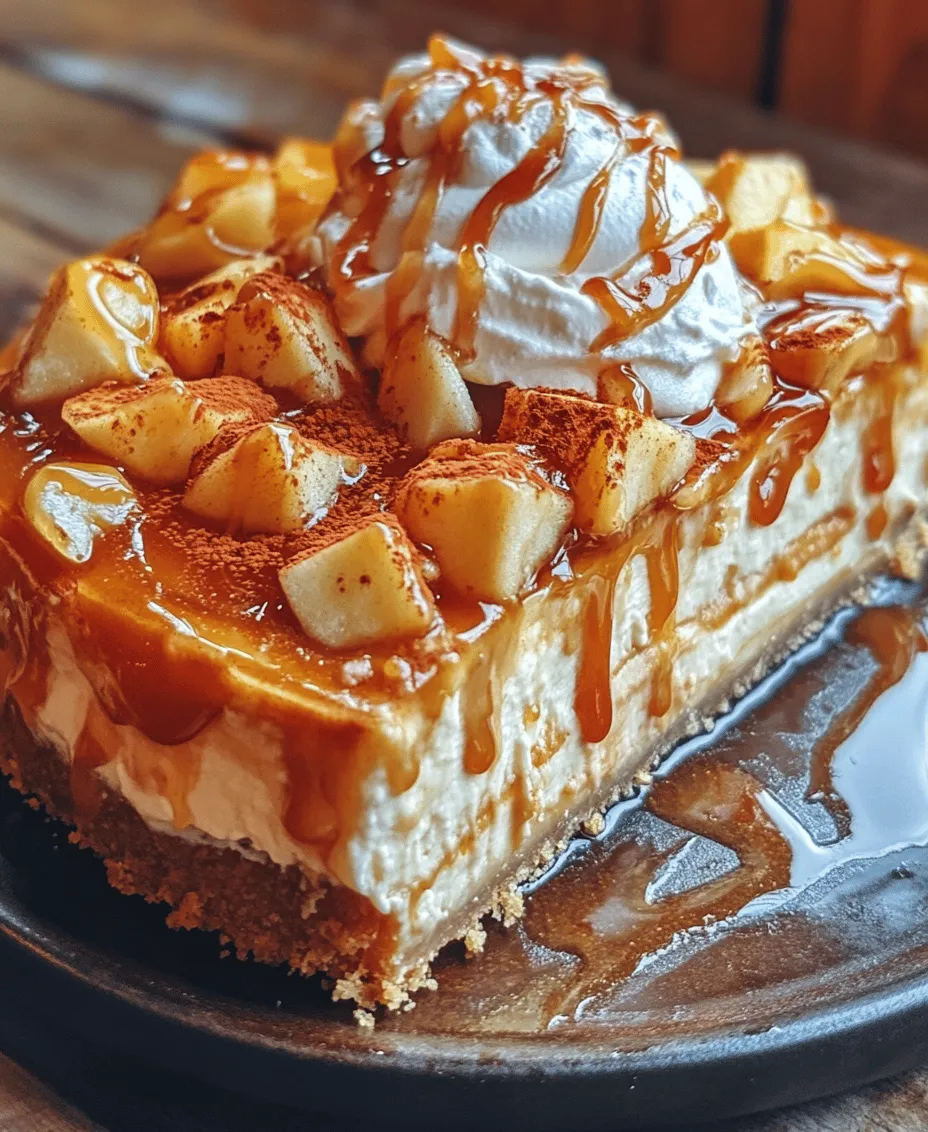
3. Presentation Tips for Serving: When ready to serve, carefully remove the cheesecake from the springform pan. Drizzle a generous amount of salted caramel sauce over the top. For an added touch, consider garnishing with freshly whipped cream and a sprinkle of sea salt. A few slices of fresh apple can also elevate the presentation while echoing the flavors of the pie.
Conclusion
The Salted Caramel Apple Pie Cheesecake is a delightful combination of creamy cheesecake, tender apples, and rich salted caramel that is sure to impress anyone who takes a bite. This dessert not only satisfies your sweet tooth but also brings together beloved flavors that evoke the warmth of fall and the joy of homemade treats.
Encouraging readers to try making this cheesecake for themselves is key. Whether for a holiday gathering, a family dinner, or simply a well-deserved treat, this recipe is bound to become a favorite. The beauty of creating homemade desserts lies in the love and creativity infused into each step, and this cheesecake perfectly exemplifies that joy. So roll up your sleeves, gather your ingredients, and delight in the process of making this show-stopping dessert that is sure to be a hit with your loved ones.