Introduction
There’s something undeniably nostalgic about the classic creamsicle—a delightful combination of creamy vanilla ice cream encased in a bright orange shell, reminiscent of sunny summer days and childhood treats. The playful balance of sweet and citrus makes it a timeless favorite. Now, imagine that beloved flavor transformed into a mini cheesecake form. Enter the Orange Creamsicle Mini Cheesecakes, a delightful twist on a classic dessert that encapsulates the essence of summer in every bite.
These mini cheesecakes are not only visually appealing but also pack a punch of flavor that will take you on a culinary journey down memory lane. They are perfect for gatherings, potlucks, or simply as a treat for yourself. The beauty of this recipe lies in its simplicity and the use of fresh ingredients, which is vital for achieving the best flavor experience. Fresh oranges provide vibrant flavor and aroma, while high-quality cream cheese creates a luscious filling. In this article, we’ll guide you through the components of these scrumptious treats, breaking down each ingredient’s role and providing you with detailed instructions to ensure your mini cheesecakes are a resounding success.
Understanding the Components of the Recipe
To create the perfect Orange Creamsicle Mini Cheesecakes, it’s essential to understand the three main components: the crust, the filling, and the topping. Each part plays a significant role in crafting a balanced and flavorful dessert.
The Crust
The crust is the foundational layer of any cheesecake, providing texture and support. In this recipe, we’ll use graham cracker crumbs, which are a popular choice for cheesecakes due to their sweet, slightly buttery flavor and crunchy texture. The combination of sugar and melted butter binds the crumbs together while enhancing the overall taste.
It’s crucial to achieve the right texture for the crust. A well-prepared crust should be firm enough to hold the cheesecake filling without crumbling apart. To achieve this, pre-baking the crust is recommended. This step not only creates structural integrity but also adds a slight toasty flavor that complements the creamy filling.
The Filling
The cheesecake filling is where the magic happens. The primary ingredient is cream cheese, which serves as the base for the filling. It provides a rich, velvety texture that is essential for any cheesecake. To enhance the creaminess and add a slight tang, we incorporate sour cream. This ingredient not only improves the mouthfeel but also balances the sweetness, making each bite a delightful experience.
Fresh orange juice and zest are crucial for infusing the filling with that signature creamsicle flavor. The zest provides a concentrated burst of citrus aroma, while the juice lends natural sweetness without overpowering the other flavors. This combination creates a refreshing and light cheesecake that will transport you to those sunny days of your childhood.
The Topping
To finish off these mini cheesecakes, we’ll create a luscious topping that mirrors the creaminess of the filling. Heavy whipping cream is the star of this component, as it contributes to a light, airy texture that perfectly contrasts the denser cheesecake beneath. Powdered sugar is added to sweeten the whipped cream without compromising its fluffiness, and a touch of vanilla extract enhances the overall flavor profile.
When combined, these components create a harmonious dessert that balances the sweetness of the cheesecake with the bright acidity of the oranges. Each bite is a delightful blend of creamy, tangy, and sweet flavors that will leave your taste buds dancing.
Ingredients Breakdown
Now that we have a solid understanding of the components that make up the Orange Creamsicle Mini Cheesecakes, let’s delve into the ingredient breakdown. Each ingredient plays a crucial role in achieving the perfect flavor and texture.
Crust Ingredients
– Graham Cracker Crumbs: The base of our crust, graham cracker crumbs provide a sweet and slightly crunchy texture. Their flavor complements the creamy filling and adds a touch of nostalgia.
– Sugar: A small amount of granulated sugar is added to the crust mixture to enhance its sweetness. It helps to balance the flavors in the cheesecake.
– Butter: Melted butter binds the graham cracker crumbs together, providing richness and flavor. It also helps the crust hold its shape after baking.
Cheesecake Filling Ingredients
– Cream Cheese: The foundation of the filling, cream cheese provides the rich and creamy texture that is characteristic of cheesecakes. It is essential for creating that indulgent mouthfeel.
– Sour Cream: Adding sour cream enhances the creaminess of the filling while contributing a slight tang that balances the sweetness of the other ingredients.
– Fresh Orange Juice: Freshly squeezed orange juice is key in delivering that authentic creamsicle flavor. It brings natural sweetness and acidity, making the cheesecake refreshing.
– Orange Zest: The zest from fresh oranges adds a concentrated burst of citrus flavor, enhancing the overall aroma and taste of the cheesecake.
– Granulated Sugar: Used in the filling to sweeten the cheesecake, ensuring it’s perfectly balanced with the tanginess from the cream cheese and sour cream.
Creamsicle Topping Ingredients
– Heavy Whipping Cream: This ingredient is whipped until fluffy to create a light and airy topping that beautifully contrasts with the dense filling.
– Powdered Sugar: Added to sweeten the whipped cream, powdered sugar dissolves easily and contributes to the smooth texture of the topping.
– Vanilla Extract: A splash of vanilla extract enhances the flavor profile of the whipped cream, making it even more delicious.
Step-by-Step Preparation Process
With the ingredients and their roles established, let’s move on to the step-by-step preparation process for the Orange Creamsicle Mini Cheesecakes. This detailed guide will help you navigate through creating these delectable treats with ease.
Preparing the Crust
1. Preheat the Oven: Start by preheating your oven to 350°F (175°C). This ensures the crust will bake evenly and achieve that perfect golden-brown color.
2. Combine Ingredients: In a medium-sized mixing bowl, combine 1 ½ cups of graham cracker crumbs, ¼ cup of granulated sugar, and ½ cup of melted butter. Mix until the crumbs are evenly coated and the mixture resembles wet sand.
3. Press the Mixture: Line a muffin tin with cupcake liners and evenly distribute the crust mixture into each liner. Use the back of a measuring cup or your fingers to firmly press the crust down. Ensure it’s tightly packed to prevent crumbling later.
4. Pre-bake the Crust: Place the muffin tin in the preheated oven and bake for 8-10 minutes, or until the crust is slightly golden and fragrant. This step is crucial for achieving a sturdy base for the cheesecakes.
5. Cool the Crust: Once baked, remove the crust from the oven and allow it to cool completely while you prepare the cheesecake filling. This cooling time is essential for maintaining the integrity of the crust.
Making the Cheesecake Filling
1. Beat the Cream Cheese: In a large mixing bowl, beat 16 ounces of softened cream cheese with an electric mixer on medium speed until smooth and creamy, typically about 2-3 minutes.
2. Add Sugar and Sour Cream: Gradually add ½ cup of granulated sugar and ½ cup of sour cream to the cream cheese. Continue mixing until fully combined and smooth.
3. Incorporate Orange Juice and Zest: Pour in ½ cup of freshly squeezed orange juice and add the zest of one orange. Mix until everything is well incorporated. The mixture should be smooth and creamy with a vibrant orange hue.
4. Fill the Crusts: Using a spoon or a piping bag, carefully fill each pre-baked crust with the cheesecake filling. Be sure to leave a little room at the top, as the filling may rise slightly during baking.
5. Bake the Cheesecakes: Place the muffin tin back in the oven and bake for 15-18 minutes, or until the edges are set but the centers still have a slight jiggle. This will ensure a creamy texture in the final product.
6. Cool and Chill: Once baked, remove the mini cheesecakes from the oven and allow them to cool at room temperature for about 30 minutes. Afterward, transfer them to the refrigerator and chill for at least 4 hours, preferably overnight. This chilling time allows the flavors to meld beautifully.
By following these initial steps, you will have successfully prepared the crust and filling for your Orange Creamsicle Mini Cheesecakes. The combination of fresh ingredients and careful preparation will set the stage for a delightful dessert that brings back the nostalgic flavors of childhood while offering a modern twist. Stay tuned for the next part, where we will dive into the creation of the creamsicle topping and the final assembly of these delectable treats.
Importance of Room Temperature Ingredients for a Smooth Texture
When making Orange Creamsicle Mini Cheesecakes, the temperature of your ingredients plays a critical role in achieving a smooth, creamy texture. Using room temperature cream cheese, eggs, and sour cream allows for easier blending and helps prevent lumps. Cold ingredients can lead to a lumpy batter that will not fully incorporate, resulting in a less than desirable cheesecake. To ensure your ingredients reach room temperature, take them out of the refrigerator about 30 minutes prior to starting your recipe. This small step is essential for achieving that velvety finish that makes these mini cheesecakes so irresistible.
Tips on Incorporating Eggs Without Overmixing
Incorporating eggs into your cheesecake batter is a delicate process that requires care. Overmixing can introduce too much air, leading to cracks during baking. To avoid this, add the eggs one at a time and mix on low speed just until each egg is fully incorporated. This method ensures that the eggs are blended without aerating the batter excessively. Remember, the goal is to achieve a smooth consistency without overworking the mixture. By taking this extra care, you’ll create a cheesecake that bakes evenly and maintains its beautiful texture.
Assembling the Mini Cheesecakes
Once your batter is prepared, it’s time to assemble your Orange Creamsicle Mini Cheesecakes. Start by preheating your oven to 325°F (163°C). Line a cupcake pan with paper liners or grease it lightly to prevent sticking.
How to Fill the Crusts Properly to Avoid Overflow
Using a spoon or a small ice cream scoop, fill each crust with the cheesecake batter, being careful not to overfill. Leave about a quarter-inch of space at the top of each crust to allow for the cheesecakes to rise during baking. A great tip is to use a piping bag to fill the crusts — this allows for more precise filling and less mess. After filling, gently tap the pan on the counter to release any air bubbles that may have formed in the batter. This step helps ensure a smooth surface and even baking.
Techniques to Ensure Even Baking and Texture
For even baking, place the cupcake pan in the center of the oven and consider using a water bath for optimal results. To create a water bath, wrap the outside of the pan in aluminum foil to prevent water from seeping in. Place the foil-wrapped pan inside a larger baking dish filled with hot water. The steam created will help maintain moisture in the oven, leading to creamier cheesecakes while preventing cracking on the surface. Bake for 18-22 minutes, or until the edges are set but the centers still have a slight jiggle. Remove the pan from the oven and allow them to cool at room temperature before transferring to the refrigerator to chill.
Preparing the Creamsicle Topping
While your cheesecakes cool, you can prepare the creamy topping that will elevate your dessert. Start by whipping heavy cream in a chilled bowl. The importance of achieving stiff peaks cannot be overstated. Stiff peaks mean that the whipped cream holds its shape when lifted with a spatula, providing a beautiful and stable topping for your mini cheesecakes.
Importance of Achieving Stiff Peaks in Whipped Cream
To achieve stiff peaks, begin whipping your cream on medium speed until it begins to thicken. Gradually add powdered sugar and vanilla extract to sweeten and flavor the cream as it continues whipping. Increase the speed to high and whip until the cream forms stiff peaks. Be careful not to overwhip, as this can lead to a grainy texture and, ultimately, butter. Once your whipped cream is perfect, set it aside until you are ready to frost your cheesecakes.
Tips for Piping or Dolloping for a Professional Finish
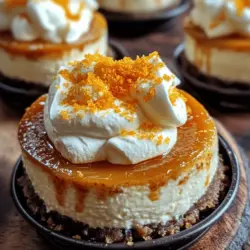
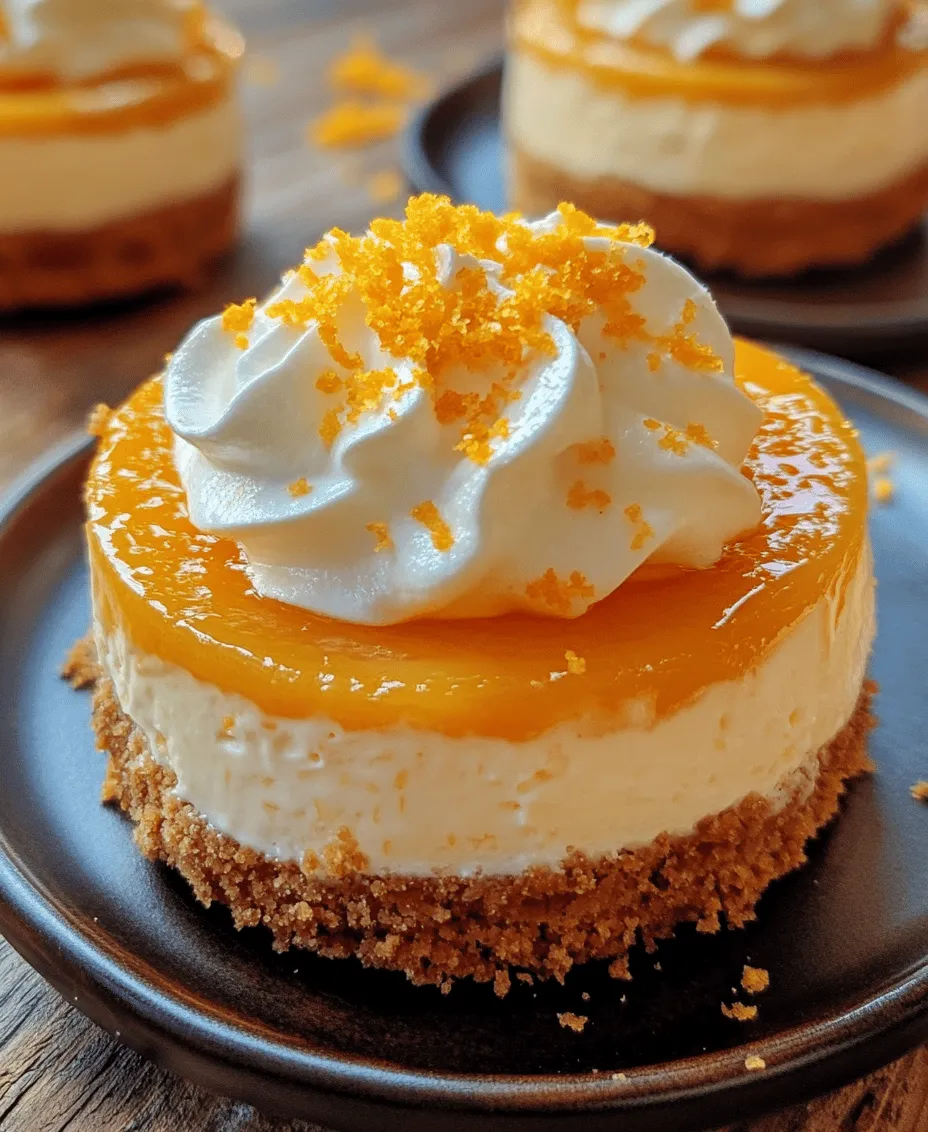
For a professional presentation, consider using a piping bag fitted with a star tip to create decorative swirls on top of each mini cheesecake. If you don’t have a piping bag, you can simply dollop the whipped cream on top using a spoon. Ensure that the whipped cream is spread evenly and generously across each cheesecake for a delightful visual impact. Garnishing with a sprinkle of orange zest or a small slice of orange on top can add a vibrant touch that enhances both the appearance and flavor of your dessert.
Garnishing and Serving
Presentation is key when serving your Orange Creamsicle Mini Cheesecakes. For an appealing display, arrange the cheesecakes on a large platter or cake stand. You can garnish them with additional orange zest, fresh mint leaves, or even a drizzle of chocolate sauce to create a stunning contrast.
When serving, consider pairing the cheesecakes with fresh fruit on the side, such as berries or sliced oranges. This not only complements the flavors but also adds a refreshing touch to each bite.
Chilling and Setting Time
Once the cheesecakes are assembled and topped, it’s crucial to chill them properly. Chilling is essential for flavor development and achieving the right texture. Allow your mini cheesecakes to chill in the refrigerator for at least 4 hours, but overnight is even better. This chilling time allows the flavors to meld beautifully and the cheesecakes to firm up, making them easier to slice and serve.
Importance of Chilling for Flavor Development and Texture
Chilling impacts the final dessert experience significantly. The cool temperature enhances the creamy texture and integrates the flavors, leading to a refreshing treat that is perfect for any occasion. The longer you chill the cheesecakes, the more intense the orange flavor will become, as it melds with the rich cream cheese base.
Recommended Chilling Time for the Best Results
For optimal results, plan to chill your Orange Creamsicle Mini Cheesecakes for at least 4-6 hours, or ideally overnight. This will give you the best flavor and texture, making each bite a delightful experience.
Flavor Profile and Pairing Suggestions
The flavor profile of these Orange Creamsicle Mini Cheesecakes is a harmonious balance of sweet, tangy, and creamy elements. The rich cream cheese base is perfectly complemented by the bright, citrusy notes of fresh orange juice and zest. This refreshing combination evokes the nostalgic flavors of a classic creamsicle, making it a delightful dessert option for any occasion.
Suggestions for Complementary Drink Pairings
To enhance your dessert experience, consider pairing these mini cheesecakes with complementary beverages. A chilled glass of sweet iced tea would beautifully balance the dessert’s creaminess, while a sparkling orange soda would echo the orange flavors in the cheesecakes. For a more adult pairing, a light Moscato or Prosecco would provide a delightful contrast to the richness of the dessert, making for a sophisticated treat.
Ideas for Beverages that Enhance the Dessert Experience
Here are a few more beverage ideas that pair wonderfully with Orange Creamsicle Mini Cheesecakes:
1. Citrus-infused water: A refreshing and light option that enhances the orange flavor.
2. Vanilla or orange-flavored coffee: These can complement the dessert’s creamy texture and citrus notes.
3. Herbal teas: Opt for chamomile or mint, which can provide a calming end to your meal.
Nutritional Considerations
Understanding the nutritional aspects of your dessert can help you make informed choices. Each mini cheesecake contains a rich blend of cream cheese and sugar, contributing to its creamy texture and sweet flavor. However, if you’re seeking alternatives, there are ways to modify the recipe to fit various dietary preferences.
Tips for Modifying the Recipe for Dietary Preferences
1. Gluten-Free Options: Use gluten-free graham crackers or almond flour for the crust to accommodate gluten sensitivities.
2. Sugar Substitutes: For a lower-sugar option, consider using sugar substitutes like stevia or erythritol in place of granulated sugar. Just be sure to check the conversion ratios, as they can vary by product.
3. Dairy-Free Version: Substitute cream cheese with a dairy-free cream cheese alternative and use coconut cream in place of heavy cream for the topping.
By making these adjustments, you can enjoy this delightful dessert without compromising on dietary needs.
Conclusion
Making and indulging in Orange Creamsicle Mini Cheesecakes is a delightful experience that combines the joy of baking with the refreshing flavors of citrus. With their creamy texture and vibrant taste, these mini cheesecakes offer a unique twist on a classic dessert, perfect for warm weather gatherings or any special occasion.
By following the detailed steps and tips provided, you’ll create a dessert that is not only visually stunning but also a crowd-pleaser. So gather your ingredients, embrace your inner baker, and try this recipe for a refreshing and delicious treat. It’s a wonderful way to share homemade joy with your loved ones, making memories that are as sweet as the desserts you create together. Enjoy every bite!