
Introduction
Cinnamon rolls have long been a beloved sweet treat, cherished for their soft, fluffy texture and warm, aromatic flavors. These delightful pastries can evoke memories of cozy weekends, special gatherings, and the comforting scent of freshly baked goods wafting through the house. Their universal appeal lies not only in their taste but also in their versatility—perfect for breakfast, dessert, or even a midday snack. The rich blend of cinnamon and sugar, encased in tender dough, makes cinnamon rolls a staple in many households around the world.
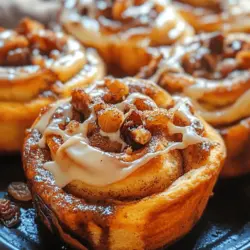
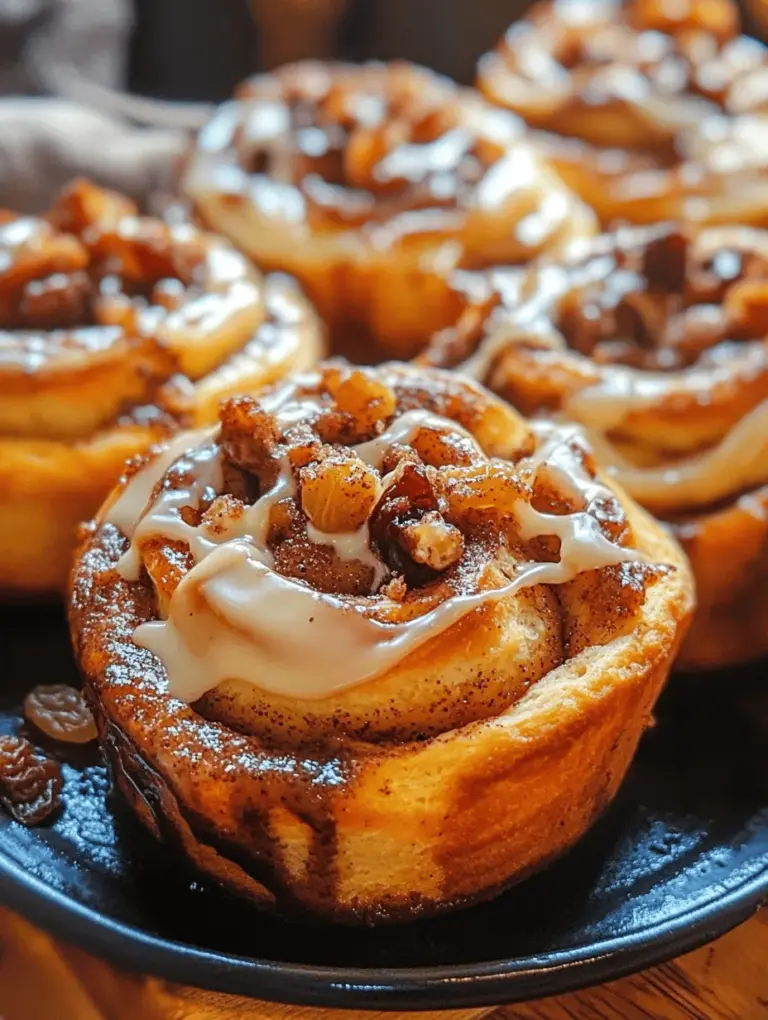
Today, we’ll explore a quick and easy version of this classic favorite: Mini Delightful Cinnamon Rolls. These bite-sized treats are not only adorable but also ideal for any occasion, whether it’s a festive brunch, a cozy family breakfast, or simply a sweet indulgence during the week. The appeal of homemade cinnamon rolls is undeniable; they offer the freshness and warmth that store-bought varieties just can’t match. Plus, with this recipe, you have the freedom to customize them according to your taste preferences, allowing for endless flavor combinations.
In this article, we’ll delve into the rich history of cinnamon rolls, understand the key ingredients that make these mini rolls truly delightful, and give you a step-by-step guide to crafting your own homemade treats.
The Allure of Cinnamon Rolls
Cinnamon rolls boast a fascinating history that transcends cultures and generations. While the exact origins of cinnamon rolls are difficult to pinpoint, it is believed that they date back to ancient times when cinnamon was prized for its flavor and medicinal properties. The first known cinnamon roll recipe emerged in Sweden during the 19th century, known as “kanelbullar” or cinnamon buns. This tradition quickly spread across Europe and eventually made its way to America, where variations flourished, particularly in the Midwest.
Today, cinnamon rolls have become an integral part of many culinary traditions. From the gooey, caramel-infused sticky buns of the American South to the elegant, flaky pastries served in Scandinavian cafes, the variations of cinnamon rolls are as diverse as the cultures they represent. This adaptability is one reason why they have remained a beloved dessert in households worldwide.
Cinnamon rolls have a magical ability to bring people together. Whether enjoyed in a cozy café or made at home with loved ones, they encapsulate warmth and comfort. The process of baking these rolls can be just as enjoyable as eating them, creating cherished memories in the kitchen as you roll, slice, and bake your way to deliciousness.
Understanding the Ingredients
To create the Mini Delightful Cinnamon Rolls, it’s essential to understand the role of each ingredient in the recipe. Here’s a breakdown of the key components that come together to create these delightful pastries:
Dough Components
1. Flour: All-purpose flour serves as the backbone of the cinnamon roll dough, providing structure and stability. The protein content in the flour helps create the desired chewy texture.
2. Sugar: Granulated sugar is not just for sweetness; it also contributes to the browning of the rolls during baking, enhancing their flavor and appearance.
3. Baking Powder: This leavening agent is crucial for creating light and fluffy rolls. It helps the dough rise quickly, making this recipe perfect for those who want to enjoy freshly baked treats without waiting for yeast to proof.
4. Warm Milk: Using warm milk instead of cold is important for activating the yeast, ensuring a soft and tender dough. The warmth encourages yeast activity, leading to better rising and texture.
5. Instant Yeast: Unlike active dry yeast, instant yeast doesn’t require proofing and can be mixed directly with dry ingredients. It ensures a rapid rise, which is perfect for this quick recipe.
6. Butter: Melted butter adds richness to the dough, enhancing flavor and moisture. It also contributes to the flaky texture of the rolls.
Filling Ingredients
1. Brown Sugar: The star ingredient in the filling, brown sugar, offers a deep, caramel-like sweetness that pairs beautifully with cinnamon. Its moisture content helps keep the rolls soft.
2. Ground Cinnamon: This aromatic spice is what gives cinnamon rolls their signature flavor. The warmth and sweetness of cinnamon make it a perfect match for the rolls.
3. Optional Ingredients: To elevate the flavor and texture, consider adding raisins or chopped nuts to the filling. Raisins bring a natural sweetness and chewiness, while nuts add a delightful crunch.
Icing Ingredients
1. Powdered Sugar: This ingredient is key for making the icing smooth and sweet. It dissolves easily, creating a luscious topping for the rolls.
2. Milk or Cream: Adding a splash of milk or cream to the powdered sugar creates a smooth, pourable icing that beautifully coats the cinnamon rolls.
3. Vanilla Extract: A touch of vanilla extract enhances the flavor of the icing, adding a subtle depth that complements the sweetness of the rolls.
4. Customization Options: Feel free to experiment with different flavors in your icing—try adding almond extract, maple syrup, or even a hint of cocoa powder for a chocolate twist.
Step-by-Step Guide to Making Mini Delightful Cinnamon Rolls
Now that we’ve explored the history and ingredients, let’s dive into the preparation of these Mini Delightful Cinnamon Rolls. Follow these detailed steps to create your batch of sweet, fluffy goodness.
Preparing the Dough
1. Mix Dry Ingredients: In a large mixing bowl, combine 2 cups of all-purpose flour, 2 tablespoons of granulated sugar, 2 teaspoons of baking powder, and a pinch of salt. Whisk together until well blended.
2. Mix Wet Ingredients: In a separate bowl, combine 1 cup of warm milk and 2 tablespoons of melted butter. Stir until the butter is fully incorporated.
3. Combine Wet and Dry: Pour the wet mixture into the dry ingredients and mix until just combined. The dough will be slightly sticky, which is ideal for achieving a soft texture.
4. Adjust Flour as Needed: If the dough is too sticky to handle, gradually add more flour, one tablespoon at a time, until the dough comes together but remains soft.
5. Knead the Dough: Turn the dough onto a lightly floured surface and knead gently for about 2-3 minutes until it becomes smooth and elastic. Be careful not to over-knead, as this can lead to tougher rolls.
Kneading the Dough
Kneading is a crucial step in developing the gluten structure of the dough, which provides the rolls with their characteristic chewiness. Here’s how to effectively knead the dough:
– Technique: Use the heel of your hand to push the dough away from you, then fold it back over itself. Rotate the dough a quarter turn and repeat the process.
– Texture Check: The dough should become smoother and slightly springy to the touch. If it feels too sticky, sprinkle a little more flour on the work surface and your hands as you knead.
– Resting Period: After kneading, cover the dough with a clean kitchen towel and let it rest for about 10 minutes. This brief resting period allows the gluten to relax, making it easier to roll out later.
Creating the Filling
While the dough is resting, you can prepare the flavorful filling that will make your cinnamon rolls truly delightful. Here’s how to create the perfect filling:
1. Combine Filling Ingredients: In a small bowl, mix together 1/2 cup of packed brown sugar and 2 tablespoons of ground cinnamon. Stir until the mixture is well combined.
2. Prepare the Dough for Rolling: After the resting period, roll out the dough on a floured surface into a rectangle, approximately 12 inches long and 8 inches wide. Aim for an even thickness of about 1/4 inch.
3. Spread the Filling: Brush the rolled-out dough with 2 tablespoons of melted butter, ensuring it covers the surface evenly. Then, sprinkle the cinnamon-sugar mixture over the buttered dough, leaving a small border around the edges.
4. Optional Add-Ins: If desired, sprinkle raisins or chopped nuts over the cinnamon-sugar mixture for added texture and flavor.
5. Roll the Dough: Starting from one long edge, carefully roll the dough tightly into a log shape, tucking in the filling as you go. Pinch the seam to seal it, ensuring no filling leaks out during baking.
Now that you have prepared the dough and filling, you’re well on your way to creating your Mini Delightful Cinnamon Rolls. These steps lay the foundation for a delicious treat that is sure to please family and friends alike. Next, we’ll dive into the slicing and baking process, followed by how to prepare the icing that will crown your cinnamon rolls with sweetness.

Step-by-Step Instructions for Preparing the Cinnamon Filling
To create the perfect cinnamon filling for your Mini Delightful Cinnamon Rolls, gather the following ingredients: brown sugar, ground cinnamon, softened butter, and a pinch of salt. This filling is crucial as it infuses each roll with a warm, sweet flavor that pairs beautifully with the soft dough.
1. Combine the Sugar and Spices: In a medium bowl, mix together 1 cup of packed brown sugar and 2 tablespoons of ground cinnamon. This blend will provide a rich, sweet-spicy flavor that defines classic cinnamon rolls. For a unique twist, consider adding a dash of nutmeg or allspice for added warmth.
2. Prepare the Butter: Take 1/2 cup (1 stick) of softened unsalted butter and place it in a separate bowl. Using a hand mixer or a spatula, cream the butter until it’s smooth and fluffy. This step is essential as it helps the filling spread easily across the dough.
3. Mix Together: Once the butter is ready, gradually add the sugar-cinnamon mixture to the butter, mixing until well combined. The result should be a thick, spreadable paste that will sit beautifully between the layers of dough.
Suggestions for Variations in Spices or Additional Flavorings
While the classic brown sugar and cinnamon filling is delightful, you can easily customize it to your taste. Here are a few suggestions:
– Maple Cinnamon Filling: Substitute half of the brown sugar with maple syrup for a richer, deeper flavor.
– Nutty Addition: Incorporate finely chopped pecans or walnuts into the filling for a delightful crunch.
– Fruit Flavor: Add a tablespoon of vanilla extract or some finely grated lemon zest for a fresh twist.
– Chocolate Swirl: For chocolate lovers, sprinkle mini chocolate chips or cocoa powder into the filling for a delightful surprise.
Rolling Out the Dough
Once your dough has risen, it’s time to roll it out. This step is crucial for achieving the desired texture and size of your cinnamon rolls.
– Flour the Surface: Lightly dust your work surface with flour to prevent sticking.
– Roll to the Right Thickness: Using a rolling pin, gently roll out the dough into a rectangle approximately 1/4 inch thick. Aim for even thickness, as this will ensure uniform cooking and texture.
Techniques for Maintaining Evenness: To keep the dough at an even thickness, start from the center and roll outward. Rotate the dough 90 degrees every few rolls to maintain a rectangular shape.
Tips for Spreading the Filling to Avoid Tearing the Dough
Spreading the filling evenly is essential. Follow these tips:
– Use a Spatula: Spread the cinnamon filling with a spatula, starting from the center and working your way to the edges. This minimizes the risk of tearing the dough.
– Leave a Border: Leave about a half-inch border around the edges to help the filling stay inside when rolling.
Shaping the Rolls
With the filling spread, it’s time to shape those delightful mini rolls.
1. Rolling the Dough: Starting from one long edge, carefully roll the dough tightly toward the opposite edge, ensuring that the filling stays inside. The tighter the roll, the more defined your cinnamon swirl will be.
2. Cutting the Rolls: Once rolled, trim any uneven edges, then slice the roll into 1-inch pieces. A sharp knife or dental floss works best for cutting, as it prevents squishing the rolls.
Visual Cues for Proper Sizing: Each piece should be roughly the same size for even baking. Aim for about 8-10 rolls, depending on the size of your rectangle.
Second Rise
After shaping your rolls, they require a second rise. This step is vital for achieving the fluffy texture that makes cinnamon rolls irresistible.
– Importance of the Second Rise: The second rise allows the yeast to continue working, creating air pockets that make the rolls light and airy. Skipping this step can result in denser rolls.
– Ideal Temperature for Rising: Place the rolls in a warm, draft-free area to rise for about 30 minutes to 1 hour. A slightly warmed oven (turned off) can be an excellent rising spot. Cover the rolls with a clean kitchen towel to prevent them from drying out.
Baking the Rolls
Baking is where the magic happens.
– Preheat the Oven: Preheat your oven to 350°F (175°C).
– Baking Tips for a Golden-Brown Finish: Place the rolls in a greased baking dish, spacing them closely together for a soft, pull-apart effect. Bake for 20-25 minutes, or until they are golden brown.
– Checking for Doneness: To test if they’re done, gently press the top of a roll. It should spring back; if it leaves an indentation, give them a few more minutes.
Preparing the Icing
The icing is the finishing touch that elevates your cinnamon rolls.
1. Making the Icing: In a small bowl, combine 1 cup of powdered sugar with 2 tablespoons of milk or heavy cream. Whisk until smooth. For a thinner consistency, gradually add more milk until you reach your desired thickness.
2. Flavoring the Icing: Enhance the flavor by adding a teaspoon of vanilla extract, or for a citrusy twist, incorporate lemon or orange zest.
Serving Suggestions
Your Mini Delightful Cinnamon Rolls are ready to impress!
– Serving Ideas: These rolls are perfect for breakfast, brunch, or as a delightful dessert. Serve them warm, drizzled with icing, and watch them disappear.
– Pairing Options: Pair your cinnamon rolls with a steaming cup of coffee, a soothing cup of tea, or a glass of cold milk to create a delightful experience.
– Presentation Tips: Arrange the rolls in a beautiful serving dish, drizzling the icing artfully over the top. Garnish with a sprinkle of cinnamon or chopped nuts for an added touch.
Storage and Reheating Tips
To keep your cinnamon rolls fresh for days, follow these storage tips:
– Best Practices for Storing Leftovers: Allow the rolls to cool completely before storing. Place them in an airtight container or wrap them in plastic wrap. They can be kept at room temperature for up to 2 days or in the refrigerator for up to a week.
– Reheating Methods: To enjoy them warm, preheat your oven to 350°F (175°C) and place the rolls in for about 10 minutes. Alternatively, you can microwave a roll for 15-20 seconds, but be careful not to overheat, as this can dry them out.
Conclusion
Making Mini Delightful Cinnamon Rolls at home is a joyous experience that fills your kitchen with warm, inviting aromas. The process allows you to connect with the ingredients and enjoy the satisfaction of creating something delicious from scratch.
Feel free to experiment with different fillings and icings, personalizing the recipe to your liking. Whether you choose to enjoy them fresh out of the oven or save some for later, the comfort and delight of homemade cinnamon rolls are unmatched. Embrace the joy of baking and treat yourself and your loved ones to these delightful mini rolls; they are sure to become a beloved staple in your home.