
Introduction
As the holiday season approaches, homes are filled with the warmth of festive decorations, the scent of baked goods, and the excitement of family gatherings. This joyous time of year encourages us to create not only cherished memories but also delightful culinary treats that bring everyone together. One such treat that has taken the spotlight in holiday celebrations is the Grinch Oreo Balls—a fun, easy, and visually appealing dessert that captures the spirit of Christmas in every bite.
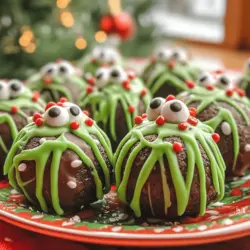
Grinch Oreo Balls are more than just a delicious confection; they serve as a whimsical nod to Dr. Seuss’s beloved character, the Grinch. With their vibrant green coating and eye-catching decoration, these bite-sized treats are perfect for any holiday gathering, be it a family party, a cookie swap, or a festive office celebration. The ease of making these treats allows both novice cooks and seasoned bakers to join in the fun, creating a memorable experience while indulging in a sweet and creamy delight.
The Magic of Grinch Oreo Balls
The inspiration behind Grinch-themed treats stems from the classic tale of “How the Grinch Stole Christmas,” which resonates with people of all ages. The story emphasizes themes of transformation, joy, and celebration, making it a fitting backdrop for holiday treats that embody the spirit of togetherness and merriment. Grinch Oreo Balls are a playful way to bring a beloved character to life through food, making them a favorite among both children and adults alike.
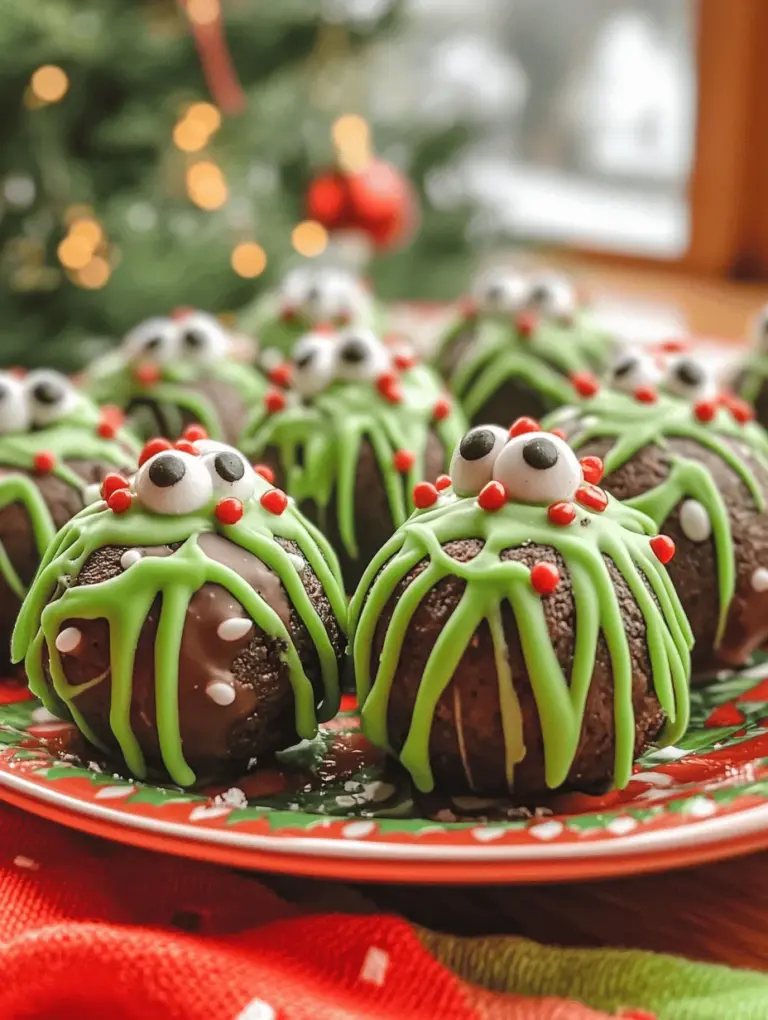
Combining classic flavors with festive themes, these Oreo balls feature a rich, creamy filling encased in a vibrant green candy coating. The sweet and slightly tangy cream cheese blends beautifully with the chocolatey Oreos, creating a satisfying contrast that is impossible to resist. During the holiday season, these treats have gained immense popularity, often making appearances on dessert tables, potlucks, and holiday parties. Their whimsical appearance and delightful taste make Grinch Oreo Balls a conversation starter and a must-try for anyone looking to add a festive touch to their holiday spread.
Ingredients Breakdown
To embark on your Grinch Oreo Balls journey, gather the following ingredients:
Ingredients
– Oreo Cookies (1 package): The base of our treats, Oreos provide a rich chocolate flavor that pairs perfectly with the creamy filling.
– Cream Cheese (8 oz, softened): This ingredient adds a luscious creaminess that binds the crushed Oreos together and balances the sweetness.
– Green Candy Melts (1 bag): These vibrant melts create the signature Grinch look, providing a sweet coating that adds to the festive appeal.
– Coconut Oil (optional, 1 tablespoon): Adding a little coconut oil can help achieve a smoother consistency for the candy melts, ensuring a flawless coating.
– Red Candy Melts (for decoration, optional): Perfect for creating little heart details or drizzling over the green coating, adding a pop of contrasting color.
– Edible Glitter (optional): A sprinkle of edible glitter will elevate the festive look, making your treats sparkle.
– Candy Eyes (optional): A fun addition that gives your Grinch Oreo Balls personality and charm.
Explanation of the Role of Each Ingredient
– Oreo Cookies: The star of the show, Oreos provide the necessary structure and flavor for our treats. Their rich chocolate flavor is the perfect complement to the cream cheese filling.
– Cream Cheese: This ingredient is essential for achieving the right texture and creaminess. It helps bind the crushed Oreos together while adding a subtle tang that balances the sweetness.
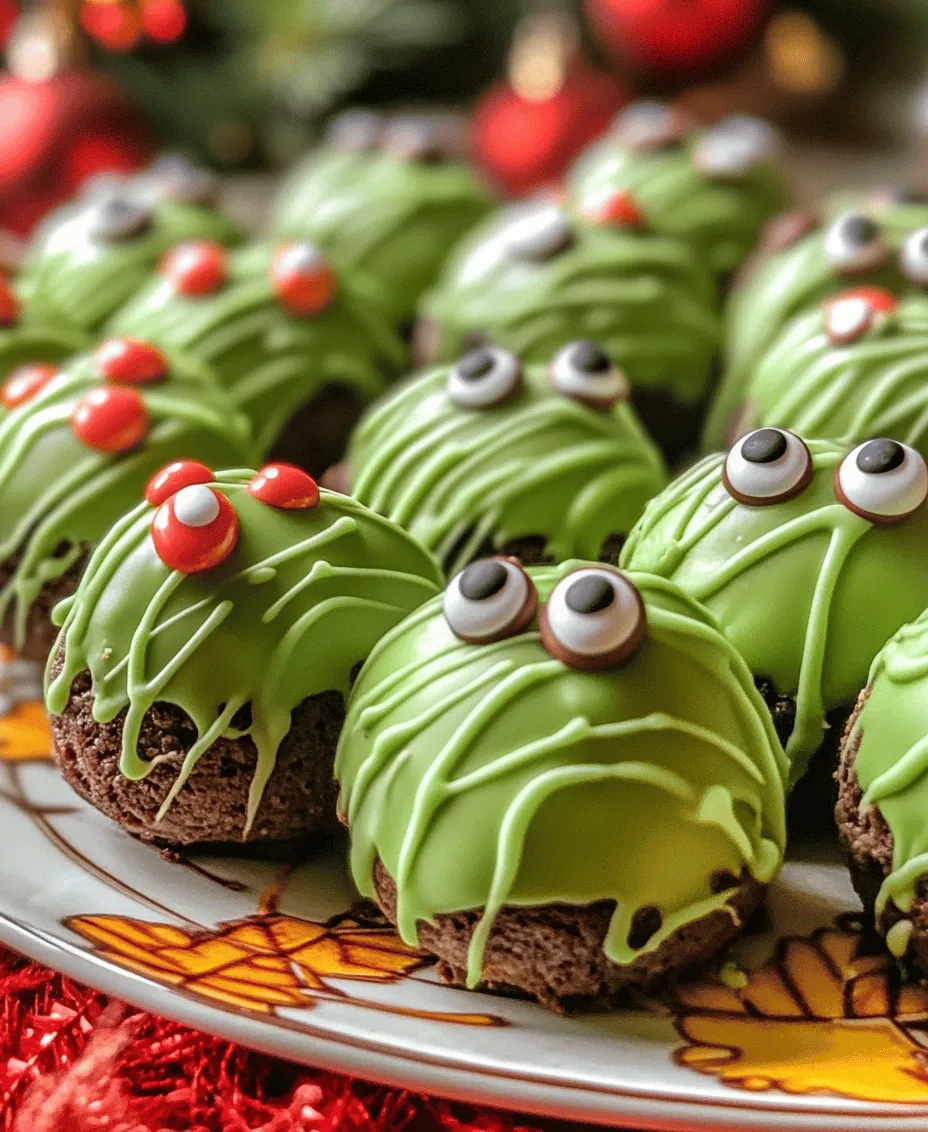
– Green Candy Melts: These melts are what give our treats their signature color, making them visually appealing and festive. They also add an extra layer of sweetness that enhances the overall flavor.
– Coconut Oil: While optional, coconut oil can improve the consistency of the melted candy, ensuring a smooth coating that adheres well to the Oreo balls.
– Red Candy Melts and Edible Glitter: These decorative elements add an extra touch of holiday cheer and creativity, allowing you to personalize your Grinch Oreo Balls.
– Candy Eyes: These playful additions bring your Grinch treats to life, making them a fun choice for holiday parties and gatherings.
Step-by-Step Preparation Guide
Crushing the Oreos
The first step in creating your Grinch Oreo Balls is to crush the Oreos into fine crumbs. This process is crucial, as the texture of the crumbs will significantly affect the final product. You have two primary methods for crushing Oreos:
1. Food Processor: This method is quick and efficient. Simply place the Oreos in the food processor and pulse until you achieve fine crumbs. Be careful not to over-process, or you might end up with Oreo dust.
2. Rolling Pin: If you prefer a hands-on approach, placing the Oreos in a zip-top bag and using a rolling pin to crush them is a great alternative. This method allows you to control the texture better, ensuring that you achieve the desired crumb consistency.
Regardless of the method you choose, it’s essential to reach a fine crumb texture. This will help the Oreo mixture bind together effectively when combined with the cream cheese, leading to smooth and cohesive balls.
Mixing with Cream Cheese
Once you have crushed the Oreos, the next step is to mix the crumbs with softened cream cheese. Softened cream cheese is vital for ensuring an even mix; it blends seamlessly with the Oreo crumbs, creating a smooth filling. Here’s how to do it:
– Combine: In a large mixing bowl, add the crushed Oreos and softened cream cheese. Using a spatula or your hands, mix the ingredients together until they are fully combined. It’s important to avoid streaks of cream cheese in the mixture, as this can lead to uneven flavor and texture.
– Tips for Even Mixing: To achieve a consistent mixture, ensure that your cream cheese is at room temperature before mixing. Cold cream cheese can be difficult to incorporate and may cause lumps in your filling. If you forget to take it out ahead of time, you can microwave it in short bursts of 10-15 seconds to soften it slightly.
Forming the Balls
After thoroughly mixing the Oreo crumbs with the cream cheese, it’s time to form the mixture into balls. Here’s how to do it:
1. Scoop and Roll: Using a cookie scoop or tablespoon, take portions of the Oreo mixture and roll them into balls about 1 inch in diameter. Aim for uniform sizes to ensure even coating and presentation.
2. Chill: Once you have formed all the balls, place them on a parchment-lined baking sheet. Refrigerate them for at least 30 minutes to allow them to firm up. Chilling is an essential step, as it helps the balls maintain their shape when coated in the melted candy.
3. Prep for Coating: While the balls are chilling, you can prepare your green candy melts. Follow the instructions on the package for melting, typically in a microwave-safe bowl in short bursts, stirring in between to ensure a smooth consistency.
Now that you have your Oreo balls ready and your candy melts prepared, you’re all set for the next steps in creating your delightful Grinch Oreo Balls. The fun of decorating and finishing these treats is just around the corner, and soon you’ll have a festive treat that is sure to impress family and friends alike.
Guidance on Portioning and Rolling Techniques
When it comes to making Grinch Oreo Balls, mastering the portioning and rolling techniques can significantly enhance the overall appearance and taste of your festive treats. To achieve uniformity, it’s best to use a small cookie scoop or a tablespoon to portion out the mixture. This ensures that each ball is consistently sized, leading to even cooking and a more appealing presentation.
Once you’ve portioned the mixture, roll it between your palms to form smooth, round balls. The warmth from your hands will help the mixture come together, but if it feels too sticky, you can chill it in the refrigerator for a few minutes to firm it up before rolling. Aim for a diameter of about 1 inch for each ball; this size is perfect for popping into your mouth and allows for a satisfying bite.
Importance of Chilling the Mixture for Firmness
Chilling the Oreo mixture before rolling is a crucial step that shouldn’t be overlooked. After combining the crushed Oreos and cream cheese, allow the mixture to chill in the refrigerator for at least 30 minutes. This resting period helps the ingredients meld together and makes them easier to handle. The colder mixture will hold its shape better when rolling into balls, resulting in a neater and more professional-looking treat.
Melting the Green Candy Coating
One of the highlights of Grinch Oreo Balls is their vibrant green candy coating. Melting candy melts requires some attention to detail to ensure a smooth, glossy finish. Here’s how to do it step by step:
1. Preparation: Begin by measuring out the desired amount of green candy melts. A good starting point is about 2 cups, depending on how many Oreo balls you plan to coat.
2. Melting Process: Place the candy melts in a microwave-safe bowl. Heat them in the microwave in 30-second intervals, stirring in between until fully melted. This method helps to prevent overheating, which can cause the candy to seize up.
3. Adding Coconut Oil: If you want to achieve a thinner consistency for easier dipping, consider adding a teaspoon of coconut oil to the melted candy melts. This addition not only improves the coating’s fluidity but also gives it a subtle sheen. Make sure to mix well so that the coconut oil is fully incorporated.
Coating the Oreo Balls
Once your candy melts are ready, it’s time to coat your Oreo balls. Here are some effective techniques to ensure a perfect coating:
1. Dipping Technique: Using a fork or a candy dipping tool, carefully lower each Oreo ball into the melted candy coating. Gently tap the fork on the side of the bowl to allow excess coating to drip off. This prevents clumping and ensures a smooth finish.
2. Visual Tips for Even Coating: To achieve an even coat, be sure to fully submerge the ball in the melted candy while gently rolling it with the fork. If you notice any gaps in the coating, use a toothpick or a small spatula to fill them in. This can help create a more polished look.
3. Setting the Coating: After coating each ball, place them on a baking sheet lined with parchment paper. Allow them to set at room temperature or refrigerate for a quicker setting time.
Decorating for Festive Flair
Adding decorative elements to your Grinch Oreo Balls is where the creativity truly shines. Here are some festive decoration ideas:
1. Candy Eyes and Red Detailing: Once the green coating has set but is still slightly tacky, you can add candy eyes for that adorable Grinch look. Use red candy melts or edible glitter to create accents like Santa hats or red bows. For instance, you can use a small amount of red candy melt to pipe a tiny Santa hat on top of a ball.
2. Importance of Timing in Decoration: Timing is key when it comes to decoration. Ensure the candy coating is set enough to hold the decorations but still tacky enough for them to adhere. If the coating hardens too much, you can use a little melted candy as “glue” to attach decorations.
Setting and Serving
After all the hard work, it’s time for your Grinch Oreo Balls to set and be served. Here’s how to do it:
1. Recommended Time for Setting in the Fridge: Allow the coated Oreo balls to sit at room temperature for about 10-15 minutes to firm up slightly. Then, transfer them to the refrigerator for about 30 minutes to fully set. This chilling period ensures the coating hardens and makes it easier to handle when serving.
2. Ideas for Serving Presentation: For a stunning presentation, arrange the Grinch Oreo Balls on a festive platter. Consider using a red or green tablecloth to enhance the holiday spirit. You can also add decorative touches like sprigs of holly or small ornaments around the platter to make it visually appealing.
Nutritional Information
Understanding the nutritional content of your treats is essential, especially during the holiday season when indulgence is common. Here’s a brief overview of the nutritional information per serving of Grinch Oreo Balls (assuming one ball is a serving):
– Calories: Approximately 130-150 calories
– Fat: 8-10 grams
– Carbohydrates: 15-18 grams
– Protein: 1-2 grams
– Sugar: 10-12 grams
For those with dietary restrictions, you can easily make gluten-free Oreo balls by using gluten-free Oreo cookies. Always check the labels on candy melts and other ingredients to ensure they meet your dietary needs. With mindful serving sizes, you can balance indulgence and enjoyment during the festive season.
The Joy of Making Treats Together
One of the most delightful aspects of making Grinch Oreo Balls is the opportunity for family involvement. Invite your children or loved ones to join you in the kitchen. Not only does this create a fun and engaging atmosphere, but it also fosters a sense of togetherness that is especially meaningful during the holiday season.
Consider trying out different colors and flavors when making the Oreo balls. You can experiment with various candy melts like red, blue, or even a mix of colors for a whimsical effect. You can also try using different flavored sandwich cookies, such as peanut butter or mint, to create unique variations of the classic recipe. Encourage conversations about holiday baking traditions and share stories, making the cooking experience even more memorable.
Conclusion
In summary, making Grinch Oreo Balls is a delightful and simple way to spread holiday cheer. The combination of creamy Oreo filling and vibrant green candy coating makes these treats irresistible. With easy-to-follow instructions and creative decoration ideas, anyone can successfully create these festive delights and enjoy the process along the way.
As you celebrate this holiday season, remember that it’s not just about the treats but also the memories created in the kitchen. So gather your loved ones, embrace the joy of baking together, and let the spirit of the holidays fill your home. Happy baking!