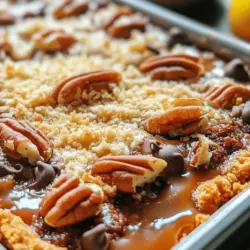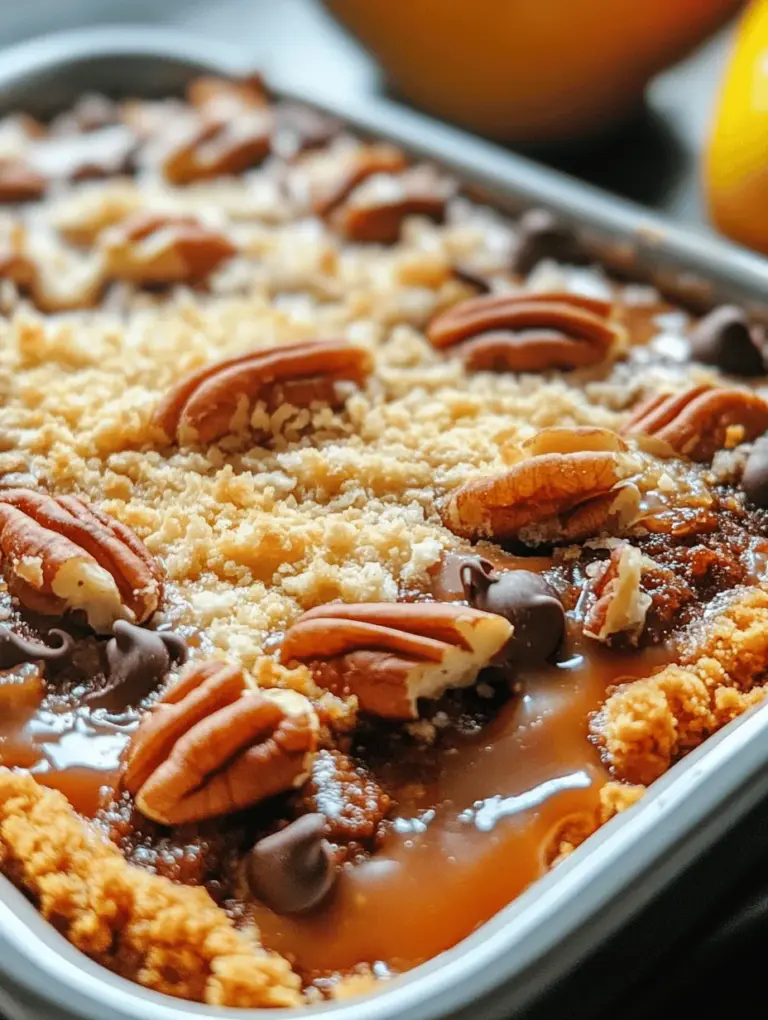
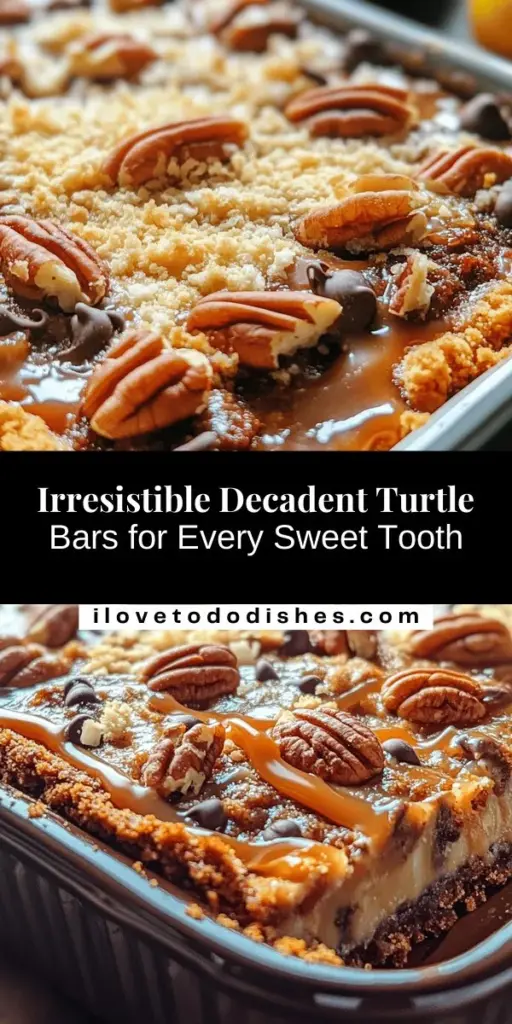
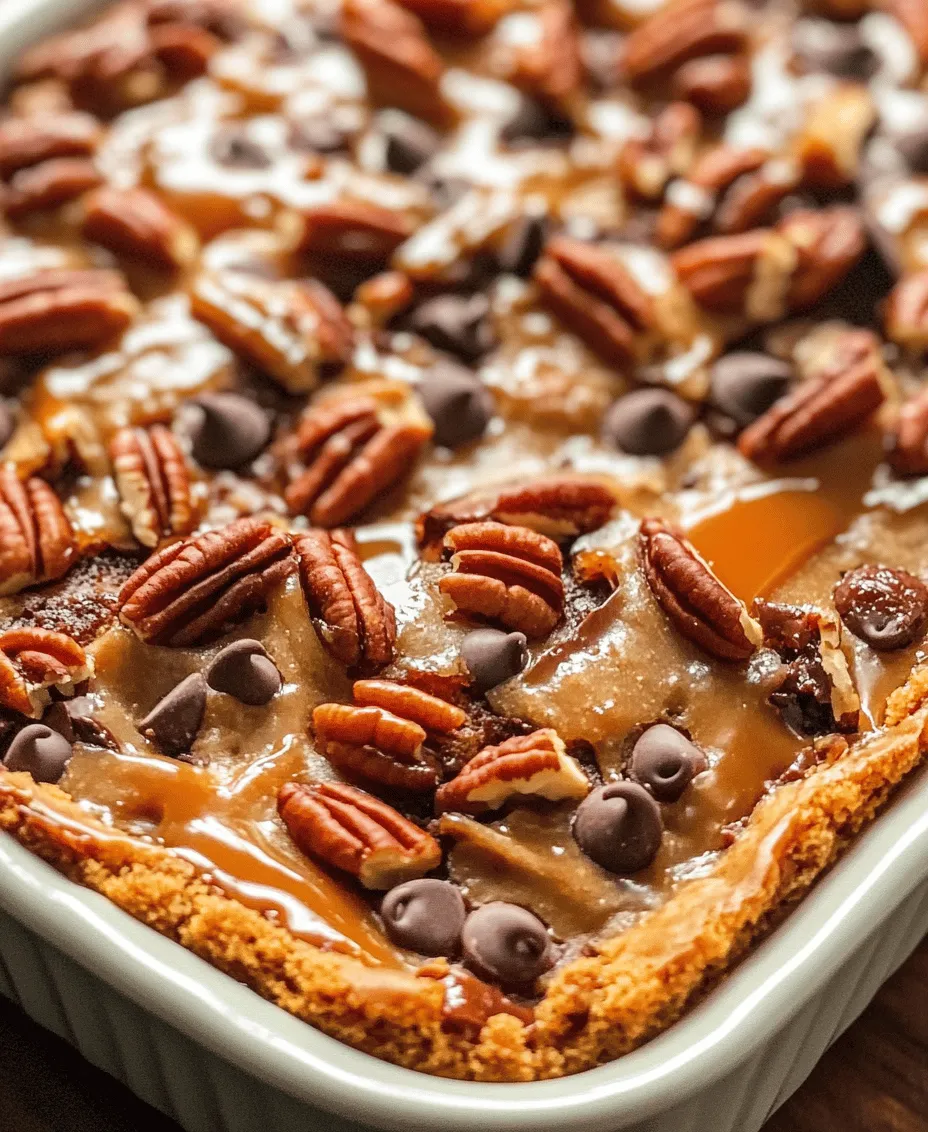
When it comes to desserts that are sure to impress, Decadent Turtle Bars stand out as a crowd-pleasing favorite. Combining the rich flavors of chocolate, gooey caramel, crunchy nuts, and a subtly sweet graham cracker crust, these bars are a delightful treat that can elevate any gathering, party, or simply serve as a satisfying indulgence for a sweet tooth. The layers of textures and flavors come together to create a chewy, crunchy, and creamy delight that will have everyone reaching for a second (or third) piece. In this article, we will delve into the origins of turtle bars, explore their components, and guide you through the steps to create this irresistible dessert.
Understanding Turtle Bars
Turtle Bars derive their name from the classic turtle candy, which features a combination of chocolate, caramel, and pecans, resembling the shape of a turtle. The origins of this beloved treat can be traced back to the early 20th century, when it was popularized by the caramel and nut confectionery. The idea of transforming these components into a bar format not only makes them easy to serve, but also allows for a perfect balance of flavors in every bite.
At their core, turtle bars are all about indulgence. The traditional components include a buttery graham cracker crust, a rich layer of chocolate, and a generous drizzle of caramel, all topped off with crunchy pecans. However, the versatility of turtle bars allows for plenty of variations. For instance, you can swap out pecans for walnuts or almonds, use different types of chocolate, or even incorporate flavored extracts to give your bars a unique twist. This adaptability makes turtle bars suitable for various dietary preferences, whether you’re catering to nut-free, gluten-free, or vegan diets.
Ingredients Breakdown
To create the perfect Decadent Turtle Bars, it’s essential to understand the role of each ingredient in achieving the desired flavor and texture. Here’s a breakdown of what you’ll need:
– Graham Cracker Crumbs: The base of our turtle bars, graham cracker crumbs provide a sweet, slightly nutty flavor and a satisfying crunch. Their ability to bind together with butter creates a sturdy crust that holds up to the rich toppings.
– Unsalted Butter: Butter is crucial for binding the graham cracker crumbs and adding richness to the crust. Using unsalted butter allows for greater control over the overall saltiness of the dessert, ensuring that the flavors of the chocolate and caramel shine through.
– Chopped Pecans: Pecans bring a delightful nuttiness and crunch to the bars. Their buttery flavor complements the sweetness of the caramel and chocolate perfectly, creating a harmonious balance that is simply irresistible.
– Chocolate Chips: You have the option to choose between milk chocolate and dark chocolate for your turtle bars. Milk chocolate offers a sweeter flavor profile, while dark chocolate provides a more intense, slightly bitter contrast that enhances the overall taste experience.
– Caramel Sauce: Caramel is the star of the show in turtle bars. You can opt for store-bought caramel sauce for convenience, or make your own at home for a richer flavor. Either way, the gooey caramel layer is what ties all the elements together.
– Sweetened Shredded Coconut: While optional, shredded coconut adds an additional layer of flavor and texture. It brings a tropical twist to the bars and pairs beautifully with the other ingredients.
– Vanilla Extract: A splash of vanilla extract deepens the overall flavor of the turtle bars, adding warmth and complexity that enhances the sweetness of the chocolate and caramel.
– Sea Salt: Don’t underestimate the power of salt! A sprinkle of sea salt on top of the bars balances the sweetness and elevates the flavors, providing a contrast that makes each bite even more satisfying.
Step-by-Step Instructions
Now that we’ve covered the essential ingredients, let’s dive into the step-by-step process of making these Decadent Turtle Bars. Follow these detailed instructions to ensure your bars turn out perfectly every time.
Preheating the Oven
Before you begin, it’s crucial to preheat your oven to 350°F (175°C). Preheating ensures that your bars cook evenly and helps to achieve that perfect golden-brown crust. While the oven is warming up, prepare your baking dish by lining it with parchment paper or lightly greasing it. This step will make it easier to remove the bars once they’re baked and prevent sticking.
With your oven preheating, you’re ready to move on to the crust preparation, which is the foundation of your turtle bars.
Stay tuned as we continue to explore the remaining steps in crafting these delightful dessert bars, ensuring that every flavor and layer comes together beautifully. The journey to creating Decadent Turtle Bars is not just about the final product; it’s about the experience of making something truly special that will be cherished by all who indulge in them.
Making the Base
The foundation of the Decadent Turtle Bars is a delightful crust that sets the stage for the rich layers above. To achieve the right consistency for the crust, start with room temperature butter, which aids in creating a smooth and even texture. When mixing the butter with the brown sugar, aim for a creamy consistency; this indicates that the sugar has started to dissolve and incorporates air, which will help in achieving a light crust.
Use a combination of all-purpose flour and a pinch of salt to balance the sweetness. If you want a sturdier base, consider adding a small amount of cornstarch, which will help create a more tender texture. When you press the mixture into the baking pan, ensure it is evenly distributed. An even layer is crucial, as it will bake consistently, preventing any soggy or overcooked sections. Use the back of a measuring cup or your fingers to smooth it out, and remember to press firmly to avoid crumbling when it’s baked.
Layering the Ingredients
Layering is where the magic happens in your turtle bars. Begin by evenly spreading the chopped pecans over the crust; this will give a crunchy texture. When adding the chocolate chips, opt for semi-sweet or dark chocolate to balance the sweetness of the caramel. Distribute them generously for an indulgent chocolate flavor in every bite.
Next comes the caramel. For a homemade touch, you can make your own caramel sauce, but store-bought works just as well for convenience. Drizzle the caramel over the chocolate and nuts, ensuring it seeps into the layers below. Finally, sprinkle shredded coconut on top, which adds a delightful chewiness and complements the other flavors beautifully. The layering should be done methodically to ensure even distribution and ensure that every bite is packed with all the delectable ingredients.
Baking Process
When it comes to baking the turtle bars, preheat your oven to 350°F (175°C) and prepare your baking pan by lining it with parchment paper. This not only prevents sticking but also makes it easier to lift the bars out once they cool. Bake your turtle bars for about 25-30 minutes. Keep an eye on the edges; they should turn a golden brown while the center remains soft, but not jiggly.
To avoid overcooking, check the bars a few minutes before the timer goes off. A toothpick inserted in the center should come out with a few moist crumbs but not wet batter. If you notice the edges browning too quickly, you can cover them with a piece of aluminum foil to shield them from direct heat. Once they are done, remove them from the oven and allow them to cool in the pan for about 10-15 minutes before transferring them to a wire rack.
Cooling and Slicing
Cooling is a crucial step in achieving perfectly sliced turtle bars. Allow the bars to cool completely in the pan before slicing, as this will help them firm up and make cutting easier. If you’re in a hurry, you can place them in the refrigerator for about 30 minutes to expedite the cooling process.
When it’s time to slice, use a sharp knife, and if necessary, lightly grease the blade to prevent sticking. For even bars, use a ruler to mark where you will cut, making sure to slice in straight lines. Cutting into squares or rectangles is a matter of personal preference, but uniform sizes are always more appealing and make for easier serving.
Perfect Pairings
When it comes to enjoying your Decadent Turtle Bars, think about enhancing the experience with complementary flavors and drinks. A rich cup of coffee is a classic pairing, as its bitterness contrasts beautifully with the sweetness of the bars. If you prefer something lighter, a herbal or chai tea can also provide a delightful accompaniment, adding warmth and spice.
For those looking to indulge further, consider serving the turtle bars with a scoop of vanilla or caramel ice cream. The creamy texture of the ice cream combined with the chewy, crunchy bars creates a satisfying contrast that is hard to resist. For an extra touch, drizzle some chocolate or caramel sauce over the ice cream for an indulgent treat.
Storage and Serving Suggestions
To maintain the freshness of your turtle bars, store them in an airtight container at room temperature. They can last up to a week, retaining their delicious flavor and texture. If you want to keep them longer, consider freezing them. Wrap each bar individually in plastic wrap and then place them in a freezer-safe bag. They can be stored in the freezer for up to three months. When ready to enjoy, let them sit at room temperature for about 30 minutes, or pop them in the microwave for a few seconds to warm up.
Turtle bars are versatile and can be served on various occasions. They are perfect for parties, picnics, or family gatherings. Cut them into smaller squares for a bite-sized treat or serve them alongside coffee for a delightful afternoon snack. Their rich flavors make them a crowd-pleaser, ensuring they’ll be a hit at any event.
Variations on the Classic Recipe
While the classic Decadent Turtle Bars are a delicious treat on their own, there are several variations you can explore to cater to different dietary needs or preferences.
– Nut-Free Options: For those with nut allergies, simply omit the pecans. You can replace them with additional chocolate chips or even crushed graham crackers for a different texture.
– Gluten-Free Alternatives: Making these bars gluten-free is simple. Substitute the all-purpose flour with a gluten-free flour blend. Ensure that all other ingredients, such as the caramel and chocolate chips, are labeled gluten-free.
– Vegan Adaptations: To create a vegan version, use plant-based butter and replace the eggs with flaxseed meal mixed with water (1 tablespoon flaxseed meal + 2.5 tablespoons water per egg). Choose dairy-free chocolate chips and a vegan caramel sauce. These substitutions will allow everyone to enjoy the deliciousness of turtle bars without compromising dietary choices.
Nutritional Information
Understanding the nutritional profile of your turtle bars can help you enjoy them guilt-free. A standard serving (one bar) typically contains around 200-250 calories, depending on the specific ingredients used. They are rich in carbohydrates due to the sugars and flour, while the pecans add healthy fats and protein.
While these bars are a treat, consider balancing them with healthier meals throughout the day. The key to enjoying desserts like turtle bars is moderation, allowing you to indulge in their rich flavors while maintaining a balanced diet.
Conclusion
Decadent Turtle Bars are an irresistible dessert option, combining rich chocolate, crunchy pecans, sweet caramel, and chewy coconut into every bite. They are not only easy to make but can also be tailored to various tastes and dietary preferences, making them a versatile treat for everyone. The joy of sharing these homemade bars with loved ones is immeasurable, creating lasting memories and satisfying cravings. Whether you enjoy them on their own or paired with a warm drink and ice cream, these turtle bars are sure to delight and impress. So gather your ingredients, follow the steps, and prepare to indulge in this delicious dessert that is bound to become a favorite in your household!