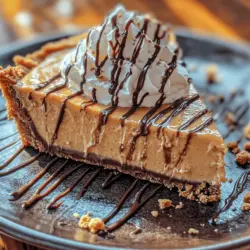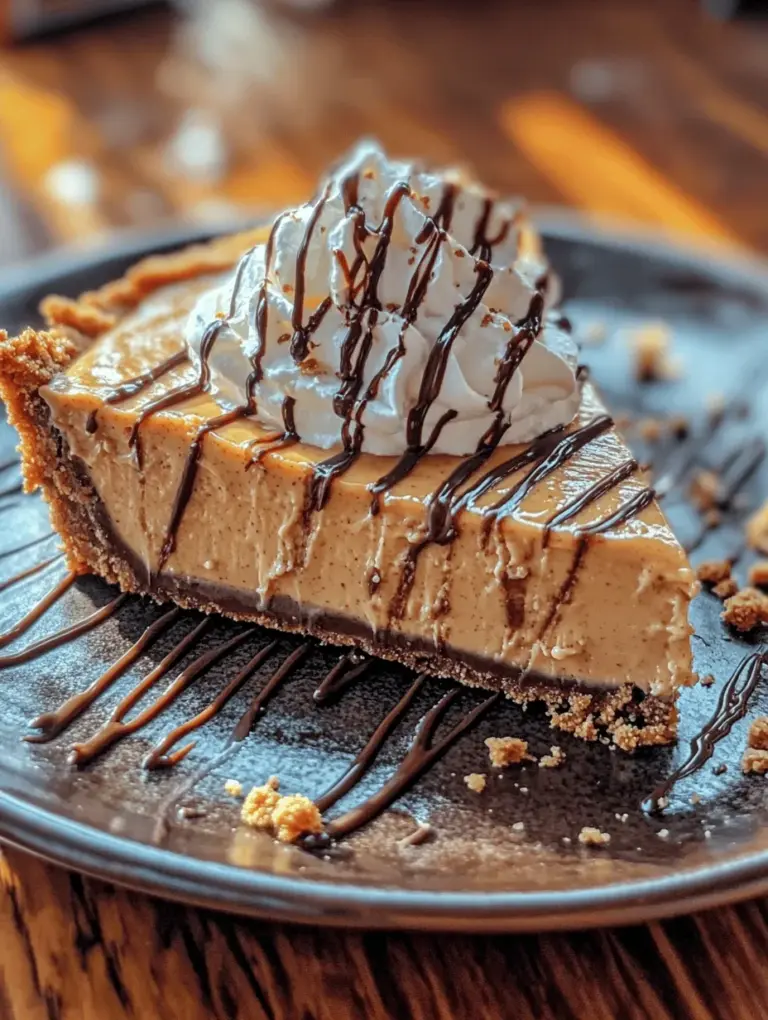
When it comes to desserts that evoke nostalgia and comfort, few can rival the allure of a decadent peanut butter pie. This delightful treat combines the rich, creamy flavors of peanut butter with the smooth decadence of chocolate, all enveloped within a buttery graham cracker crust. The result is a dessert that is not only indulgent but also visually stunning, making it perfect for a variety of occasions—from family gatherings and birthday celebrations to special holidays or simply treating yourself after a long day.
In this comprehensive article, we will explore the steps involved in creating this mouthwatering dessert. You will learn about the essential ingredients, their roles in achieving the pie’s signature taste and texture, and detailed instructions to guide you through the process. Whether you’re a seasoned baker or a novice in the kitchen, this peanut butter pie is sure to impress.
Understanding the Key Ingredients
To create the perfect decadent peanut butter pie, it’s essential to understand the role each ingredient plays in crafting this delightful dessert. Below, we will delve into the key components that come together to make this pie irresistible.
Graham Cracker Crust
The foundation of any great pie is its crust, and the graham cracker crust is a classic choice for this peanut butter pie.
– Importance of a Sturdy Crust: A well-prepared crust provides structure to the pie, ensuring that it holds its shape when sliced and served. The buttery flavor of the graham cracker crust complements the rich filling beautifully.
– Alternatives to Graham Cracker Crumbs: While graham crackers are traditional, you can also experiment with other bases like Oreo cookie crumbs for a chocolatey twist, or even crushed digestive biscuits for a slightly different flavor profile. These alternatives can add a unique touch to your pie while maintaining the same delightful characteristics.
Peanut Butter
Peanut butter is the star ingredient of this dessert, providing its signature flavor and creamy texture.
– Choosing the Right Type of Peanut Butter: For the best results, opt for creamy peanut butter rather than chunky, as it blends more smoothly with the other ingredients. Natural peanut butter, which contains only peanuts and salt, can also be used, but ensure it’s well-stirred to achieve a consistent texture.
– Health Benefits of Peanut Butter: Not only does peanut butter bring rich flavor to the pie, but it also offers health benefits. Packed with protein, healthy fats, and vitamins, peanut butter can be a nutritious addition to your dessert, making it a guilt-free indulgence in moderation.
Cream Cheese
Cream cheese adds a luscious creaminess to the filling, enhancing its overall texture and flavor.
– Role of Cream Cheese in the Filling: The creamy texture of cream cheese is crucial in achieving that smooth and velvety filling that melts in your mouth. It balances the richness of the peanut butter while providing a slight tanginess that elevates the flavor profile.
– Tips for Achieving the Perfect Texture: To ensure a smooth filling, always use room temperature cream cheese. This helps it blend seamlessly with the peanut butter, eliminating lumps and creating a uniform consistency.
Heavy Whipping Cream
Incorporating whipped cream into the filling is essential for achieving a light and airy texture.
– How Whipped Cream Enhances the Pie’s Lightness: The incorporation of whipped cream lightens the filling, making it more delicate and easier to enjoy. It adds a luxurious mouthfeel without overwhelming the palate.
– Differences Between Heavy Cream and Other Types of Cream: Heavy whipping cream contains a higher fat content than regular cream, which allows it to whip up beautifully and hold its shape. This is vital for creating a filling that is both rich and fluffy.
Chocolate Drizzle
A decadent peanut butter pie wouldn’t be complete without a delicious chocolate drizzle that adds both flavor and visual appeal.
– Types of Chocolate to Use for the Drizzle: You can use semi-sweet, dark, or even milk chocolate for the drizzle, depending on your taste preferences. Each type contributes a different level of sweetness and richness, allowing you to customize the dessert to your liking.
– The Impact of Chocolate on Flavor and Presentation: The chocolate drizzle not only enhances the flavor profile of the pie but also adds an elegant touch. A beautifully drizzled top creates an eye-catching presentation that is sure to impress your guests.
Step-by-Step Instructions for the Decadent Peanut Butter Pie
Now that we’ve covered the key ingredients, let’s dive into the step-by-step instructions for making your own decadent peanut butter pie. Follow these detailed directions to ensure your pie turns out perfectly every time.
Preparing the Graham Cracker Crust
The first step in creating your peanut butter pie is to prepare the graham cracker crust. Here’s what you’ll need and how to do it:
Ingredients and Tools Needed
– 1 ½ cups of graham cracker crumbs
– ½ cup of unsalted butter, melted
– ¼ cup of granulated sugar
– A 9-inch pie pan
– A mixing bowl
– A fork or pastry cutter
Detailed Instructions for Mixing and Baking
1. Preheat your oven to 350°F (175°C). This ensures the crust bakes properly for that perfect crunch.
2. In a mixing bowl, combine the graham cracker crumbs, granulated sugar, and melted butter. Mix until the crumbs are evenly coated and the mixture resembles wet sand.
3. Press the mixture firmly into the bottom and up the sides of the pie pan. Use the back of a measuring cup or your fingers to create an even layer. Ensure it’s packed tightly for a sturdy crust.
4. Bake the crust in the preheated oven for 8-10 minutes, or until it’s lightly golden brown. This step is crucial as it helps to set the crust and enhances its flavor.
5. Remove the crust from the oven and allow it to cool completely. Cooling the crust is essential, as it prevents the filling from melting or becoming too runny when added.
Creating the Peanut Butter Filling
With the graham cracker crust cooling, it’s time to prepare the luscious peanut butter filling that makes this pie truly decadent.
Mixing Techniques for a Smooth Consistency
1. In a large mixing bowl, beat the room temperature cream cheese with a hand mixer or stand mixer until smooth and creamy. This should take about 1-2 minutes.
2. Add in the creamy peanut butter and continue to beat until fully combined and no lumps remain. The mixture should be fluffy and well-blended.
3. Gradually incorporate powdered sugar into the mixture, adjusting for sweetness. Start with 1 cup and taste, adding more if desired. Mix until the sugar is fully incorporated and the filling is smooth.
4. In a separate bowl, whip the heavy cream until soft peaks form. This will take about 3-5 minutes using an electric mixer. Be careful not to over-whip, as this can lead to a grainy texture.
5. Gently fold the whipped cream into the peanut butter mixture, using a spatula to combine without deflating the cream. This step is key for achieving that light and airy filling.
6. Once combined, pour the filling into the cooled graham cracker crust, smoothing the top with a spatula.
7. Refrigerate the pie for at least 4 hours or overnight to allow it to set properly. This chilling step enhances the flavors and provides the pie with its ideal texture.
Now that you have a complete understanding of the ingredients and the initial steps to create your decadent peanut butter pie, you’re on your way to impressing friends and family with this delightful dessert. Stay tuned for the next part, where we’ll cover the finishing touches, including the chocolate drizzle and tips for serving.

Whipping the Cream
Whipping the cream is a crucial step in creating the fluffy texture that elevates your Decadent Peanut Butter Pie with Chocolate Drizzle. To achieve the perfect whipped cream, start with cold heavy cream. The colder the cream, the more volume it will achieve when whipped. Using a chilled mixing bowl and beaters can also enhance the effectiveness of the whipping process.
Techniques for Achieving Stiff Peaks
To whip your cream to stiff peaks, begin by pouring the cold heavy cream into your mixing bowl. Using an electric mixer on medium-high speed, whip the cream until it begins to thicken. Once it starts to form soft peaks—where the cream holds its shape but is still somewhat droopy—increase the speed to high. Continue whipping until you see stiff peaks form. This means that when you lift the beater out of the cream, the peaks hold their shape firmly without collapsing.
How to Fold Whipped Cream Without Deflating It
Folding whipped cream into your peanut butter mixture is essential for maintaining its airy texture. To do this, use a rubber spatula. First, take a small portion of the whipped cream and mix it into the peanut butter filling; this will lighten the filling and make it easier to incorporate the rest. Then, gently add the remaining whipped cream, and using a folding motion—scooping from the bottom and bringing it over the top—combine until no white streaks remain. Be careful not to overmix, as this can deflate the whipped cream and result in a denser filling.
Assembling the Pie
Once your peanut butter filling is ready, it’s time to assemble your pie. This step is where your pie will come to life, so pay attention to the layering techniques for a visually stunning dessert.
Layering Techniques for an Aesthetically Pleasing Pie
Begin with your cooled pie crust, whether it’s a pre-baked graham cracker crust or a homemade one. Pour the peanut butter filling into the crust and spread it evenly. To achieve a smooth top, use an offset spatula or the back of a spoon to level the surface. For an additional textural element, consider folding in some crushed peanuts or chocolate chips into the filling before pouring it into the crust.
Once the filling is evenly spread, top it with the remaining whipped cream. You can either spread the whipped cream flat or create beautiful peaks using the spatula. For an extra touch of elegance, use a piping bag fitted with a decorative tip to pipe the whipped cream around the edges of the pie.
Refrigeration Time and Its Significance for Texture
After assembling the pie, it’s crucial to let it chill in the refrigerator for at least 4 hours, or preferably overnight. This allows the filling to set properly, ensuring that each slice holds its shape beautifully when served. Additionally, the refrigeration helps the flavors meld together, enhancing the overall taste of the pie. Patience is key—resist the urge to skip this step for the best results.
Making the Chocolate Drizzle
The chocolate drizzle adds a rich finish to your peanut butter pie, complementing its flavors perfectly. Here’s how to prepare it.
Step-by-Step Guide to Melting Chocolate
To make the chocolate drizzle, start by choosing a high-quality chocolate—dark, semi-sweet, or even milk chocolate depending on your preference. Chop the chocolate into small, even pieces to ensure it melts uniformly. You can melt the chocolate using a double boiler method or in the microwave.
For the double boiler method, fill a pot with a couple of inches of water and bring it to a simmer. Place a heatproof bowl on top, making sure it doesn’t touch the water, and add the chopped chocolate to the bowl. Stir continuously until melted and smooth.
If using a microwave, place the chopped chocolate in a microwave-safe bowl and heat it in 30-second intervals, stirring in between until fully melted.
Importance of Letting the Drizzle Cool Before Application
Once your chocolate is melted, allow it to cool slightly before drizzling it over the pie. If the chocolate is too hot, it may melt the whipped cream on top, ruining your beautiful layers. Let it cool for about 5-10 minutes until it’s still pourable but not too hot. Use a spoon or a piping bag to drizzle the chocolate over the pie, creating a decorative pattern that enhances its visual appeal.
Serving Suggestions
Now that your pie is assembled and drizzled with chocolate, it’s time to serve it. Here are some best practices for slicing and serving your decadent dessert.
Best Practices for Slicing and Serving
For clean slices, use a sharp knife that has been dipped in warm water; wipe it dry before making each cut. This technique helps prevent the filling from sticking to the knife, resulting in neat, beautiful slices. Serve the pie chilled, and consider accompanying each slice with a dollop of additional whipped cream or a scoop of vanilla ice cream for an indulgent treat.
Creative Presentation Ideas for Special Occasions
Presentation can elevate your pie from simple to stunning. Consider garnishing the pie with additional chocolate shavings, crushed peanuts, or even a sprinkle of sea salt for a sophisticated touch. For special occasions, you might make mini versions in muffin tins or small jars, allowing for individual servings that are both cute and easy to handle.
Nutritional Information and Dietary Considerations
Understanding the nutritional content of your dessert can help you enjoy it in moderation, and it’s helpful for guests with dietary restrictions.
Caloric Breakdown of the Pie
While the exact caloric content can vary based on specific ingredients and portion sizes, a typical slice of this peanut butter pie (1/8 of the pie) contains approximately 350-450 calories. This includes calories from the crust, peanut butter filling, whipped cream, and chocolate drizzle.
Estimating the Nutritional Values Per Serving
For a more detailed breakdown, here’s an estimate of the nutritional values per serving:
– Calories: 400
– Total Fat: 28g
– Saturated Fat: 12g
– Carbohydrates: 35g
– Sugars: 20g
– Protein: 6g
Dietary Modifications
If you’re looking to adapt the recipe for specific dietary needs, here are some suggestions:
Suggestions for Gluten-Free or Vegan Alternatives
– Gluten-Free: Substitute the graham cracker crust with a gluten-free option made from ground nuts or gluten-free cookies.
– Vegan: Use coconut cream instead of heavy cream for the whipped topping and choose a plant-based cream cheese alternative for the filling. Ensure that the chocolate used is dairy-free as well.
How to Reduce Sugar Without Compromising Taste
To lower the sugar content, consider using natural sweeteners like maple syrup or agave syrup in place of granulated sugar. You could also reduce the amount of sweetener in the peanut butter filling without sacrificing flavor, as the chocolate drizzle adds sweetness too.
The Versatility of Peanut Butter Pie
This pie isn’t just a one-note dessert; it’s versatile and can adapt to various tastes and occasions.
Flavor Variations
Feel free to experiment with flavor variations. Adding ripe mashed bananas or chocolate chips can enhance the pie’s flavor profile. You can also incorporate seasonal variations, such as a hint of pumpkin spice in the filling during the fall months for a festive twist.
Occasion-Specific Adaptations
For gatherings, consider making mini-pies to serve as individual desserts. These can be assembled in muffin tins or small jars, making them easy to grab and enjoy. If you’re looking for a quicker alternative, try transforming this pie into a no-bake dessert by layering the filling in a glass dish and skipping the crust entirely.
Conclusion
The Decadent Peanut Butter Pie with Chocolate Drizzle is a timeless dessert that brings together rich flavors and textures in an easy-to-make recipe. Whether you’re a seasoned baker or a novice in the kitchen, this pie offers a delightful challenge and an impressive outcome. By following the detailed steps and understanding the key ingredients, you can create a dessert that is not only delicious but also a centerpiece for any occasion. Enjoy the process of making this pie, and savor the satisfaction that comes with each bite. With its versatility and potential for customization, this pie will surely become a favorite for years to come.