Introduction
There’s something truly magical about homemade ice cream. The joy of creating a cold, creamy treat from scratch not only fills your kitchen with delicious aromas but also evokes cherished memories of warm summer days and family gatherings. For those who have ever contemplated making their own ice cream, the thought of investing in an ice cream maker can often be a deterrent. However, with the no-churn method, this delightful dessert becomes accessible to everyone, regardless of culinary expertise or kitchen equipment.
No-churn ice cream is a revelation for home cooks, requiring minimal preparation and no special tools. It allows you to whip up velvety smooth ice cream in just a few simple steps, transforming your dining table into a dessert bar. This recipe, “Creamy Dreams: No-Churn Ice Cream Delight,” is an incredibly versatile base that can be customized with a variety of mix-ins and flavors, making it perfect for any occasion or palate. Whether you prefer classic vanilla, rich chocolate, or fruity concoctions, this no-churn recipe offers endless possibilities to satisfy your sweet tooth.
Understanding No-Churn Ice Cream
The no-churn concept is a game-changer for ice cream lovers, as it eliminates the need for a bulky ice cream machine. Traditional ice cream recipes often involve labor-intensive steps such as cooking a custard base, constantly churning the mixture, and carefully monitoring temperatures. In contrast, no-churn ice cream simplifies the process, allowing you to create creamy, frozen delights with minimal effort.
At its core, no-churn ice cream relies on a few key ingredients that work together to create a luscious texture without the need for churning. The secret lies in the harmonious blend of heavy whipping cream and sweetened condensed milk. The heavy cream provides the necessary fat content to create a rich and creamy base, while the sweetened condensed milk adds sweetness and a smooth consistency. This combination not only saves time but also ensures that you achieve the desired texture that rivals traditional ice cream.
For home cooks, the no-churn method is ideal for several reasons. First and foremost, it requires fewer ingredients and less time than traditional methods. Additionally, it allows for greater flexibility in flavoring and customizing your ice cream. Whether you want to add mix-ins like chocolate chips, fruit purees, or crushed cookies, the no-churn base is forgiving and adaptable, making it perfect for creative experimentation. Moreover, it’s a fantastic way to involve kids in the kitchen, as they can help choose flavors and mix-ins, fostering a love for cooking from an early age.
Key Ingredients for Creamy Dreams
Heavy Whipping Cream
The cornerstone of any good ice cream recipe is heavy whipping cream. With a fat content of around 36-40%, it provides the silky smooth texture that we associate with premium ice cream. The fat in heavy cream plays a crucial role in creating a rich mouthfeel and preventing the formation of ice crystals, which can lead to a gritty texture. When whipped, the cream introduces air into the mixture, resulting in a light and fluffy consistency that is essential for the perfect ice cream.
Sweetened Condensed Milk
Another vital ingredient in the no-churn ice cream recipe is sweetened condensed milk. This thick, syrupy milk is made by removing most of the water from regular milk and adding sugar, creating a creamy, sweet product that enhances the overall flavor of the ice cream. The sweetened condensed milk not only adds sweetness but also contributes to the smoothness and creaminess of the final product. Its high sugar content helps to prevent ice crystals from forming, ensuring that your ice cream remains soft and scoopable even after it has been frozen.
Vanilla Extract
While the base of the ice cream is delicious on its own, a splash of vanilla extract elevates the flavor profile significantly. Vanilla is a classic ice cream flavor that adds warmth and depth, making it a perfect complement to the rich creaminess of the heavy whipping cream and sweetened condensed milk. You can use pure vanilla extract for the best flavor, or experiment with other extracts like almond or peppermint for a unique twist.
Optional Mix-Ins
The beauty of the “Creamy Dreams” no-churn ice cream recipe lies in its versatility. Once you have mastered the basic base, the world of mix-ins opens up a realm of creativity. Here are some popular suggestions:
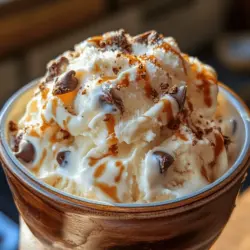
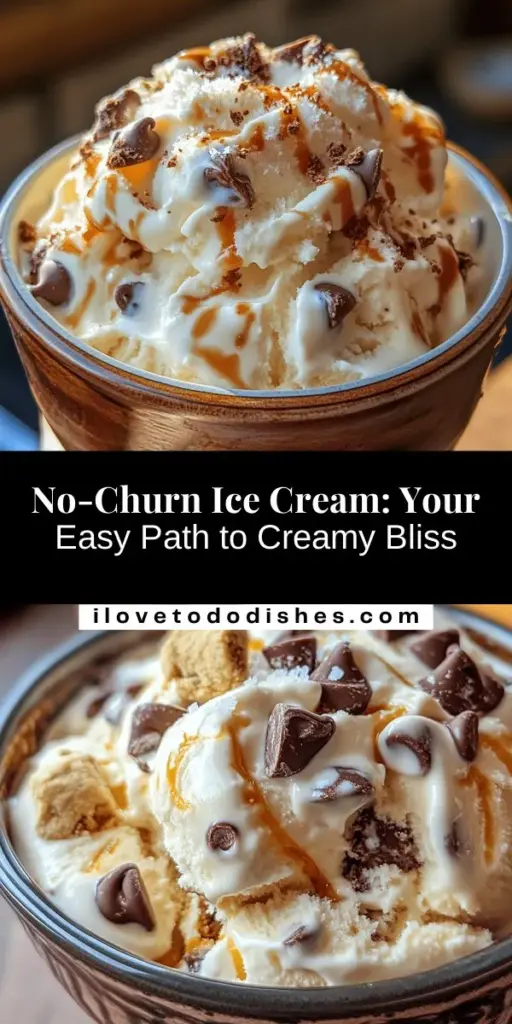
– Chocolate Chips: Add semi-sweet, dark, or even white chocolate chips for a delightful chocolatey crunch.
– Crushed Cookies: Incorporating crushed cookies like Oreos or graham crackers can add texture and a familiar taste.
– Fruit Purees: Fresh fruit purees or even store-bought sauces can infuse your ice cream with natural sweetness and vibrant flavors. Consider strawberry, mango, or raspberry for a refreshing summer treat.
– Nuts: Chopped nuts like pecans, almonds, or walnuts can provide a satisfying crunch and an additional flavor dimension.
Each of these mix-ins can be adjusted according to personal preferences, allowing you to create a completely customized ice cream experience.
The Significance of a Pinch of Salt
One essential ingredient that should never be overlooked is a pinch of salt. Salt plays a crucial role in balancing the sweetness of the ice cream, enhancing the overall flavor while also suppressing any bitterness from the cream. A small amount of salt can elevate your ice cream from good to great, making it a key component in achieving the perfect flavor balance.
Step-by-Step Instructions
Now that we’ve covered the essential ingredients and their roles in creating a delicious no-churn ice cream, it’s time to dive into the step-by-step instructions. Making your own creamy ice cream at home is easier than you think, and the following guide will walk you through the entire process seamlessly.
Step 1: Gather Your Ingredients
Before you start, ensure that you have all your ingredients on hand. For the basic no-churn ice cream, you will need:
– 2 cups heavy whipping cream
– 1 can (14 ounces) sweetened condensed milk
– 1 teaspoon pure vanilla extract
– A pinch of salt
– Optional mix-ins (chocolate chips, crushed cookies, fruit purees, or nuts)
Step 2: Whip the Heavy Cream
In a large mixing bowl, pour in the heavy whipping cream. Using an electric mixer or a whisk, beat the cream on medium-high speed until stiff peaks form. This process usually takes around 3-5 minutes with an electric mixer. Be careful not to over-whip the cream, as it can turn grainy and may start to separate.
Step 3: Combine the Ingredients
In a separate bowl, combine the sweetened condensed milk, vanilla extract, and a pinch of salt. Stir until well mixed. Once combined, gently fold the whipped cream into the sweetened condensed milk mixture. Use a spatula to carefully incorporate the two mixtures without deflating the whipped cream to maintain the airy texture.
Step 4: Add Optional Mix-Ins
If you are incorporating mix-ins into your ice cream, now is the time to add them. Gently fold in your desired mix-ins, ensuring they are evenly distributed throughout the ice cream base.
Step 5: Freeze the Mixture
Transfer the ice cream mixture into an airtight container, smoothing the top with a spatula. Seal the container tightly and place it in the freezer. Allow the ice cream to freeze for at least 4-6 hours, or until it becomes firm and scoopable.
Step 6: Serve and Enjoy
Once the ice cream has fully set, it’s ready to be served! Scoop out generous portions into bowls or cones, and enjoy your homemade creamy dreams. For an extra touch, consider garnishing with additional mix-ins or a drizzle of chocolate sauce.
With these simple steps, you can create a delightful no-churn ice cream that will impress your family and friends. The versatility of this recipe means that you can experiment with flavors and ingredients, making it a staple in your dessert repertoire.
As you embark on this ice cream-making adventure, remember to have fun and let your creativity shine through. Whether you stick to the classic vanilla base or explore exciting flavor combinations, your homemade no-churn ice cream is sure to become a favorite treat that brings joy to any occasion.
Creamy Dreams: No-Churn Ice Cream Delight
Detailed Breakdown of Each Step in the Recipe
Creating a luscious batch of no-churn ice cream is both an art and a science. Follow these detailed steps to ensure your ice cream turns out creamy and delightful.
1. Whipping the Cream: Start by pouring chilled heavy whipping cream into a large mixing bowl. Using an electric mixer, whip the cream on medium speed until it begins to thicken. Gradually increase the speed to high and continue whipping until stiff peaks form. This is crucial as stiff peaks indicate that the cream has been aerated enough to hold its shape, contributing to the airy texture of your ice cream. The whipped cream should be thick enough to hold a peak when you lift the beaters.
2. Creating the Base: In a separate bowl, combine sweetened condensed milk with any flavor extracts you’re using, such as vanilla or almond. Stir the mixture gently until combined. The sweetness of the condensed milk balances the richness of the whipped cream, creating a delightful base for your ice cream.
3. Folding Ingredients: This step is vital to maintaining the light texture of the whipped cream. Begin by adding a small dollop of the whipped cream to the condensed milk mixture. Use a spatula to fold it in gently. This technique helps lighten the condensed milk mix, making it easier to incorporate the rest of the whipped cream without deflating it.
Continue to add the whipped cream in increments, folding gently using a figure-eight motion. Be careful not to stir vigorously, as this can deflate the whipped cream and lead to a dense ice cream texture. The goal is to maintain the airiness achieved during whipping.
4. Incorporating Mix-Ins: If you’re adding mix-ins like chocolate chips, chopped fruits, or nuts, now is the time to fold them into your mixture. Sprinkle them evenly over the whipped cream base and use the same gentle folding technique to ensure an even distribution without losing the volume of the whipped cream.
Freezing and Serving Your Ice Cream
Once your mixture is ready, it’s time to freeze it for a perfectly creamy texture.
1. Freezing Best Practices: Transfer the ice cream mixture into a freezer-safe container. Use a spatula to spread it evenly, smoothing the top. To prevent ice crystals from forming, press plastic wrap directly onto the surface of the ice cream before sealing the container with a lid.
2. Optimal Freezing Time: For the best results, freeze your no-churn ice cream for at least 6 hours or overnight. This ensures that the mixture sets completely and develops a rich, creamy texture. If you try to scoop it too soon, it may not have the desired firmness.
3. Softening Before Scooping: When you’re ready to serve, allow the ice cream to sit at room temperature for about 5-10 minutes. This softening period makes scooping easier and ensures you can form perfect balls for serving. If the ice cream is too hard, you may risk damaging the scoop or creating uneven portions.
Flavor Variations and Customizations
One of the joys of making no-churn ice cream is the endless possibilities for flavor variations. Here are some ideas to inspire your next batch:
1. Creative Variations for the Base Recipe: While vanilla is a classic base, consider adding other flavor extracts such as coconut, hazelnut, or even a splash of your favorite liqueur for an adult twist.
2. Seasonal Flavors: Embrace the seasons by crafting unique flavors like pumpkin spice in the fall or peppermint during the winter holidays. Simply incorporate spices or purees into the condensed milk base to achieve these delightful tastes.
3. Unique Mix-Ins: Elevate your ice cream by adding gourmet touches. Swirl in homemade caramel or fudge sauce, or mix in crushed cookies or brownie bits. For a coffee-infused treat, fold in instant coffee granules or brewed espresso for a mocha flavor.
4. Dietary Considerations: If you have dietary restrictions, don’t worry! You can substitute ingredients to create a dairy-free or low-sugar version. Use coconut cream instead of heavy whipping cream and opt for a sugar alternative in place of sweetened condensed milk.
The Joy of Homemade Ice Cream
Creating ice cream from scratch is not just a culinary endeavor; it’s a rewarding experience that brings joy and satisfaction.
1. Satisfaction of Homemade Treats: There’s something incredibly gratifying about making ice cream at home. You have complete control over the ingredients, flavors, and even the sweetness level, allowing you to tailor your treat to your personal preferences.
2. Sharing with Loved Ones: Homemade ice cream is perfect for sharing. Whether it’s a hot summer day or a special occasion, serving a scoop of your creation to family and friends creates a sense of community and warmth. It’s a delightful way to celebrate togetherness.
3. Presentation Ideas: When serving your ice cream, consider creative presentation options. Use waffle cones, decorative bowls, or even mason jars for a rustic touch. Sprinkling toppings like sprinkles, crushed nuts, or chocolate shavings on top can elevate the visual appeal and make each serving feel special.
Conclusion
Making no-churn ice cream at home is not only simple but a delightful journey into the world of frozen treats. The joy of whipping up a creamy base, experimenting with flavors, and sharing your final creation with loved ones is unmatched.
As you embark on this delicious adventure, don’t hesitate to experiment with various flavors and mix-ins to personalize your ice cream. Whether you stick to classic vanilla or venture into seasonal specialties, every scoop represents a moment of creativity and enjoyment.
So gather your ingredients, unleash your imagination, and indulge in the delightful experience of enjoying a scoop of creamy dreams!