Introduction
As the holiday season approaches, the aroma of freshly baked cookies fills the air, bringing with it a sense of warmth and nostalgia. Holiday cookies are a beloved tradition, with their vibrant flavors and comforting textures becoming synonymous with celebrations, family gatherings, and the joy of giving. Among the myriad of seasonal treats, Chocolate Dipped Peppermint Cookies stand out as a festive favorite that captures the essence of the season.
These delightful cookies are not just any ordinary baked goods; they are a harmonious blend of rich chocolate, refreshing peppermint, and buttery goodness. The juxtaposition of the smooth chocolate coating with the crisp, mint-infused cookie creates a symphony of flavors that is both indulgent and refreshing. Whether you are hosting a holiday party, looking for the perfect gift to share with friends and family, or simply indulging in a sweet treat for yourself, these cookies are sure to impress.
The appeal of Chocolate Dipped Peppermint Cookies lies not only in their taste but also in their versatility. They can be elegantly arranged on a platter for festive gatherings, packaged beautifully as gifts, or enjoyed with a cup of hot cocoa while cozying up by the fireplace. With their vibrant colors and decadent flavors, these cookies are a delightful addition to any holiday celebration.
Understanding the Ingredients
To craft the perfect Chocolate Dipped Peppermint Cookies, it’s essential to understand the key ingredients that contribute to their delightful taste and texture. Each component plays a critical role in creating the ultimate cookie experience.
Flour, Butter, and Sugars
The foundation of any cookie recipe begins with flour, butter, and sugars. All-purpose flour provides the structure needed for the cookies to hold their shape, while butter adds richness and moisture, resulting in a tender crumb. The types of sugars used also significantly influence the texture and flavor of the cookies. Granulated sugar contributes to the crispness of the cookie, while brown sugar adds a touch of chewiness and a deeper, caramel-like flavor. This combination of sugars creates a well-balanced sweetness that complements the other flavors in the cookie.
Peppermint Extract and Crushed Candies
No peppermint cookie would be complete without the signature flavor of peppermint. The addition of peppermint extract enhances the overall taste profile, infusing each bite with a refreshing minty essence. For an extra burst of flavor, crushed peppermint candies are often sprinkled on top of the cookies before they are dipped in chocolate. This not only adds a festive touch but also a delightful crunch that contrasts beautifully with the smooth chocolate coating.
Semisweet Chocolate for Dipping
The final touch that elevates these cookies to a new level is the semisweet chocolate used for dipping. Semisweet chocolate strikes the perfect balance between sweetness and richness, making it an ideal choice for coating the cookies. When melted and dipped, the chocolate forms a luscious layer that not only enhances the flavor but also adds a glossy finish, making the cookies visually appealing. The combination of chocolate and peppermint is a classic pairing that evokes the spirit of the holidays.
Step-by-Step Preparation Guide
Creating the perfect Chocolate Dipped Peppermint Cookies requires careful preparation and attention to detail. Below is a comprehensive guide to ensure your baking experience is smooth and enjoyable.
Prepping the Kitchen: Essential Tools and Equipment
Before diving into the recipe, it’s important to gather all the necessary tools and equipment to streamline the process. Here’s what you’ll need:
– Baking sheets: Ensure you have at least two sheets to accommodate all the cookies.
– Parchment paper: Line the baking sheets with parchment paper for easy cookie removal and cleanup.
– Mixing bowls: Have separate bowls for dry and wet ingredients for efficient mixing.
– Electric mixer: A stand mixer or handheld mixer will make the creaming process easier.
– Measuring cups and spoons: Accurate measurements are crucial for cookie success.
– Rubber spatula: Perfect for scraping down the sides of the bowl and folding ingredients together.
– Cooling rack: Allow the cookies to cool properly after baking.
Importance of Measuring Ingredients Accurately
Baking is a science, and precise measurements are essential for achieving the desired texture and flavor of your cookies. Use the spoon-and-level method to measure flour: spoon the flour into your measuring cup and level it off with a straight edge. This prevents packing the flour, which can lead to dense cookies. Similarly, ensure that both granulated and brown sugars are measured correctly to maintain the right balance of sweetness and moisture.
Detailed Instructions for Each Step in the Recipe
Step 1: Preheat the Oven and Prepare the Baking Sheets
Begin by preheating your oven to 350°F (175°C). This ensures that your cookies bake evenly and achieve the perfect texture. While the oven is heating, prepare your baking sheets by lining them with parchment paper. This will prevent the cookies from sticking and make for easy cleanup.
Step 2: Mixing Dry Ingredients
In a medium-sized mixing bowl, combine the all-purpose flour, baking soda, and salt. The baking soda is a leavening agent that helps the cookies rise and become fluffy, while salt enhances the overall flavor. Whisk these dry ingredients together until they are well combined, ensuring that there are no lumps. This step is crucial as it helps distribute the baking soda and salt evenly throughout the flour, contributing to a consistent texture in the finished cookies.
Step 3: Creaming Butter and Sugars
In a large mixing bowl, use an electric mixer to cream together the softened butter, granulated sugar, and brown sugar. Beat the mixture on medium speed until it becomes light and fluffy, which should take about 2-3 minutes. This process incorporates air into the batter, resulting in a tender cookie. It’s important to scrape down the sides of the bowl periodically to ensure that all ingredients are thoroughly mixed.
Step 4: Incorporating Eggs and Extracts
Once the butter and sugars are well creamed, add in one large egg and the peppermint extract. Beat the mixture until the egg is fully incorporated, then add the second egg. Continue mixing until the batter is smooth. The eggs provide moisture and richness, while the peppermint extract infuses the dough with its signature flavor. For an extra touch of minty goodness, consider using a splash of vanilla extract as well.
Step 5: Combining Mixtures
Gradually add the dry ingredients to the wet mixture, mixing on low speed until just combined. Avoid overmixing at this stage; overmixing can lead to tough cookies. The goal is to combine the mixtures until there are no visible streaks of flour. Once combined, gently fold in the crushed peppermint candies, allowing them to distribute evenly throughout the dough.
With these detailed steps, you’re well on your way to creating delectable Chocolate Dipped Peppermint Cookies that will delight your friends and family this holiday season. Gather your ingredients and prepare your kitchen, as the festive baking adventure is about to begin!

Folding in Peppermint: Techniques for Even Distribution
Once your cookie dough is mixed to perfection, it’s time to add the star ingredient: peppermint. To fold in peppermint, whether you’re using peppermint extract or crushed peppermint candies, it’s essential to do so gently to maintain the dough’s structure. Start by adding your peppermint extract or crushed candies to the center of your dough. With a spatula or wooden spoon, use a folding motion, lifting the dough from the bottom and turning it over. Repeat this process until the peppermint is evenly distributed throughout the mixture. This technique minimizes the risk of overmixing, which could lead to tougher cookies.
Shaping and Spacing Cookies on the Baking Sheet
Shaping your cookies is a key step that influences both their appearance and texture. Using a cookie scoop or two tablespoons, portion out the dough and roll it into balls. Aim for uniform sizes to ensure even baking. Place the cookie dough balls onto a parchment-lined baking sheet, leaving enough space (about 2 inches) between each cookie. This spacing is crucial as the cookies will spread during baking, and adequate room prevents them from merging into one another.
Baking the Cookies
Optimal Baking Time and Temperature for Achieving the Perfect Cookie
For Chocolate Dipped Peppermint Cookies, preheat your oven to 350°F (175°C). This temperature is ideal for achieving a slightly crisp outside while maintaining a chewy center. Bake the cookies for about 10-12 minutes. The exact time may vary depending on your oven and cookie size, so keep a close eye on them.
Recognizing When Cookies Are Done: Visual Cues for Readiness
Visual cues are your best friends when determining if your cookies are done. Look for a slight golden edge and a soft, puffy center. The cookies will continue to firm up as they cool on the baking sheet, so don’t be tempted to leave them in the oven too long. They should not appear overly brown; a light golden hue indicates the perfect texture.
Cooling Cookies: Why It’s Essential Before the Chocolate Dipping Process
Once the cookies are out of the oven, it’s vital to let them cool on the baking sheet for about 5 minutes before transferring them to a wire rack. Cooling is essential because it allows the cookies to set properly. Attempting to dip warm cookies in chocolate can lead to a messy outcome, as the chocolate may melt or slide off. Proper cooling ensures that the cookies maintain their shape and structure while also allowing the chocolate to adhere better.
Chocolate Dipping Process
Preparing the Chocolate: Best Practices for Melting Chocolate Chips
While the cookies cool, you can prepare the chocolate for dipping. Use high-quality chocolate chips—semi-sweet or dark chocolate works best for a rich flavor. Place the chocolate chips in a microwave-safe bowl and heat in 30-second intervals, stirring in between, until smooth and fully melted. Alternatively, you can use a double boiler to melt the chocolate gently. Make sure not to overheat the chocolate, as it can become grainy and lose its glossy finish.
Techniques for Dipping Cookies: Ensuring an Even Chocolate Coating
Once your chocolate is melted and smooth, it’s time for the fun part: dipping! Hold a cookie by its edges and dip it halfway into the melted chocolate. Gently shake the cookie to allow any excess chocolate to drip off, ensuring you achieve a nice even coating. For a more decorative touch, you can use a fork to dip and then tap it lightly on the side of the bowl to remove excess chocolate.
Importance of Letting Excess Chocolate Drip Off Properly for Presentation
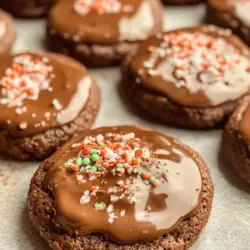
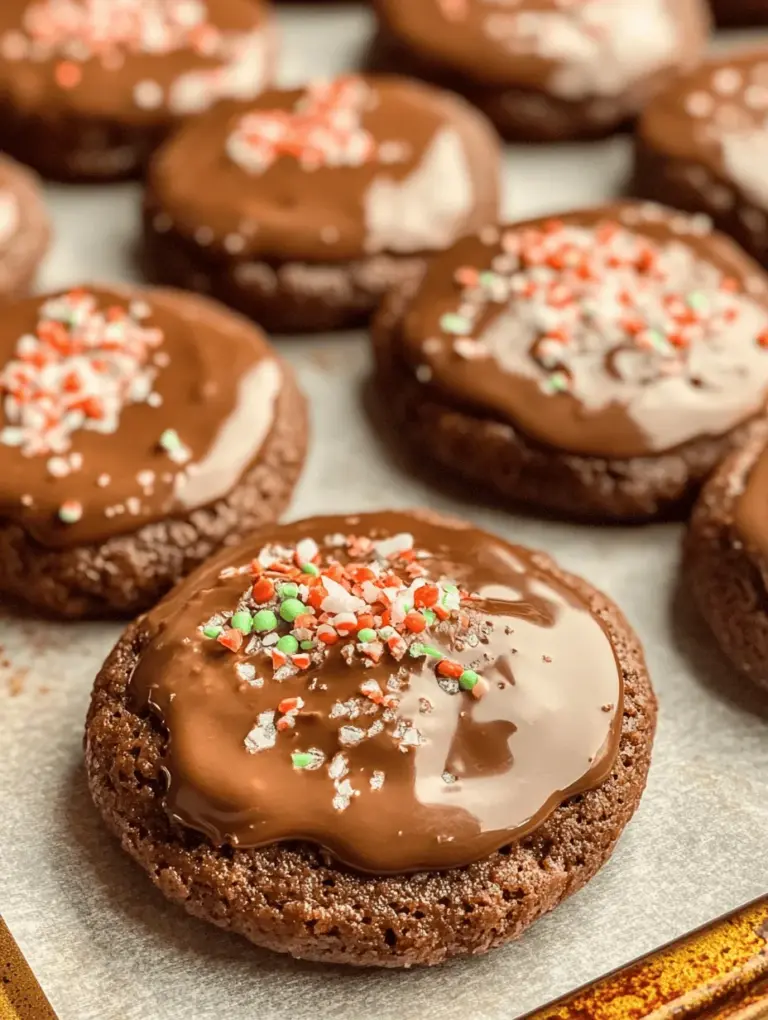
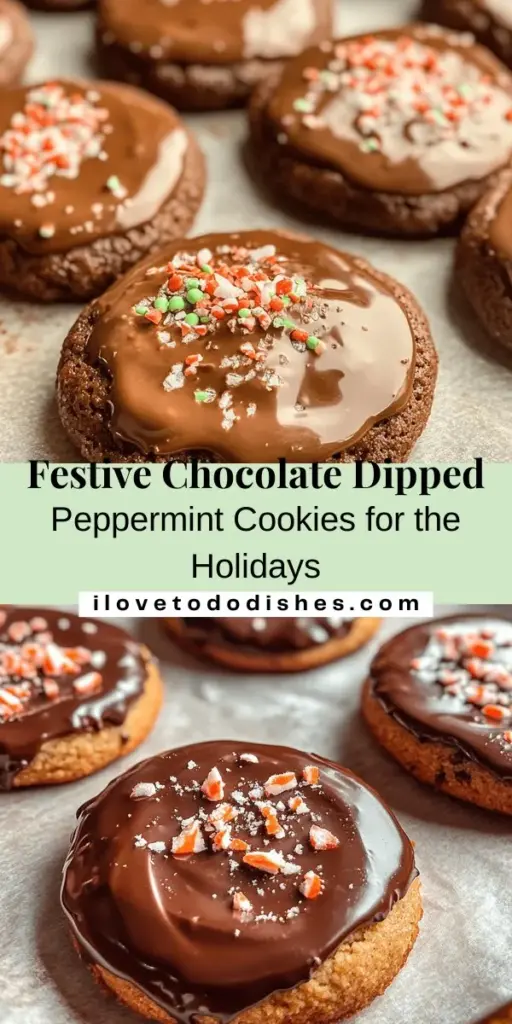
Allowing excess chocolate to drip off is crucial for both aesthetics and taste. If too much chocolate remains on the cookie, it can lead to a messy appearance and overpower the peppermint flavor. After dipping, place the cookie on a parchment-lined tray to cool and set. The chocolate will harden as it cools, creating a beautiful, glossy finish.
Garnishing the Cookies
How to Effectively Garnish with Crushed Peppermint for Visual Appeal and Added Flavor
To enhance both the look and flavor of your Chocolate Dipped Peppermint Cookies, consider garnishing them with crushed peppermint. After dipping the cookies in chocolate, immediately sprinkle crushed peppermint candies on top while the chocolate is still wet. This not only adds a festive touch but also provides an enjoyable crunch with each bite. For a cleaner appearance, use a fine sieve to dust the crushed peppermint over the cookies.
Discussing the Option of Additional Toppings or Variations (If Applicable)
If you want to get creative, there are various toppings you can add to these cookies. For instance, a drizzle of white chocolate can create a beautiful contrast against the dark chocolate, or you can sprinkle some sea salt for a sweet-and-salty twist. Don’t hesitate to experiment with flavors; adding a hint of orange zest or chopped nuts can elevate the taste profile of your cookies.
Storing and Enjoying Your Cookies
Best Practices for Storing Chocolate Dipped Peppermint Cookies to Maintain Freshness
To keep your Chocolate Dipped Peppermint Cookies fresh, store them in an airtight container at room temperature. They can last up to one week if stored properly. If you need to store them for a longer period, consider freezing them. Place the cookies in a single layer on a baking sheet and freeze until solid. Then, transfer them to a freezer-safe container, separating layers with parchment paper to prevent sticking. They can last up to three months in the freezer.
Suggestions for Serving: Ideal Occasions and Pairings with Beverages
These cookies are perfect for a variety of occasions, from holiday parties to cozy family gatherings. They pair wonderfully with hot beverages such as peppermint tea, hot chocolate, or even a glass of cold milk. For a festive touch, consider serving them on a decorative platter with a sprinkling of additional crushed peppermint for presentation.
Exploring Variations or Adaptations for Dietary Preferences (Gluten-Free, Dairy-Free)
If you or your guests have dietary restrictions, these cookies can be easily adapted. To make them gluten-free, simply substitute regular flour with a gluten-free flour blend. For a dairy-free option, use dairy-free chocolate chips and a vegan butter substitute. These adjustments ensure that everyone can enjoy the delightful taste of Chocolate Dipped Peppermint Cookies.
Conclusion
In conclusion, making Chocolate Dipped Peppermint Cookies is a delightful experience that brings the joy of baking right into your kitchen. Each step, from folding in the peppermint to the final chocolate dip, contributes to a cookie that is not only visually stunning but also bursting with festive flavors. Sharing these cookies with friends and family during the holiday season creates lasting memories and spreads holiday cheer.
We encourage you to try this recipe and savor the rich chocolate combined with the refreshing taste of peppermint. Your guests will be delighted, and you’ll find that these cookies quickly become a favorite in your holiday baking repertoire. So, gather your ingredients, roll up your sleeves, and enjoy the wonderful process of baking these delectable treats!