
Introduction
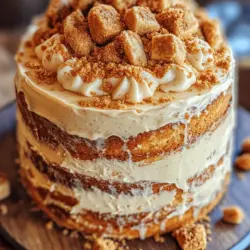
Welcome to the world of Biscoff Bliss Cake, a dessert that captivates the senses and elevates any occasion. This tantalizing cake combines the rich, caramelized flavor of Biscoff spread with the moist texture of a perfectly baked cake, making it a must-try for dessert lovers everywhere. Whether you’re celebrating a birthday, hosting a dinner party, or simply indulging in a sweet treat for yourself, this cake is versatile and appealing enough to fit any gathering.
The rising popularity of Biscoff spread in the baking world has transformed countless recipes, and the Biscoff Bliss Cake is no exception. Originally a cookie brand that has gained fame worldwide, Biscoff has become a staple in kitchens, thanks to its unique flavor that adds depth and richness to various desserts. As home bakers experiment with this delightful spread, they discover not just a new favorite ingredient but also a way to impress family and friends with their culinary creations.
In this article, we will explore the enchanting world of Biscoff and guide you through making your very own Biscoff Bliss Cake. With its enchanting aroma and irresistible taste, it’s no wonder this cake has become a cherished recipe for many. Get ready to dive into the flavorful experience that is sure to leave your guests asking for seconds!
The Allure of Biscoff
To truly appreciate the Biscoff Bliss Cake, we must first understand the star of the show: Biscoff cookies and spread. Biscoff cookies, also known as speculoos, have a rich history that dates back to their creation in the early 1900s in Belgium. Made from a blend of flour, sugar, and a unique mix of spices, these cookies are baked to perfection, resulting in a crunchy texture and a distinct flavor profile that combines caramel and warm spices.
The Biscoff spread, introduced in the early 2000s, takes the beloved cookie experience to new heights. Created by grinding Biscoff cookies into a smooth, creamy paste, it retains the delightful flavors of caramel and spice while adding a luscious texture that makes it perfect for baking. With its unique flavor, Biscoff spread has quickly become a game-changer in the world of desserts, allowing bakers to infuse their recipes with its decadent essence.
What makes Biscoff spread particularly appealing is its versatility. It can be used in various ways, from slathering on toast to swirling into ice cream, but it’s in baking where it truly shines. When incorporated into cakes, cookies, and pastries, Biscoff spread adds moisture, richness, and a depth of flavor that is hard to resist. The addition of crushed Biscoff cookies not only enhances the texture but also creates visual appeal, making every bite a delightful experience.
Ingredients Breakdown
Now that we’ve established the allure of Biscoff, let’s dive into the essential ingredients that will help you create the perfect Biscoff Bliss Cake. Each ingredient plays a crucial role in the cake’s flavor, texture, and overall success.
– All-Purpose Flour: The backbone of the cake, all-purpose flour provides the necessary structure. It creates a balanced texture that is neither too dense nor too light, ensuring the cake holds up well.
– Granulated Sugar: This ingredient is responsible for the sweetness and moisture in the cake. It helps to create a tender crumb, enhancing the overall flavor profile.
– Unsalted Butter: Butter adds richness and depth of flavor to the cake. Using unsalted butter allows you to control the saltiness of the final product, which is crucial for achieving the perfect balance of flavors.
– Biscoff Spread: The star ingredient! Biscoff spread infuses the cake with its signature caramel and spice flavors, ensuring that every bite is filled with indulgence. It also contributes to the moisture, making the cake incredibly soft and tender.
– Eggs: Eggs act as binding agents in the recipe. They provide structure and stability while also adding moisture, contributing to the cake’s overall richness.
– Buttermilk: Buttermilk is a key ingredient for achieving tenderness in baked goods. It reacts with the baking soda to create a light and fluffy texture, while also adding a slight tang that complements the sweetness of the cake.
– Baking Powder and Baking Soda: These leavening agents work together to provide rise and fluffiness to the cake. They create air pockets that help the cake achieve a light texture.
– Salt: A small amount of salt enhances the flavor of the cake, balancing the sweetness and bringing out the richness of the other ingredients.
– Vanilla Extract: Vanilla extract adds depth and complexity to the flavor profile of the cake. It complements the Biscoff spread beautifully and elevates the overall taste.
– Crushed Biscoff Cookies: These cookies add texture and visual appeal to the cake. The crunchy bits throughout the soft cake create a delightful contrast that enhances the eating experience.
– Optional Frosting: To take your Biscoff Bliss Cake to the next level, consider adding a frosting. Whether it’s a cream cheese frosting or a simple buttercream infused with Biscoff spread, it enhances both the presentation and taste, offering an extra layer of indulgence.
With these ingredients in hand, you’re ready to create a Biscoff Bliss Cake that will wow your family and friends. The combination of flavors and textures will have everyone coming back for more, and the best part is that it’s simple to make!
Step-by-Step Instructions
Now that we’ve covered the ingredients, let’s move on to the step-by-step instructions for baking your Biscoff Bliss Cake. Follow these detailed guidelines to ensure your cake turns out perfectly every time:
Step 1: Preheat Your Oven
Start by preheating your oven to 350°F (175°C). This ensures that the cake bakes evenly, allowing for the best texture and rise.
Step 2: Prepare Your Cake Pans
Grease and flour two 9-inch round cake pans. Alternatively, you can line the bottoms with parchment paper for easy removal after baking. This step is crucial to prevent the cake from sticking and to ensure a smooth release.
Step 3: Mix the Dry Ingredients
In a medium bowl, whisk together the all-purpose flour, baking powder, baking soda, and salt. This step helps to evenly distribute the leavening agents and ensures a uniform texture in your cake.
Step 4: Cream Butter and Sugar
In a large mixing bowl, use an electric mixer to cream the unsalted butter and granulated sugar together until the mixture is light and fluffy. This process typically takes about 3-5 minutes. The aeration from this step is essential for a light cake.
Step 5: Add Biscoff Spread
Once the butter and sugar are well combined, add the Biscoff spread to the mixture. Beat until fully incorporated and smooth, ensuring that the spread is evenly distributed throughout the batter.
Step 6: Incorporate the Eggs
Add the eggs one at a time, mixing well after each addition. This will help to create a cohesive batter. Ensure that the eggs are at room temperature for optimal mixing.
Step 7: Combine the Wet Ingredients
In a separate bowl, combine the buttermilk and vanilla extract. Gradually add this mixture to the butter mixture, alternating with the dry ingredients. Begin and end with the dry ingredients, mixing just until combined to avoid overworking the batter.
Step 8: Fold in Crushed Biscoff Cookies
Gently fold in the crushed Biscoff cookies, ensuring they are evenly distributed throughout the batter. This will add delightful texture and flavor to your cake.
Step 9: Divide and Pour the Batter
Divide the batter evenly between the prepared cake pans. Use a spatula to smooth the tops, ensuring even baking.
Step 10: Bake the Cakes
Place the pans in the preheated oven and bake for 25-30 minutes, or until a toothpick inserted into the center comes out clean. Keep an eye on the cakes towards the end of the baking time to prevent over-baking.
Step 11: Cool the Cakes
Once baked, remove the cakes from the oven and let them cool in the pans for 10 minutes. Then, carefully transfer them to a wire rack to cool completely. This step is essential for maintaining the moisture in the cakes.
By following these detailed steps, you are well on your way to creating a delicious Biscoff Bliss Cake that will be the star of any dessert table. The combination of the Biscoff spread and the rich, tender cake will leave a lasting impression on anyone who has the pleasure of tasting it. Stay tuned for the upcoming sections, where we will explore tips for achieving the best results and answer some common questions about this delightful cake!
Preheat the Oven
Before embarking on your baking journey, preheating the oven is an essential step that should never be overlooked. The temperature control in baking directly influences the texture and rise of your cake. For the Biscoff Bliss Cake, preheat your oven to 350°F (175°C). This consistent heat will allow your cake to rise evenly, creating a fluffy texture that is crucial for a successful bake. Skipping this step can lead to undercooked centers or overly dense cakes. Take this time to prepare your cake pans, ensuring they’re either greased or lined with parchment paper to prevent sticking.
Prepare the Batter
The foundation of any great cake is its batter, and the creaming method is a crucial technique that sets the stage for a light and airy Biscoff Bliss Cake. Start by placing softened unsalted butter and granulated sugar in a large mixing bowl. Using an electric mixer, beat the two together on medium speed until the mixture is light and fluffy, which usually takes about 3-5 minutes. This process incorporates air into the batter, which is essential for achieving that desired lift during baking.
Incorporate Eggs and Vanilla
Next, it’s time to add the eggs and vanilla extract. It’s vital to add the eggs one at a time, mixing thoroughly after each addition. This step allows the eggs to emulsify properly into the batter, ensuring a uniform texture throughout the cake. After the eggs, add the vanilla extract, which will enhance the flavor profile of your cake. The combination of these ingredients will create a rich and flavorful base, integral to the overall taste of your Biscoff Bliss Cake.
Combine Dry Ingredients
The next step is to combine the dry ingredients. In a separate bowl, whisk together all-purpose flour, baking powder, and a pinch of salt. Whisking these dry ingredients separately is crucial as it helps to evenly distribute the leavening agents and salt throughout the flour. This step prevents any lumps from forming in your batter and ensures that your cake will rise evenly. Once combined, gradually add the dry mixture to the wet ingredients, mixing gently until just incorporated. Be careful not to overmix, as this can lead to a dense cake.
Add Texture
What truly sets the Biscoff Bliss Cake apart is the addition of crushed Biscoff cookies. These cookies not only add a delightful crunch but also infuse the cake with that signature caramelized flavor. Gently fold in the crushed cookies into the batter, ensuring an even distribution without overworking the mixture. This will provide a beautiful texture contrast when you take a bite, enhancing the overall experience of your cake.
Bake the Cakes
Once your batter is ready, it’s time to bake. Divide the batter evenly between your prepared cake pans. Bake in your preheated oven for approximately 25-30 minutes. To check for doneness, insert a toothpick into the center of the cakes; if it comes out clean or with a few crumbs attached, your cakes are ready. Another sign is the golden-brown edges and a slight spring back when you gently press the surface of the cake.
Cool the Cakes
Cooling the cakes properly is just as important as the baking itself. Allow the cakes to sit in the pans for about 10 minutes before transferring them to a wire rack. Cooling them in the pans helps them set, while moving them to a wire rack allows air to circulate around the cakes, preventing sogginess. Make sure to cool the cakes completely before frosting. Frosting warm cakes can lead to melting and a messy presentation, so patience is key here.
Prepare the Frosting
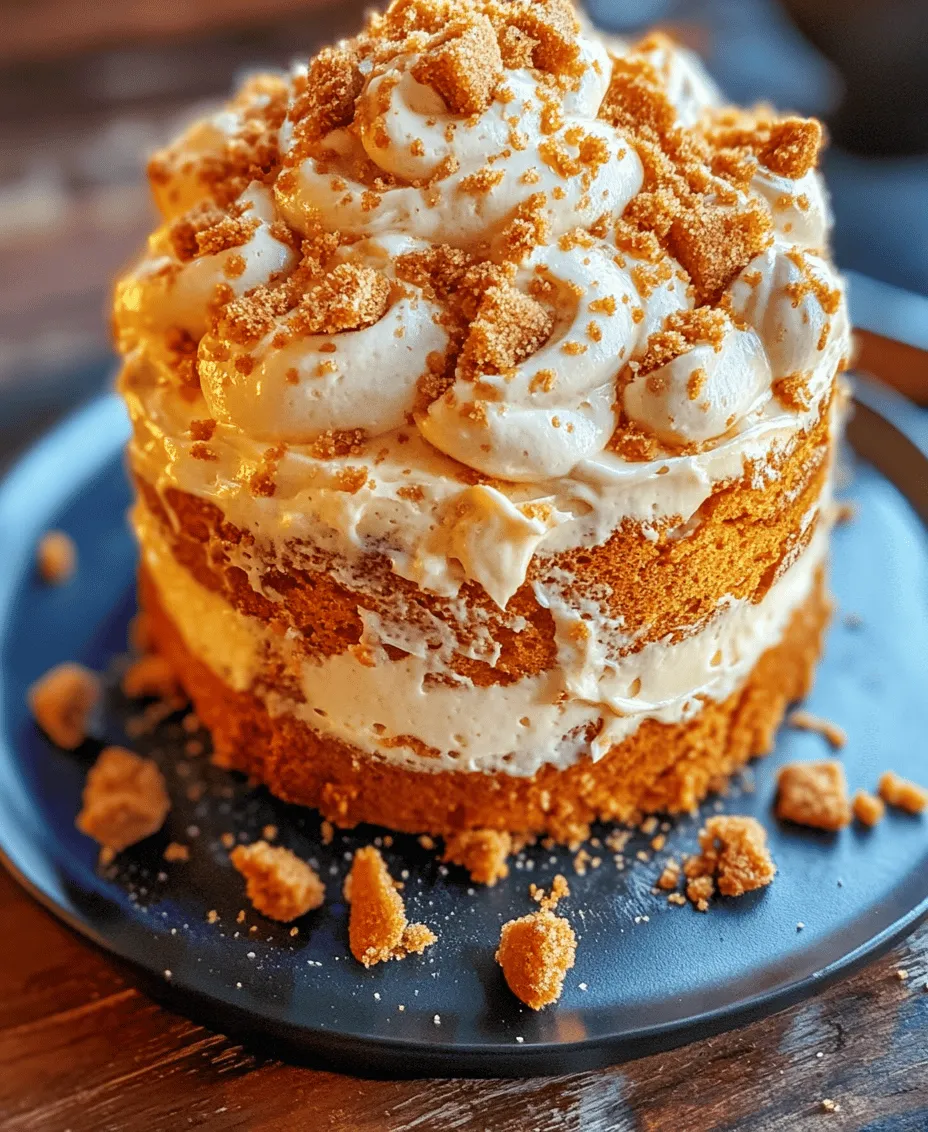
While your cakes cool, you can prepare the frosting. The Biscoff Bliss Cake pairs wonderfully with a creamy Biscoff buttercream frosting. To make this, beat together softened butter and powdered sugar until light and fluffy, then mix in Biscoff spread for that rich flavor. You can customize the sweetness by adjusting the amount of powdered sugar or even adding a splash of milk to achieve your desired consistency. Alternatively, consider whipped cream for a lighter touch or cream cheese frosting for a tangy balance to the sweetness.
Assemble the Cake
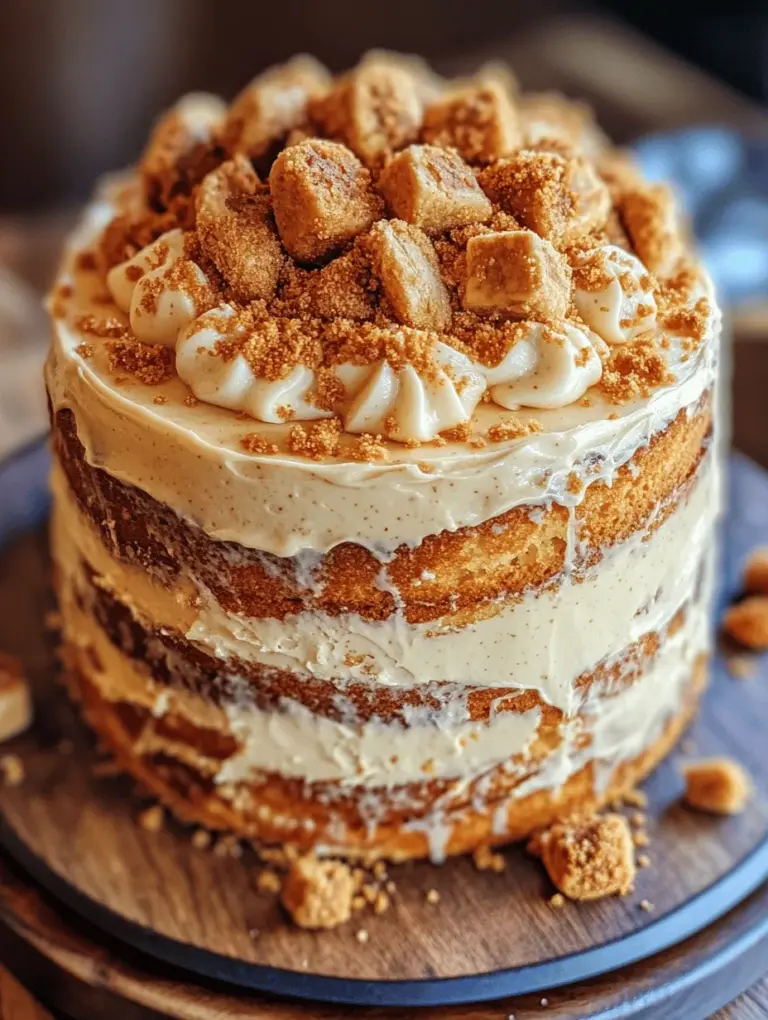
Once your cakes are completely cooled, it’s time to assemble your Biscoff Bliss Cake. Place the first layer on a serving plate, and spread a generous amount of frosting on top. Carefully place the second cake layer on top and frost the top and sides of the cake, smoothing it out with a spatula. Layering can be tricky, so ensure that the cakes are level to avoid any crumbling. If necessary, use a serrated knife to trim the tops of the cakes for an even finish.
Decorate
Decoration is where you can let your creativity shine. Consider drizzling additional Biscoff spread on top of the cake or garnishing with whole Biscoff cookies for an eye-catching finish. You could also sprinkle crushed cookies around the base or on top for added texture and visual appeal. Edible gold leaf or chocolate shavings can provide a touch of elegance, making this cake perfect for any celebration.
Serve and Enjoy
Your Biscoff Bliss Cake is now ready to be served! This cake pairs beautifully with a cup of coffee or tea, enhancing the warm, spiced flavors of the Biscoff. It also makes a wonderful centerpiece for gatherings, birthday parties, or simply as a delightful treat to enjoy after dinner. For an extra indulgent experience, serve slices with a scoop of vanilla ice cream or a dollop of whipped cream.
Biscoff Bliss Cake Variations
Exploring different frosting options can elevate your Biscoff Bliss Cake to new heights. While the Biscoff buttercream is a classic choice, whipped cream offers a lighter alternative, perfect for those who prefer less sweetness. Cream cheese frosting, with its tangy flavor, can also beautifully complement the rich caramel notes of the Biscoff cookies.
For those looking to experiment, consider adding chocolate chips or a dash of cinnamon to the batter for an exciting flavor twist. If you’re catering to gluten-sensitive guests, you can make a gluten-free version of the cake by substituting all-purpose flour with a gluten-free blend. Just ensure that your other ingredients, particularly the Biscoff cookies, are gluten-free as well.
Storing and Serving Suggestions
To keep your Biscoff Bliss Cake fresh, store it in an airtight container at room temperature for up to three days. If you want to extend its shelf life, you can refrigerate it, though this may alter the cake’s texture slightly. For extended storage, consider wrapping slices or the whole cake in plastic wrap and placing it in the freezer. This way, you can enjoy the delightful flavors of your cake for up to three months.
When it comes to serving, this cake is versatile enough to be enjoyed on its own, but it also pairs beautifully with coffee or tea. It can be a show-stopping dessert at gatherings, or simply a sweet treat to brighten your day.
Conclusion
The Biscoff Bliss Cake is a delectable fusion of flavors and textures that will undoubtedly impress anyone fortunate enough to try it. Its versatility allows for numerous variations, ensuring that each baking experience can be unique. We encourage you to take the plunge and try this recipe for yourself, allowing its delightful flavors to captivate your taste buds.
Don’t forget to share your baking adventures and any creative twists you’ve added to your Biscoff Bliss Cake. Whether it’s the frosting or a secret ingredient, your experiences can inspire others in their own baking journeys!