
Introduction
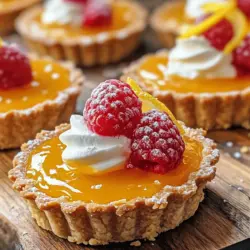
Mini desserts have taken the culinary world by storm, captivating the hearts of dessert lovers everywhere. Among these delightful bites, mini lemon curd tarts stand out for their vibrant flavor and elegant presentation. These charming little treats are not only a feast for the eyes but also a refreshing delight for the palate, making them a perfect addition to any gathering. With a zesty lemon filling nestled in a buttery tart shell, these mini tarts offer a burst of sunshine in every bite.
The allure of lemon curd lies in its refreshing taste, which finds a perfect balance between tartness and sweetness. This versatile filling can elevate various desserts, but when encased in a delicate pastry, it transforms into an irresistible treat. The simplicity of the recipe makes it accessible for bakers of all levels, allowing anyone to impress their guests with these adorable tarts. Whether you’re hosting a garden party, celebrating a birthday, or simply indulging in a sweet craving, mini lemon curd tarts are a delightful choice that can elevate any occasion.
The Appeal of Mini Desserts
In recent years, mini desserts have surged in popularity, becoming a staple at gatherings and celebrations. Their bite-sized nature allows guests to enjoy a variety of flavors without the guilt of overindulgence. The concept of portion control has never been more appealing, especially in a world that constantly encourages moderation in our eating habits. Mini desserts, like these lemon curd tarts, offer the perfect solution, allowing everyone to savor a little sweetness without feeling like they’ve overdone it.
Visually, mini tarts are a showstopper. Their petite size allows for creative presentation, making them an excellent choice for events where aesthetics matter, such as weddings, showers, and cocktail parties. Each tart can be adorned with fresh fruit, whipped cream, or edible flowers, adding to their charm and making them a centerpiece on any dessert table. The combination of flavors and textures, along with their eye-catching appearance, ensures that mini lemon curd tarts will be a hit among guests of all ages.
Understanding the Ingredients
To create the perfect mini lemon curd tarts, understanding the ingredients is essential. Each component contributes to the overall flavor and texture of the tarts, from the buttery crust to the tangy lemon filling. Below is a breakdown of the key ingredients involved in this recipe.
Tart Shell Ingredients
– All-Purpose Flour: This is the foundation of the tart shell, providing structure and texture. All-purpose flour strikes the right balance between strength and tenderness, ensuring the tarts hold their shape while remaining flaky.
– Powdered Sugar: Unlike granulated sugar, powdered sugar has a fine texture that helps create a tender crust. It adds sweetness without the graininess that can sometimes occur with regular sugar.
– Unsalted Butter: The choice of unsalted butter is crucial in pastry-making. It adds richness and flavor while allowing for better control over the salt content in the recipe. The fat in the butter also contributes to the flaky texture of the tart shells.
– Egg Yolk: Egg yolks play a vital role in binding the ingredients together, adding richness and moisture to the dough. They help create a tender and flavorful crust.
– Vanilla Extract: A touch of vanilla extract enhances the overall flavor of the tart shell, providing a subtle warmth that complements the lemon curd filling.
– Salt: A pinch of salt balances the sweetness of the powdered sugar and enhances the flavors of the other ingredients.
Lemon Curd Ingredients
– Eggs: Fresh eggs are the backbone of lemon curd, providing structure, richness, and creaminess. They help thicken the curd as it cooks, creating a luxurious texture.
– Granulated Sugar: This ingredient adds sweetness to the tangy lemon juice and zest, balancing the tartness and making the curd enjoyable.
– Fresh Lemon Juice: The star of the show, fresh lemon juice imparts a vibrant tanginess that defines lemon curd. Using fresh juice rather than bottled ensures a bright, fresh flavor.
– Lemon Zest: Adding lemon zest enhances the aromatic quality of the curd. It contributes a burst of citrus flavor that complements the juice, resulting in a more complex and delightful taste.
– Butter: Just like in the tart shell, butter plays a crucial role in lemon curd, lending a smooth, creamy texture that makes it irresistible.
Optional Garnishing Ingredients
To elevate your mini lemon curd tarts, consider adding optional garnishes such as:
– Fresh Berries: Strawberries, raspberries, or blueberries can add a pop of color and a burst of flavor.
– Whipped Cream: A dollop of whipped cream can add a light and airy contrast to the tartness of the lemon curd.
– Mint Leaves: Fresh mint leaves can provide a refreshing touch and enhance the visual appeal of the tarts.
– Edible Flowers: Using edible flowers can take your presentation to the next level, making the tarts look even more enchanting.
With a clear understanding of the ingredients, you are now ready to embark on the journey of creating these adorable mini lemon curd tarts. In the next section, we will delve into the step-by-step guide for preparing the tart shells, ensuring that your culinary adventure is both enjoyable and successful.
Step-by-Step Guide to Making Adorable Mini Lemon Curd Tarts
Preparing the Tart Shells
Creating the perfect tart shell is the first step in making mini lemon curd tarts. The following detailed instructions will guide you through the process of mixing and forming the dough.
1. Gather Your Ingredients: Start by assembling all the ingredients for the tart shells: all-purpose flour, powdered sugar, unsalted butter, egg yolk, vanilla extract, and salt. Make sure your butter is cold for the best results.
2. Mix Dry Ingredients: In a mixing bowl, combine the all-purpose flour, powdered sugar, and salt. Whisk these dry ingredients together until well blended.
3. Cut in the Butter: Cut the cold unsalted butter into small cubes and add it to the bowl with the dry ingredients. Using a pastry cutter or your fingertips, work the butter into the flour mixture until it resembles coarse crumbs. This step is crucial for achieving a flaky texture in your tart shell.
4. Add Egg Yolk and Vanilla: In a small bowl, whisk together the egg yolk and vanilla extract. Add this mixture to the flour and butter mixture, and gently stir until just combined. Be careful not to overmix; the dough should come together but remain slightly crumbly.
5. Form the Dough: Turn the dough out onto a lightly floured surface. Using your hands, gather the dough into a ball and flatten it into a disc. Wrap the disc in plastic wrap and refrigerate for at least 30 minutes. Chilling the dough helps relax the gluten, resulting in a tender crust.
6. Preheat the Oven: While the dough is chilling, preheat your oven to 350°F (175°C). This ensures that the tarts bake evenly and achieve a beautiful golden color.
7. Roll Out the Dough: After chilling, remove the dough from the refrigerator. On a lightly floured surface, roll it out to about 1/8 inch thick. Use a round cookie cutter or a glass to cut out circles of dough that will fit into your mini tart pans.
8. Transfer to Tart Pans: Gently press the dough circles into the mini tart pans, making sure to press into the corners and up the sides. Trim any excess dough hanging over the edges.
9. Prick the Bottoms: Use a fork to prick the bottoms of the tart shells. This prevents air bubbles from forming during baking and ensures even cooking.
10. Chill Again: Place the filled tart pans back in the refrigerator for another 10-15 minutes. Chilling the shells again helps maintain their shape during baking.
11. Bake the Tart Shells: Once chilled, remove the tart pans from the refrigerator and bake in the preheated oven for 12-15 minutes, or until the edges are lightly golden. Keep an eye on them to ensure they don’t overbake.
12. Cool the Tart Shells: Once baked, remove the tart shells from the oven and allow them to cool completely in the pans before filling them with lemon curd.
With the tart shells prepared, you are one step closer to enjoying these delectable mini lemon curd tarts. In the next part of this article, we will explore how to make the luscious lemon curd filling that will perfectly complement the buttery tart shells.
Importance of Chilling the Dough Before Baking
Chilling the dough is a crucial step when making mini lemon curd tarts. This step helps the fats in the dough solidify, which in turn prevents the tarts from shrinking during baking. When you chill the dough for at least 30 minutes, it becomes easier to roll out and shape without losing its structure. This chilling period also allows the gluten to relax, resulting in a more tender crust. So, resist the urge to skip this step; your patience will reward you with perfectly shaped tarts.
Baking the Tart Shells
Once your dough has chilled, it’s time to bake the tart shells. Preheat your oven to 350°F (175°C). Using a rolling pin, roll out the dough on a lightly floured surface until it’s about 1/8 inch thick. Cut out circles that are slightly larger than your tart pans, ensuring you have enough dough to cover the sides.
Gently press the dough circles into the tart pans, ensuring there are no air bubbles. Trim any excess dough hanging over the edges for a clean presentation. To prevent the dough from puffing up while baking, prick the bottom of each shell with a fork. This technique allows steam to escape and ensures that the crust bakes evenly.
Proper Oven Temperature and Timing for Perfect Shells
Place the tart shells in the preheated oven and bake for about 15-20 minutes, or until they are golden brown. Keep an eye on them during the last few minutes of baking, as oven temperatures can vary. If you notice the edges browning too quickly, you can cover them with strips of aluminum foil.
Once baked, remove the tart shells from the oven and allow them to cool in the pans for about 5 minutes before transferring them to a wire rack to cool completely. This method helps maintain their crispness and prevents them from becoming soggy.
Tips for Cooling the Tarts Without Compromising Texture
Cooling the tarts properly is essential to preserve their texture. Avoid leaving the tarts in the hot pans for too long, as residual heat can create steam that will soften the shells. Once you’ve moved the tarts to a wire rack, allow them to cool completely before filling them with lemon curd. This cooling process not only ensures the shells remain crisp but also provides a perfect base for the luscious curd that will soon fill them.
Crafting the Perfect Lemon Curd
Now that your tart shells are prepared, let’s focus on making the lemon curd. The key to achieving a velvety smooth curd lies in temperature control. Start by combining fresh lemon juice, lemon zest, sugar, and eggs in a heatproof bowl. Place this bowl over a pot of simmering water (double boiler method), ensuring the bowl doesn’t touch the water.
Importance of Temperature Control While Making Curd
This gentle heating method keeps the curd from cooking too quickly, which can lead to scrambled eggs instead of a silky texture. Stir continuously with a whisk, allowing the mixture to thicken gradually. It usually takes about 10-15 minutes for the curd to reach the desired consistency.
Tips for Achieving the Right Consistency
To test if your lemon curd is ready, dip a spoon into the mixture; it should coat the back of the spoon and leave a trail when you run your finger through it. Once it reaches this stage, remove it from the heat.
Straining the Curd for a Smooth Finish
For an ultra-smooth finish, strain the curd through a fine-mesh sieve into a bowl. This step removes any bits of cooked egg and lemon zest, resulting in a refined texture that’s perfect for filling your tart shells. Stir in unsalted butter until melted and fully incorporated, which adds richness and a glossy finish to the curd.
Filling and Setting the Tarts
With your tart shells cooled and the lemon curd prepared, it’s time to fill those adorable mini tarts. Using a piping bag or a small spoon, carefully fill each tart shell with lemon curd. Aim for a smooth and even surface, ensuring each tart is filled to the brim for that delightful burst of flavor in every bite.
Techniques for Filling the Tart Shells Neatly
If you’re using a piping bag, ensure the tip is small enough to fit into the shell without creating a mess. If you prefer using a spoon, fill each tart gradually, allowing the curd to settle naturally. Once filled, gently tap the tarts on the counter to help remove any air bubbles and ensure an even distribution of the curd.
Importance of Chilling for Curd to Set Properly
After filling the tarts, place them in the refrigerator for at least 2 hours, or until the curd has set. Chilling the tarts allows the curd to firm up, making them easier to handle and serve later. This step is essential for achieving that perfect, creamy texture that contrasts beautifully with the crisp tart shell.
Garnishing Your Mini Tarts
Presentation is key when serving mini lemon curd tarts. Garnishing adds a visual appeal and enhances the overall flavor profile. Here are a few creative ideas for garnishing your tarts:
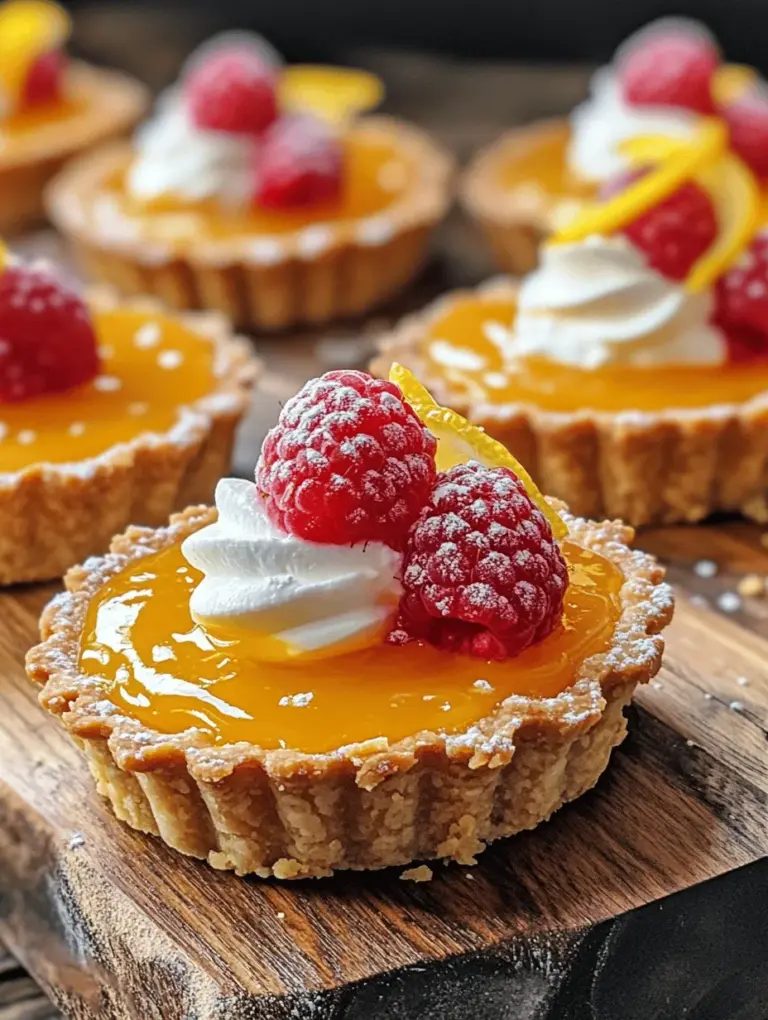
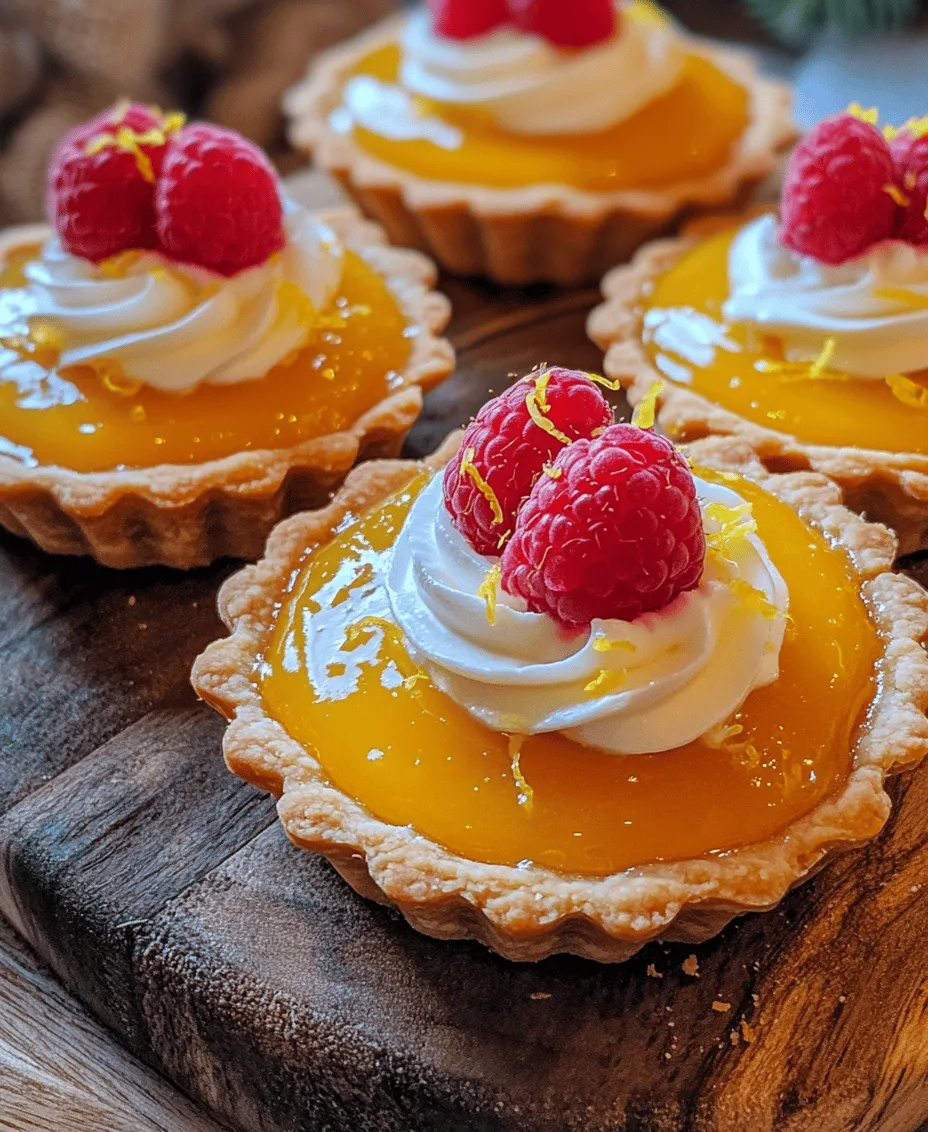
– Using Fresh Berries: Top each tart with fresh raspberries, blueberries, or strawberries. Not only do they add a pop of color, but they also complement the tartness of the lemon curd with their natural sweetness.
– Whipped Cream: A dollop of freshly whipped cream on top of each tart adds creaminess and richness. For a fun twist, you can flavor the whipped cream with a hint of vanilla or a dusting of powdered sugar.
– Lemon Zest: For a touch of brightness and aroma, sprinkle some lemon zest over the tarts before serving. The zest enhances the lemon flavor and adds an attractive finishing touch.
Serving Suggestions and Pairings
These adorable mini lemon tarts are perfect for a variety of occasions. They make a delightful addition to spring and summer parties, bridal showers, and holiday gatherings. Their small size makes them easy to serve and enjoy without the need for utensils, making them an excellent choice for picnics and outdoor events.
Beverage Pairings that Complement the Tartness
When it comes to beverage pairings, consider serving your mini lemon tarts with herbal teas, such as chamomile or mint, which provide a soothing contrast to the tartness of the curd. Sparkling water with a slice of lemon or a splash of berry syrup can also elevate the experience by complementing the flavors of the tarts.
Discussion of How These Tarts Can Be Served at Various Events
Whether you’re hosting a casual brunch, a festive holiday dinner, or an elegant afternoon tea, mini lemon curd tarts are versatile enough to fit any occasion. Their vibrant color and delightful taste make them a standout dessert that guests will love.
Storage and Shelf Life
If you find yourself with leftover mini lemon tarts, you’ll want to store them properly to maintain their freshness and texture. Here are some best practices for storing your delightful treats:
Best Practices for Storing Mini Lemon Curd Tarts
Keep the tarts in an airtight container in the refrigerator. They can be stored for up to 3 days, but they are best enjoyed within the first couple of days for optimal texture and flavor.
How to Maintain Freshness and Texture Over Time
To prevent the tart shells from becoming soggy, it’s best to store the tart shells and lemon curd separately if possible. Fill the tart shells just before serving to ensure they remain crisp.
Discussion on Freezing Options and Their Effectiveness
If you want to make your tarts in advance, you can prepare the tart shells and freeze them. Once cooled, wrap the shells tightly in plastic wrap and place them in a freezer-safe bag. They can be frozen for up to three months. When you’re ready to use them, simply thaw the shells in the refrigerator and fill them with freshly made lemon curd.
Conclusion
Making and sharing mini lemon curd tarts is a delightful experience that brings joy to both the baker and the lucky recipients. The balance of flavors—tart lemon curd encased in a buttery, crisp shell—creates a dessert that is simply irresistible. Whether you serve them at a gathering or enjoy them as a personal treat, these mini tarts are sure to impress.
So, why not gather your ingredients and try this recipe? You’ll savor the delicious results and create a memorable dessert that everyone will love. Happy baking!