Introduction
If you’re in search of a dessert that combines indulgent flavors with effortless preparation, look no further than these Deliciously Simple Peanut Butter Oreo Cookie Balls. This no-bake treat has quickly gained popularity among cookie lovers for its delightful blend of creamy peanut butter and rich Oreo cookies. The irresistible combination of flavors makes these cookie balls a favorite for parties, gatherings, or simply a sweet snack to enjoy at home.
The beauty of this recipe lies not only in its taste but also in its simplicity. With minimal ingredients and an incredibly quick preparation time, you can whip up a batch of these cookie balls in under 30 minutes. Whether you’re a busy parent looking for a fun activity to do with the kids or a novice baker eager to impress your friends, this recipe is perfect for everyone. Let’s dive deeper into what makes these cookie balls so special and how to create them in your own kitchen.
Understanding the Ingredients
Before we embark on the journey of making these delightful cookie balls, it’s essential to understand the ingredients that make them so delicious. Each component plays a crucial role, and knowing their qualities can enhance your baking experience.
Oreo Cookies
Oreo cookies have been a beloved treat since their inception in 1912. With their signature chocolate wafer cookies and creamy filling, Oreos have become a staple in many households. Today, they come in a variety of flavors, including classic, double-stuffed, mint, and even seasonal varieties like pumpkin spice. For this recipe, the classic Oreo is the go-to choice, but feel free to experiment with other flavors if you’re feeling adventurous.
The key to a successful cookie ball lies in the texture of the crushed Oreos. The combination of the crunchy chocolate cookies and the smooth filling creates a balanced flavor profile that pairs perfectly with peanut butter.
Creamy Peanut Butter
Peanut butter is the star of the show in this recipe, providing a rich, nutty flavor that complements the sweetness of the Oreos. Not only does it taste great, but it also comes with several nutritional benefits. Peanut butter is a good source of protein, healthy fats, and essential vitamins and minerals. When selecting peanut butter, you’ll find varieties ranging from creamy to crunchy, as well as natural options that contain minimal ingredients.
For this recipe, creamy peanut butter is recommended for its smooth texture, which blends seamlessly with the crushed Oreos. However, if you prefer a bit of crunch, using crunchy peanut butter can add an interesting texture to your cookie balls.
Chocolate Chips
To finish off these cookie balls, a coating of chocolate is essential. Chocolate chips provide a delicious outer layer that adds to the overall flavor experience. When it comes to chocolate chips, you have options: milk chocolate, semi-sweet, and dark chocolate are all excellent choices.
Milk chocolate offers a sweeter taste, while dark chocolate provides a richer, more intense flavor. Depending on your personal preference, you can choose one type or mix them for a unique twist. Regardless of the variety you select, high-quality chocolate will ensure a smooth and delectable coating.
Importance of Ingredient Quality
When it comes to baking, the quality of your ingredients can significantly impact the final result. Using fresh, high-quality Oreo cookies, creamy peanut butter, and premium chocolate chips will elevate your cookie balls, making them even more enjoyable. Investing in good ingredients is especially important for a recipe that has such few components, as each flavor will shine through.
Step-by-Step Guide to Making Peanut Butter Oreo Cookie Balls
Now that you have a better understanding of the ingredients, let’s get started on making your Deliciously Simple Peanut Butter Oreo Cookie Balls. Follow these detailed steps to create this delightful treat.
Step 1: Crushing the Oreos
The first step in making these cookie balls is to crush the Oreo cookies. Achieving the right texture is crucial for a cohesive mixture, so it’s important to use the right method.
Methods for Crushing Oreos:
– Food Processor: This is the easiest and most efficient method. Simply place the Oreos in the food processor and pulse until they resemble fine crumbs. Be careful not to over-process, as you want a crumbly texture rather than a powder.
– Zip-top Bag and Rolling Pin: If you don’t have a food processor, you can put the Oreos in a zip-top bag, seal it, and crush them with a rolling pin. This method also allows for a bit of stress relief as you roll away!
– Blender: A high-powered blender can also do the trick, but keep an eye on the consistency to avoid turning the cookies into dust.
Aim for a crumbly texture where the cookie pieces are small enough to integrate well with the peanut butter but still have some texture.
Step 2: Mixing in the Peanut Butter
Once you have your crushed Oreos, it’s time to mix in the creamy peanut butter. Transfer the crushed Oreos to a mixing bowl and add a generous amount of peanut butter. The exact amount can vary based on your preference for richness, but a typical ratio is about 1 cup of peanut butter for every 3 cups of crushed Oreos.
Achieving the Perfect Dough-like Consistency:
– Use a spatula or your hands to mix the ingredients together until they form a dough-like consistency. The mixture should be firm enough to hold its shape when rolled into balls but not so dry that it crumbles apart.
– If the mixture feels too dry, you can add a little more peanut butter or even a splash of honey or maple syrup for added sweetness and moisture.
Step 3: Forming the Balls
With your mixture ready, it’s time to form the cookie balls.
Techniques for Uniform Size and Shape:
– Use a cookie scoop or your hands to portion out the mixture. A tablespoon-sized scoop works well for uniformity.
– Roll each portion into a ball, about 1 inch in diameter. Make sure to apply gentle pressure to ensure that the balls hold together.
Step 4: Chilling the Mixture
After forming the balls, it’s essential to chill them before coating. This step helps the cookie balls firm up, making them easier to coat in chocolate.
– Place the formed cookie balls on a baking sheet lined with parchment paper and refrigerate for at least 15-30 minutes. If you have time, chilling them for a longer period can enhance their firmness and flavor.
Step 5: Melting the Chocolate
While the cookie balls are chilling, you can prepare the chocolate coating. Melting the chocolate properly is key to achieving a smooth and shiny finish.
Best Practices for Melting Chocolate:
– Microwave: Place the chocolate chips in a microwave-safe bowl. Heat in 30-second intervals, stirring in between, until the chocolate is fully melted and smooth. Be cautious not to overheat, as chocolate can burn easily.
– Double Boiler: If you prefer, you can melt the chocolate using a double boiler method. Place a heatproof bowl over a pot of simmering water, stirring occasionally until melted.
Once your chocolate is melted and smooth, you’re ready to coat your chilled cookie balls.
With these initial steps covered, you’re well on your way to creating a delicious batch of Peanut Butter Oreo Cookie Balls. Stay tuned for the next part of this recipe, where we will dive into the coating process and offer tips for the best results!

Coating the Cookie Balls
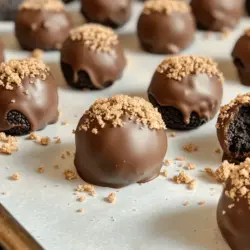
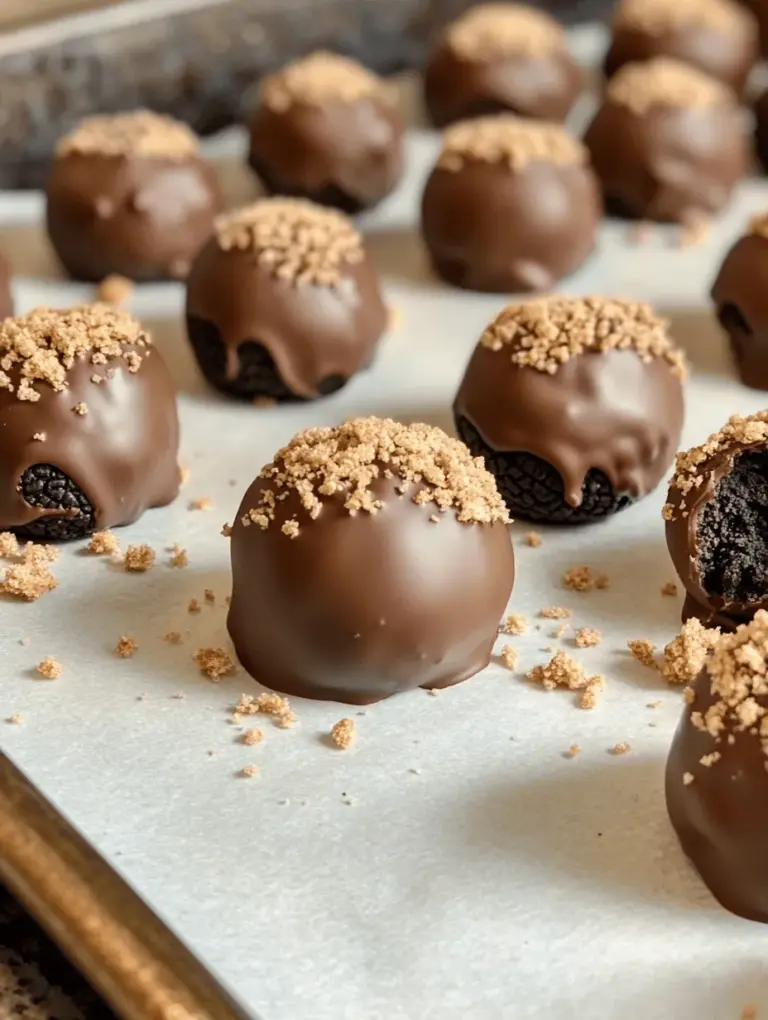
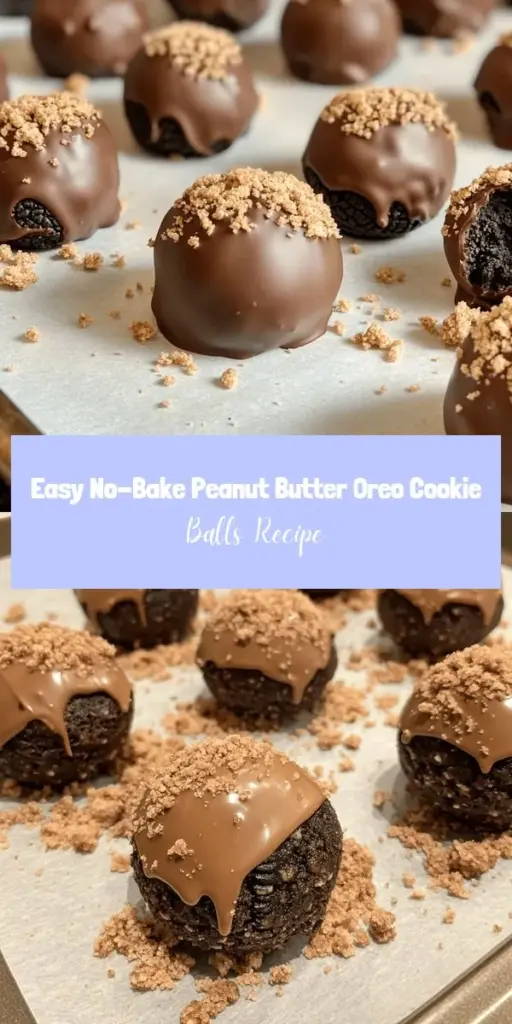
Once your peanut butter Oreo cookie balls are formed and chilled, it’s time to coat them in luscious chocolate. This step is crucial as it not only adds a delightful taste but also enhances their visual appeal. To achieve an even coat, follow these tips:
1. Melt the Chocolate: Use high-quality chocolate chips or chocolate bars, melting them in a microwave or a double boiler. If using the microwave, heat in 30-second increments, stirring after each session until smooth. Ensure the chocolate doesn’t overheat, as burnt chocolate can ruin the coating.
2. Use a Fork or Dipping Tool: To dip the cookie balls, a fork or a specialized dipping tool can be very helpful. Place the chilled cookie ball on the fork, then dip it into the melted chocolate. Use a spoon to pour the chocolate over the top, ensuring it’s completely covered.
3. Remove Excess Chocolate: After dipping, gently tap the fork on the rim of the bowl to remove excess chocolate. This helps in achieving a smoother finish and prevents the base from being too thick.
4. Setting on Parchment Paper: Once coated, place the cookie balls on a parchment-lined baking sheet. This prevents sticking and makes cleanup easier.
Final Chill
After coating your cookie balls, it’s essential to let them set properly. This final chill ensures that the chocolate hardens and creates a delightful shell around the creamy peanut butter Oreo center. Here’s how to do it:
1. Chill in the Refrigerator: Place the coated cookie balls back in the refrigerator for about 30 minutes. This allows the chocolate to firm up nicely.
2. Check for Firmness: After half an hour, check to see if the chocolate has set. They should feel firm to the touch. If they are still soft, give them a little more time in the fridge.
Serving Suggestions
Now that your Peanut Butter Oreo cookie balls are ready, it’s time to think about how to present them. Here are some creative serving suggestions:
1. Elegant Presentation: Arrange the cookie balls on a decorative platter. You can space them out or group them in clusters for a visually appealing display. Consider adding a dusting of cocoa powder or crushed Oreos on top for an extra touch.
2. Pairing with Beverages: These cookie balls pair wonderfully with various beverages. A glass of cold milk is a classic choice, enhancing the peanut butter and chocolate flavors. Alternatively, serve them with a steaming cup of coffee or hot chocolate for a cozy treat.
3. Party and Gathering Ideas: For parties or gatherings, present the cookie balls in mini cupcake liners. This not only looks festive but also makes them easy for guests to grab and enjoy. Consider adding a side of caramel or chocolate sauce for dipping to elevate the experience.
Healthier Alternatives and Variations
If you’re looking to modify the recipe for dietary preferences or just want to experiment with flavors, here are some suggestions:
1. Substituting Ingredients: For a gluten-free version, use gluten-free Oreo cookies. Additionally, opt for natural peanut butter without added sugars or oils for a healthier option.
2. Flavor Variations: Get creative with flavors by adding crushed nuts like almonds or walnuts to the cookie mixture for added crunch. You can also experiment with flavored chocolate, such as white chocolate or dark chocolate, to suit your taste.
3. Incorporating Additional Ingredients: Consider adding sprinkles on top of the chocolate before it sets for a colorful touch. A sprinkle of sea salt can also enhance the flavors, creating a delightful sweet and salty combination.
Storage and Shelf Life
To keep your Peanut Butter Oreo cookie balls fresh and delicious, proper storage is key:
1. Best Practices for Storing: Store the cookie balls in an airtight container to keep them from drying out. Make sure they are fully cooled and the chocolate has set before placing them in the container.
2. Recommended Storage Conditions: Keep the container in a cool, dry place away from direct sunlight. If you live in a warm climate, it’s best to store them in the refrigerator to maintain their firmness.
3. Shelf Life: When stored correctly, these cookie balls can last up to two weeks. However, if you notice any changes in texture or smell, it’s best to discard them. Signs of spoilage can include a dull appearance or a change in the chocolate’s sheen.
Conclusion
In conclusion, making Deliciously Simple Peanut Butter Oreo Cookie Balls is not only easy but also incredibly rewarding. These treats are a perfect blend of creamy peanut butter, rich chocolate, and crunchy Oreo goodness that will satisfy any sweet tooth. Whether you’re preparing them for a family gathering, a party, or just for yourself, the joy of creating and sharing these delightful cookie balls is unmatched.
We encourage you to try this recipe and experience the wonderful flavors for yourself. Don’t forget to share them with friends and family, as treats like these are best enjoyed together. Experiment with different variations and serve them in creative ways to impress your guests. Happy baking!