Introduction to Heavenly Red Velvet Cheesecake
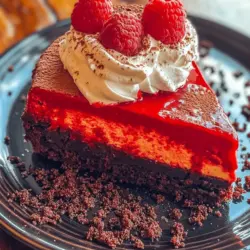
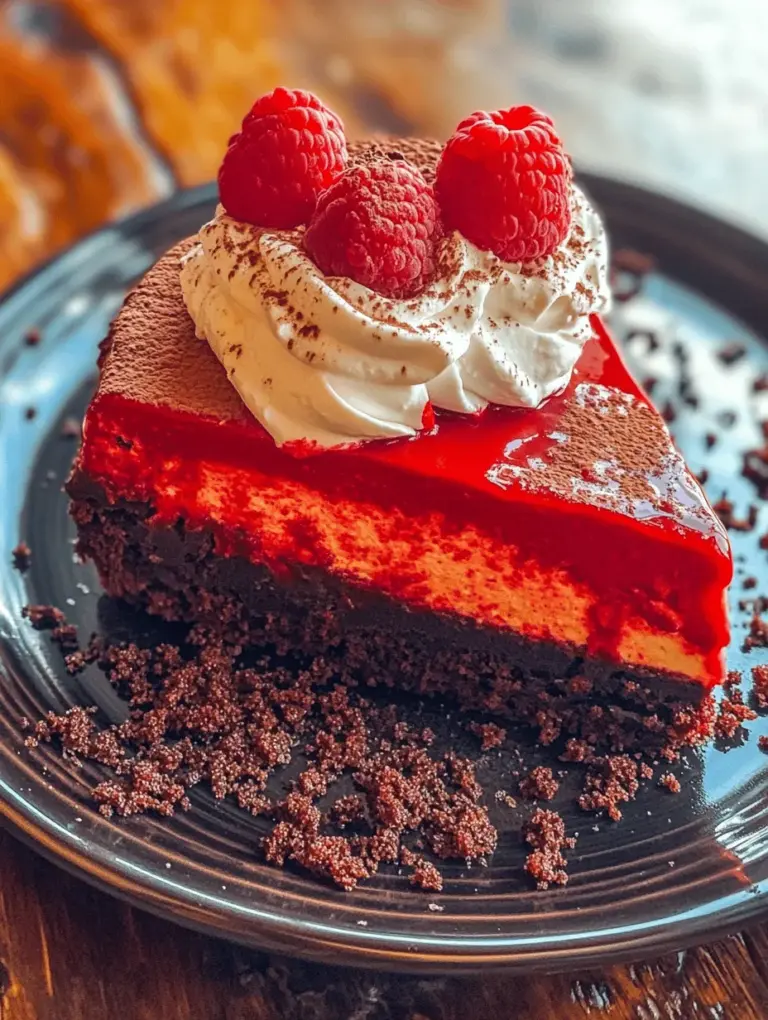
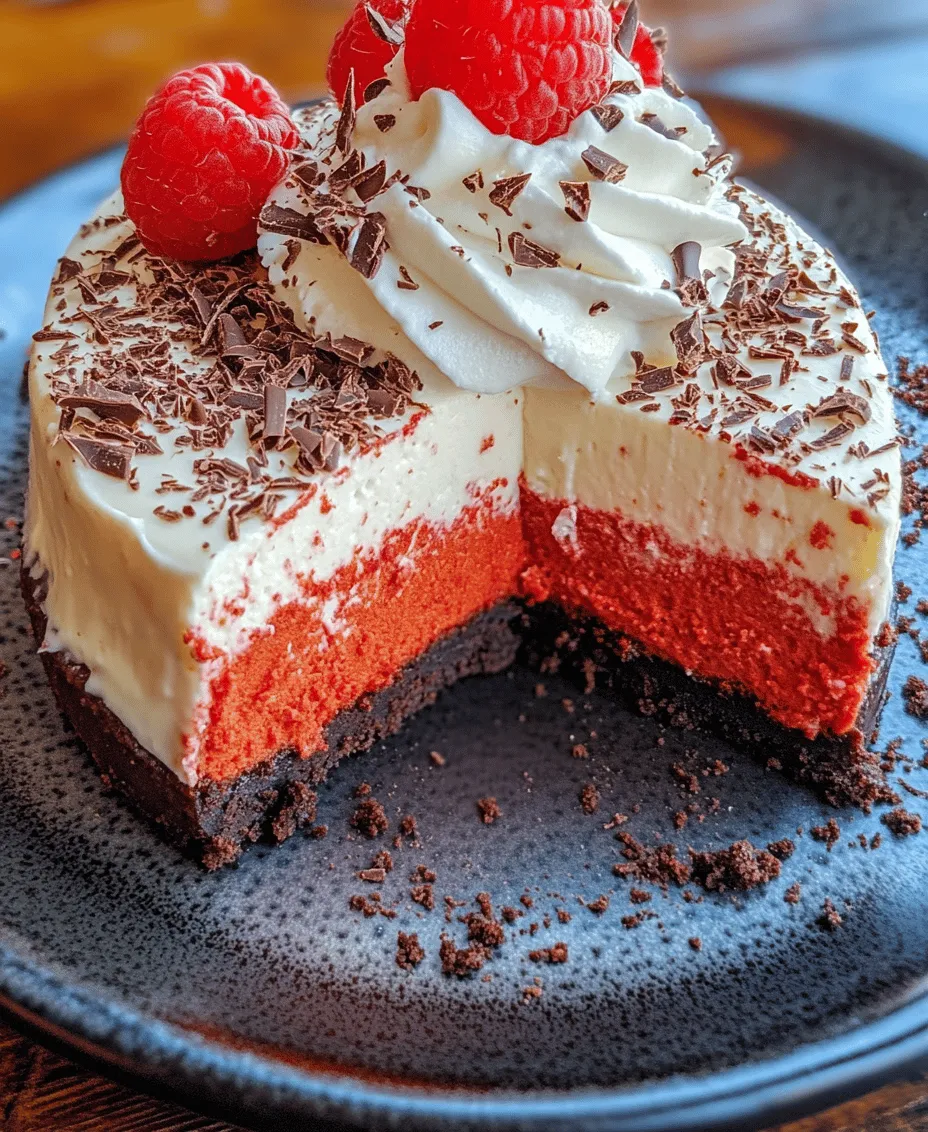
Indulge your senses with the exquisite Heavenly Red Velvet Cheesecake, a dessert that beautifully marries the sumptuousness of classic red velvet cake with the creamy richness of cheesecake. This delightful creation is more than just a treat; it’s a show-stopping centerpiece for any celebration, from Christmas to birthdays, or even a casual gathering with friends. With its striking red layers and velvety cream cheese topping, this cheesecake doesn’t just look stunning—it tastes divine.
The allure of red velvet cake has captivated dessert lovers for generations. Its unique color and flavor profile make it an irresistible choice, while the addition of cheesecake elevates it into the realm of gourmet desserts. This recipe will take you step-by-step through the process of creating this indulgent masterpiece, ensuring that even novice bakers can achieve stunning results.
Understanding the Components of Heavenly Red Velvet Cheesecake
To truly appreciate the Heavenly Red Velvet Cheesecake, we must delve into its distinct layers and the delightful components that come together to create its rich flavors and textures.
The Allure of Red Velvet Cake
Origin and History
The origins of red velvet cake can be traced back to the early 20th century, particularly during the Great Depression when cocoa powder became more widely available. The term “velvet” is used to describe the cake’s soft and smooth texture, which is enhanced by the use of buttermilk and vinegar. Over the decades, this cake has evolved into a cultural icon, especially in the Southern United States, where it has found its place at many festive occasions. The striking red color, often thought to be a nod to romance and celebration, has made it a popular choice for weddings, anniversaries, and Valentine’s Day.
Flavor Profile
The flavor of red velvet cake is subtly complex. It features mild chocolate undertones that are perfectly balanced by the tanginess of cream cheese frosting. This unique combination makes it not only visually appealing but also deeply satisfying to the palate. The cake itself is moist and tender, providing an ideal base for the creamy cheesecake layer that follows.
The Creamy Cheesecake Layer
Why Cheesecake?
Cheesecake is known for its rich, creamy texture, which complements the tender crumb of red velvet cake beautifully. The addition of a cheesecake layer enhances the dessert’s overall flavor profile, introducing a luxurious creaminess that elevates each bite. The tangy notes from the cream cheese pair seamlessly with the sweetness of the cake, creating a harmonious balance that is sure to delight any dessert lover.
Variations
While the classic cream cheese cheesecake is a favorite, there are numerous variations that can be incorporated into this recipe. From chocolate cheesecake to vanilla bean or even fruit-flavored options, the possibilities are endless. Each variation brings its own unique twist, allowing bakers to customize their Heavenly Red Velvet Cheesecake to suit personal tastes or seasonal ingredients.
The Delicious Oreo Crust
The Role of the Crust
The crust is an often overlooked yet crucial component of the cheesecake experience. In this recipe, the Oreo crust adds a rich chocolatey flavor and a satisfying crunch that contrasts beautifully with the smooth cheesecake and tender red velvet layers. The combination of flavors creates a multi-dimensional dessert that is both exciting and indulgent.
Alternative Crust Options
While the Oreo crust is a favorite for its ease and flavor, there are several alternative crust options to explore. A classic graham cracker crust offers a slightly different texture and flavor, while nut-based crusts, such as those made from almonds or pecans, can provide a gluten-free option with a unique taste. Each type of crust adds its own character to the cheesecake, making it fun to experiment with different combinations.
Ingredients Breakdown for Heavenly Red Velvet Cheesecake
Creating the Heavenly Red Velvet Cheesecake requires a selection of high-quality ingredients, each contributing to the dessert’s overall flavor and texture. Let’s break down the key components to ensure your cheesecake turns out perfectly.
Essential Ingredients for the Red Velvet Cake Layer
Flour and Sugar
The foundation of any cake is its flour and sugar. For the red velvet layer, it’s crucial to use all-purpose flour, which provides the right balance of structure and tenderness. The sugar not only sweetens the cake but also enhances its moisture, contributing to the overall richness.
Coloring
One of the most iconic aspects of red velvet cake is its vibrant color, achieved through red food coloring. While traditional recipes used beet juice for a natural hue, modern bakers often prefer gel food coloring for its vivid shade and stability. Using the right amount of coloring is essential to achieving that signature red without compromising the cake’s flavor.
Key Components of the Cheesecake Layer
Cream Cheese
The star of the cheesecake layer is undoubtedly the cream cheese. To achieve the best texture and flavor, opt for high-quality full-fat cream cheese. It should be at room temperature to ensure easy blending and a smooth consistency, which is essential for a creamy cheesecake filling. Avoid low-fat or whipped versions, as they do not yield the same rich results.
Sour Cream
Sour cream is another key ingredient that adds both flavor and moisture to the cheesecake. Its tangy profile mirrors that of cream cheese, enhancing the overall taste while also contributing to a creamy texture. This ingredient makes the cheesecake less dense and more luscious, ensuring each slice is a delight.
Crafting the Oreo Crust
Oreo Cookies and Butter
The combination of Oreo cookies and melted butter creates a rich, chocolatey crust that perfectly complements the flavors of the red velvet and cheesecake layers. Crush the Oreo cookies into fine crumbs, and mix them with melted butter to form a crumbly mixture that will hold together when pressed into the springform pan.
Sugar
Adding a touch of sugar to the crust enhances its sweetness and balances the flavors of the cheesecake and the cake layers. While Oreos are already sweet, a little extra sugar can elevate the crust and create a delightful contrast to the tangy cheesecake.
Step-by-Step Instructions for Making Heavenly Red Velvet Cheesecake
Now that we have a solid understanding of the components and ingredients of the Heavenly Red Velvet Cheesecake, let’s dive into the preparation process. Follow these detailed instructions to ensure your cheesecake is a resounding success.
Prepping the Oven and Springform Pan
Before you begin mixing your ingredients, it’s important to preheat your oven to the appropriate temperature—typically around 325°F (163°C). Preheating ensures even baking, which is critical for a dessert that relies on the perfect texture.
Next, prepare your springform pan. Grease the bottom and sides lightly with butter or cooking spray to prevent sticking. For added security, consider lining the bottom with parchment paper. This will make it easier to remove the cheesecake once it has cooled, allowing you to present it beautifully.
With the oven preheating and the pan prepared, you’re ready to embark on the journey of creating your own Heavenly Red Velvet Cheesecake. Stay tuned for the next part where we will delve into the detailed steps of mixing, baking, and assembling this extraordinary dessert.
Temperature Matters: Preparing for the Perfect Bake
Before diving into creating your Heavenly Red Velvet Cheesecake, it’s crucial to understand the importance of temperature in baking. Preheating your oven is essential as it ensures that your cheesecake bakes evenly, achieving that desired texture without any surprises. A preheated oven helps the cake rise properly and sets the structure of the cheesecake layer, preventing a dense or overly moist outcome.
Additionally, preparing your pan correctly is pivotal. For this recipe, you will want to use a 9-inch springform pan, which allows for easy removal of the cheesecake once it’s baked. Ensure to grease the sides of the pan with butter or cooking spray to facilitate smooth release. For an extra layer of protection against leaks, you can also wrap the outside of the pan with aluminum foil, especially if you’re using a water bath method during baking.
Creating the Perfect Crust
Mixing and Baking
Start by combining the crushed graham crackers, sugar, and melted butter in a mixing bowl. Use a fork to mix these ingredients until they resemble wet sand. Press this mixture firmly into the bottom of your prepared springform pan, using the bottom of a measuring cup or your fingers to create an even layer. Once the crust is formed, bake it in your preheated oven at 350°F (175°C) for about 10 minutes. This step not only helps to set the crust but enhances its flavor and provides a delightful crunch that will complement the creamy cheesecake layer. After baking, let the crust cool while you prepare the red velvet cake layer.
Crafting the Red Velvet Cake Layer
Mixing Techniques
Creating a silky and fluffy red velvet cake batter requires careful mixing. In a large mixing bowl, combine your dry ingredients: flour, cocoa powder, baking powder, baking soda, and salt. In a separate bowl, mix your wet ingredients: vegetable oil, sugar, eggs, buttermilk, vanilla extract, and red food coloring. When combining these mixtures, add the dry ingredients to the wet, but do this gently. Overmixing can lead to a tough cake, so fold the ingredients together until just combined. The batter should be smooth and slightly thick, with no visible flour pockets.
Baking the Red Velvet Layer
Baking Time and Testing
Pour the red velvet batter over the cooled crust in your springform pan, smoothing the top with a spatula. Bake this layer in the oven for about 25-30 minutes, or until a toothpick inserted into the center comes out clean or with a few moist crumbs attached. This toothpick test is a reliable way to ensure your cake layer is perfectly baked without being dry. Once done, remove it from the oven and allow it to cool completely in the pan on a wire rack.
Preparing the Cheesecake Layer
Mixing Ingredients
While the red velvet layer cools, it’s time to prepare the cheesecake mixture. In a mixing bowl, beat the softened cream cheese until it’s smooth and creamy. Gradually add sugar and continue mixing until well incorporated. Next, add the sour cream, vanilla extract, and eggs one at a time, mixing just until combined after each addition. The key here is to mix on low speed to avoid incorporating too much air, which can lead to cracks in the cheesecake as it bakes.
Combining the Layers
Layering Techniques
Once your cheesecake mixture is ready, it’s time to layer it over the cooled red velvet cake. Carefully pour the cheesecake batter on top of the red velvet layer, starting from the center and gently spreading it outwards. This technique minimizes disturbance to the red velvet layer beneath. You can also use a spatula to level the cheesecake layer, ensuring an even surface for a beautiful presentation.
Baking the Cheesecake Layer
Cooling Techniques
Place the springform pan back in the oven and bake the cheesecake for about 60-70 minutes at 325°F (160°C). To prevent cracks, consider placing a shallow baking dish filled with water on the lower rack of the oven, creating steam to keep the cheesecake moist. Once the cheesecake is set around the edges but still slightly jiggly in the center, turn off the oven and crack the door open. Allow the cheesecake to cool gradually in the oven for about an hour. This gradual cooling helps to prevent sudden temperature changes that can cause the cheesecake to crack.
Serving Suggestions for Heavenly Red Velvet Cheesecake
When it’s time to serve your Heavenly Red Velvet Cheesecake, presentation is key. Carefully run a knife along the edge of the pan before releasing the springform. This will ensure a clean removal and a perfect slice. For an elegant look, consider placing your cheesecake on a decorative cake stand.
Garnishing Options
To elevate the visual appeal and flavor of your cheesecake, garnish it with freshly whipped cream and a variety of berries. A dollop of whipped cream on each slice adds a light and airy texture that contrasts beautifully with the dense cheesecake. Fresh strawberries, raspberries, or blueberries not only add a pop of color but also a refreshing tartness that balances the sweetness of the dessert.
Pairing Suggestions
For beverage pairings, consider serving your cheesecake with a rich coffee, a creamy latte, or a glass of dessert wine. The coffee’s bitterness complements the sweetness of the cheesecake, while a sweet dessert wine enhances the overall indulgence of the treat. Alternatively, a glass of cold milk can be a nostalgic and delightful pairing.
Storage and Shelf Life of Heavenly Red Velvet Cheesecake
Understanding how to properly store your Heavenly Red Velvet Cheesecake will help maintain its freshness and flavor for days to come.
Refrigeration Tips
To store your cheesecake, cover it with plastic wrap or aluminum foil to prevent it from absorbing any odors from the fridge. Properly stored, your cheesecake will last for about 5-7 days in the refrigerator. Make sure to slice individual pieces when ready to serve; this will help keep the remaining cheesecake fresh.
Freezing Options
Can you freeze cheesecake? Yes! Freezing your Heavenly Red Velvet Cheesecake is a great way to preserve it for longer periods. To freeze, first chill the cheesecake completely in the fridge. Once cooled, wrap individual slices tightly in plastic wrap, then place them in an airtight container or freezer bag. When properly frozen, your cheesecake can last up to 3 months. To thaw, simply transfer the desired slices to the refrigerator for several hours or overnight before serving.
Conclusion: The Joy of Creating Heavenly Red Velvet Cheesecake
The Heavenly Red Velvet Cheesecake is more than just a dessert; it’s an experience that brings joy and sweetness to any occasion. The combination of the rich red velvet cake and creamy cheesecake layers creates a delightful balance of flavors and textures that will leave a lasting impression on anyone who tries it. Whether you’re celebrating a special moment or simply indulging in a treat, this recipe serves as a reminder of the joy that baking can bring. Enjoy the process and savor each luscious bite of this decadent creation. With proper preparation, thoughtful garnishing, and ideal storage techniques, your cheesecake will not only impress your guests but also provide you with a sense of accomplishment and joy in your baking journey.