Introduction
Brownies are more than just a dessert; they are a cultural phenomenon cherished by dessert lovers around the world. Their rich, fudgy texture and deep chocolate flavor make them a favorite for any occasion, from casual family gatherings to elegant dinner parties. The simplicity of whipping up a batch of brownies is part of their allure, as is the joy of sharing them with others.
Today, we’re taking the classic brownie to new heights by introducing a delightful twist: OREO cookies. This beloved sandwich cookie, with its iconic chocolate wafer and creamy filling, elevates the traditional brownie to a whole new level of indulgence. The combination of rich chocolate flavors from the brownies and the unique, creamy crunch of OREO cookies creates a dessert experience that is nothing short of spectacular.
In this article, we promise to guide you through a delightful recipe that marries simplicity with decadence, ensuring you can impress your guests or treat yourself to a sweet indulgence. Get ready to bake a batch of rich chocolate OREO brownies that will leave everyone craving more!
The Allure of Chocolate OREO Brownies
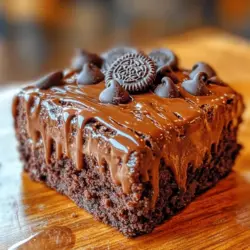
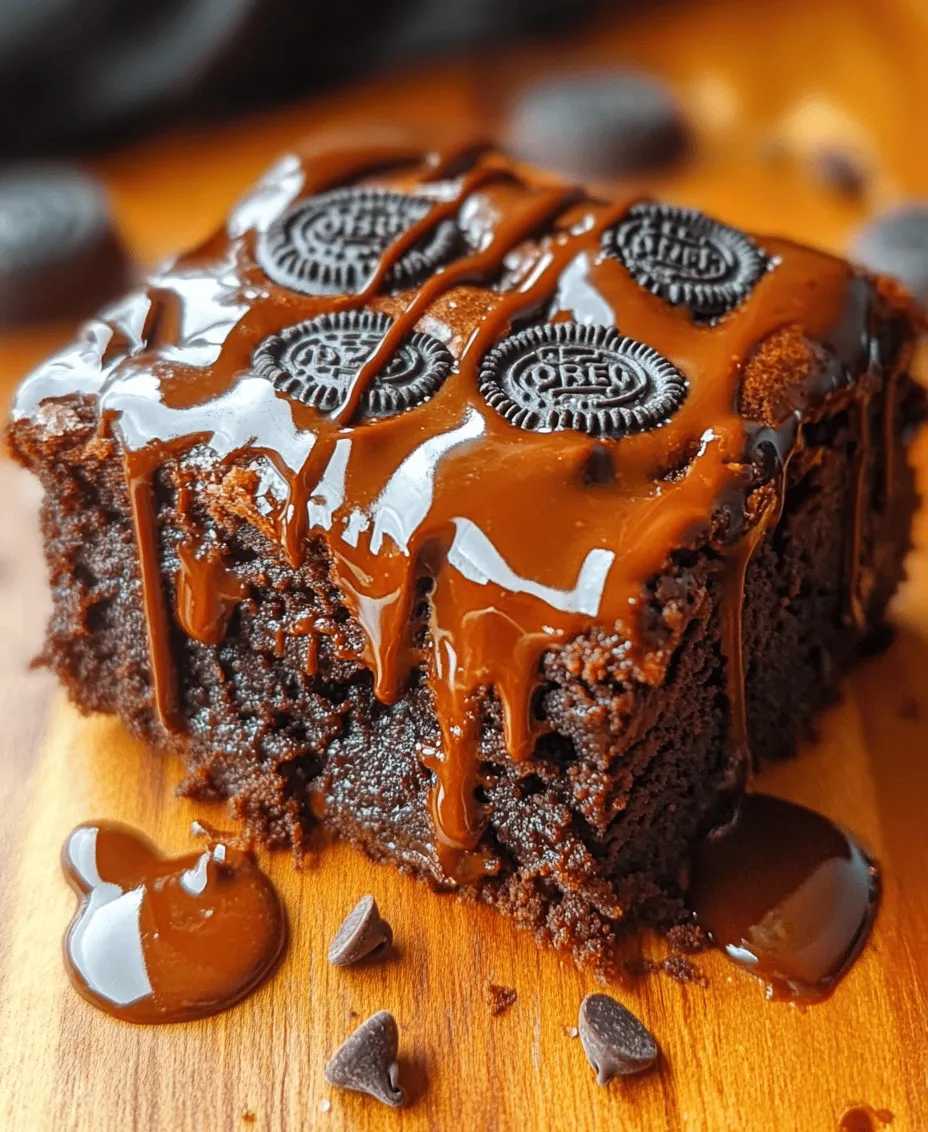
Imagine biting into a brownie that is not only dense and fudgy but also studded with chunks of OREO cookies. The taste is a harmonious blend of deep chocolate flavors, complemented by the crunchy texture of OREO wafers and the smooth creaminess of the filling. Each bite offers a delightful contrast, making these brownies irresistible.
Brownies have a rich history in dessert cuisine, originating in the United States in the late 19th century. Their versatility has allowed them to evolve, leading to countless variations. The introduction of OREO cookies into this classic recipe adds a modern twist that speaks to the contemporary palate. The combination of chocolate and OREO is not just a culinary delight; it also evokes nostalgia, reminding many of childhood treats and simple pleasures.
This unique dessert experience is what makes chocolate OREO brownies so appealing. They are not just brownies; they are a celebration of flavors and textures that will impress anyone who takes a bite. Whether you are a chocolate lover or a fan of OREO cookies, this recipe promises to satisfy your sweet tooth in the best way possible.
Ingredients Breakdown
Before we dive into the preparation, let’s take a moment to understand the key ingredients that will come together to create these decadent brownies. Each component plays a crucial role in achieving the perfect balance of flavors and textures.
– Unsalted Butter: The backbone of any brownie, unsalted butter enhances the texture and provides a rich flavor. Using unsalted butter allows you to control the saltiness of the final product, ensuring that the sweetness shines through.
– Sugars: This recipe calls for both granulated sugar and brown sugar. Granulated sugar adds sweetness and helps create a crispy top layer, while brown sugar contributes moisture and a slight chewiness, thanks to its molasses content. The combination results in brownies that are both sweet and satisfying.
– Eggs: Eggs are essential for binding the ingredients together and adding moisture to the batter. They also help to create a fluffy texture, resulting in brownies that are rich and decadent.
– Flour and Cocoa Powder: The foundation of any brownie structure is flour, which provides stability. Cocoa powder is what gives brownies their signature chocolate flavor. Using high-quality cocoa powder can significantly enhance the overall taste of the brownies.
– Semi-Sweet Chocolate Chips: These little morsels of chocolate add richness and depth to the brownies. As they melt during baking, they create pockets of gooey chocolate that enhance the overall texture.
– OREO Cookies: The star of the show! OREO cookies will be chopped and folded into the brownie batter, introducing a delightful crunch and creamy filling that complements the chocolate beautifully.
– Chocolate Fudge Sauce (optional): For those looking to take their brownies to the next level, a drizzle of chocolate fudge sauce adds an extra layer of indulgence. It’s entirely optional but highly recommended for chocolate lovers.
Understanding the role of each ingredient is essential for achieving the best results. Quality ingredients will yield the most flavorful and satisfying brownies, so take the time to select the best you can find.
Preparation Steps
Now that we have our ingredients ready, let’s walk through the steps to create these rich chocolate OREO brownies. Each step is designed to ensure that you achieve the perfect blend of flavors and textures.
Step 1: Preheat the Oven and Prepare the Baking Dish
Begin by preheating your oven to 350°F (175°C). This temperature is ideal for baking brownies, allowing them to cook evenly without burning. While the oven is heating, prepare your baking dish. You can use an 8×8-inch square pan or a 9×13-inch pan for thinner brownies. Grease the pan with butter or line it with parchment paper for easy removal later. If using parchment paper, leave some overhang to make lifting the brownies out of the pan easier once they are baked.
Step 2: Mixing the Butter and Sugars
In a medium-sized mixing bowl, melt 1 cup (2 sticks) of unsalted butter. You can do this in the microwave or on the stovetop. Once melted, let it cool slightly before adding the sugars. Combine 1 cup of granulated sugar and 1 cup of packed brown sugar into the bowl with the melted butter. Using a whisk or electric mixer, blend the butter and sugars together until they are fully combined and smooth. The mixture should be glossy and slightly thickened, indicating that the sugars are beginning to dissolve in the warm butter.
Step 3: Incorporating the Eggs
Next, crack in 4 large eggs, one at a time, mixing well after each addition. This step is crucial as it allows the eggs to incorporate fully into the batter, contributing to the overall structure and moisture of the brownies. After adding the eggs, mix in 2 teaspoons of pure vanilla extract. The vanilla adds an aromatic sweetness that enhances the chocolate flavors.
Step 4: Adding Dry Ingredients
In a separate bowl, whisk together the dry ingredients: 1 cup of all-purpose flour, 1 cup of unsweetened cocoa powder, and a pinch of salt. The flour provides the necessary structure, while the cocoa powder enriches the chocolate flavor. Gradually add the dry ingredients to the wet mixture, stirring gently until just combined. Be careful not to overmix; it’s okay if there are a few lumps remaining.
Step 5: Folding in Chocolate Chips and OREO Cookies
Now it’s time to elevate your brownies with some extra chocolate and the star ingredient—OREO cookies! Fold in 1 cup of semi-sweet chocolate chips for added richness. Then, chop about 10-12 OREO cookies into bite-sized pieces and gently fold them into the batter. The goal is to evenly distribute the OREO chunks throughout the brownie mixture without overworking the batter.
Step 6: Pouring and Spreading the Batter
Pour the brownie batter into the prepared baking dish, spreading it evenly with a spatula. Take your time to ensure an even layer, which will help the brownies bake uniformly. If you’d like, you can sprinkle a few extra chocolate chips and OREO pieces on top for an appealing presentation.
Step 7: Baking the Brownies
Place the baking dish in the preheated oven and bake for 25-30 minutes. The exact baking time may vary depending on your oven and the size of the baking dish. To check for doneness, insert a toothpick into the center of the brownies. If it comes out with a few moist crumbs, they are done. Remember, brownies will continue to cook slightly after being removed from the oven, so it’s better to err on the side of slightly underbaking for that perfect fudgy texture.
As your brownies bake, the kitchen will fill with an irresistible aroma of chocolate, making the wait even more tantalizing.
This is just the beginning of your journey to creating rich chocolate OREO brownies that promise to please any palate. Stay tuned for the next steps, where we will explore how to cool, cut, and serve these delightful treats!
Incorporating Eggs and Vanilla: Tips for Mixing Effectively
When it comes to making the perfect Rich Chocolate OREO Brownies, the way you incorporate eggs and vanilla into your batter is crucial. Begin by ensuring that your eggs are at room temperature, as this helps them mix more evenly into the batter. Crack the eggs into a separate bowl, whisk them lightly, and then add them to your melted chocolate mixture along with the vanilla extract.
Mixing should be done gently but thoroughly. Use a whisk or a hand mixer on low speed to blend until just combined. This is important; overmixing at this stage can lead to a denser brownie. You want to incorporate air into the mixture without breaking down the eggs completely. A well-mixed batter should appear smooth with a slight sheen.
Combining Dry Ingredients: Sifting for Lightness
Incorporating your dry ingredients is where the magic happens. Sifting your flour, cocoa powder, and baking powder together is essential. This not only removes any lumps but also aerates the ingredients, leading to a lighter brownie texture.
To sift, use a fine mesh sieve or a sifter. Place the dry ingredients into the sieve and shake it gently over your mixing bowl. As you sift, you can also sprinkle in the sugar to help it blend evenly. Once sifted, gently fold the dry ingredients into your wet mixture using a spatula. It is vital to mix just until you no longer see streaks of flour; overmixing here can create tough brownies.
Folding in Chocolate Chips and OREOs: Preventing Overmixing
Now it’s time to add the star ingredients: chocolate chips and chopped OREOs. Add these to your brownie batter after the dry ingredients have been incorporated. Use a spatula to carefully fold them in, ensuring an even distribution without overmixing.
Overmixing at this stage can lead to a rubbery texture, which is not what you want. You should aim for a batter that is thick and rich, with chunks of chocolate and OREO pieces peeking through.
Baking Process: How to Check for Doneness
Preheat your oven to 350°F (175°C) and prepare your baking pan by greasing it or lining it with parchment paper. Pour the brownie batter into the pan, spreading it evenly with your spatula. Bake for about 25 to 30 minutes, but start checking at the 25-minute mark.
To check for doneness, insert a toothpick into the center of the brownies. If it comes out with a few moist crumbs (but not wet batter), your brownies are ready. Remember, they will continue to cook slightly after being removed from the oven due to residual heat, so it’s better to underbake slightly than to overbake.
The Science Behind Baking Brownies: Moisture, Temperature, and Texture
Understanding the science behind baking brownies can elevate your baking skills. The key components are moisture, temperature, and texture. The balance of fat (butter), sugar, and flour is essential for achieving that fudgy center.
Using high-quality cocoa powder and chocolate contributes to a richer flavor and darker color. The baking temperature matters too; a too-hot oven can cause the edges to cook faster than the center, leading to uneven baking. A lower temperature allows for a more uniform bake and preserves moisture, resulting in the desired chewy texture.
Cooling and Serving Suggestions
Once your brownies are baked to perfection, the next step is cooling them properly. Allow the brownies to cool in the pan on a wire rack for at least 10 to 15 minutes. This cooling period is important as it allows the brownies to set, making them easier to cut into squares without crumbling.
Creative Serving Ideas
1. Drizzling with Chocolate Fudge Sauce: For an extra indulgent treat, drizzle your brownies with homemade or store-bought chocolate fudge sauce. The warm sauce will melt slightly into the brownies, creating a delicious contrast of textures.
2. Serving with Ice Cream or Whipped Cream: A scoop of vanilla ice cream or a dollop of whipped cream can take your brownies to the next level. The cold creaminess complements the warmth of the brownies beautifully.
3. Pairing with Beverages Like Coffee or Milk: Rich Chocolate OREO Brownies pair wonderfully with a glass of cold milk or a hot cup of coffee. The bitterness of coffee enhances the chocolate flavor, while milk provides a classic pairing.
Storage and Shelf Life
To keep your brownies fresh, proper storage is key. Once completely cooled, store the brownies in an airtight container at room temperature for up to 4-5 days. If you live in a warm climate, you might want to keep them in the refrigerator to prevent them from becoming too soft.
How to Freeze Brownies for Later Enjoyment
For longer storage, you can freeze brownies. Wrap them tightly in plastic wrap and then place them in a freezer-safe bag or container. They can be stored in the freezer for up to three months. When you’re ready to enjoy them, simply thaw at room temperature for a few hours or microwave for a few seconds until warmed through.
Tips on Reheating for Optimal Taste and Texture
To reheat your brownies, place them in the microwave for about 10-15 seconds. Alternatively, you can warm them in a preheated oven at 350°F (175°C) for about 5-10 minutes. This will refresh the texture and make them taste freshly baked.
Variations and Customizations
One of the best aspects of baking brownies is the ability to customize them according to your preferences. Here are some variations to consider:
Exploring Alternative Ingredients and Mix-Ins
– Different Types of Chocolate Chips: Experiment with dark, milk, or white chocolate chips. Each type will lend a different flavor profile to your brownies.
– Adding Nuts or Other Cookies for Texture: Chopped walnuts, pecans, or even other crushed cookies can provide a delightful crunch. Consider mixing in crushed peanut butter cookies for an added flavor twist.
– Making Them Gluten-Free with Alternative Flours: Swap out regular flour for almond flour or a gluten-free blend. This allows those with gluten sensitivities to enjoy these decadent brownies.
– Suggestions for Flavor Variations: Enhance your brownies with flavor variations like peppermint extract for a festive touch or swirl in caramel sauce before baking for a rich, gooey addition.
Conclusion
In conclusion, Rich Chocolate OREO Brownies are a delightful treat that combines the rich flavors of chocolate and the iconic crunch of OREOs. Their fudgy texture, complemented by chocolate chips and chunks of OREO, makes them irresistible.
Baking these brownies can be a joyous experience, and we encourage you to share the recipe with family and friends. Whether you’re baking for a special occasion or simply indulging yourself, these brownies are sure to impress. Dive into the world of baking, enjoy the process, and savor the delectable results of your homemade treats. Happy baking!