Introduction
Dessert bars have taken the culinary world by storm, becoming a favorite for both home bakers and professional chefs alike. Their popularity is not just due to their deliciousness, but also their ease of preparation. With minimal fuss and maximum flavor, dessert bars offer a delightful alternative to traditional cakes and pies. Among the myriad of options available, the Decadent Salted Caramel Butter Bars stand out as a must-try recipe for any occasion. Whether you’re hosting a gathering, celebrating a special event, or simply indulging in a sweet treat after a long day, these bars are sure to impress.
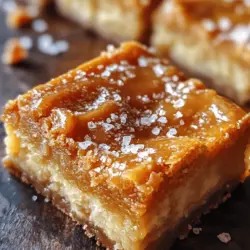
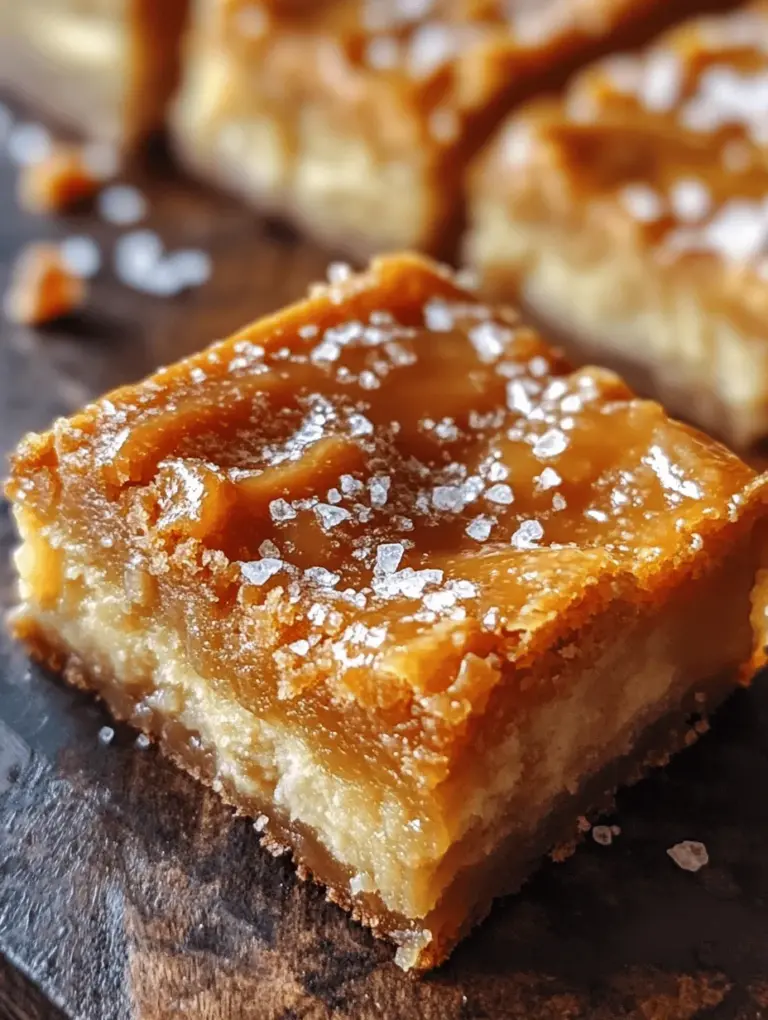
The magic of these decadent treats lies in their perfect balance of flavors. The rich, buttery base is complemented by a gooey layer of sweet caramel, while a sprinkle of sea salt elevates the overall taste experience. This harmonious blend of rich butter flavor, luscious caramel, and a hint of saltiness creates an irresistible dessert that is hard to resist. Not only do these bars deliver on flavor, but they also boast a delightful texture that combines the chewiness of caramel with the softness of the buttery crust.
Understanding the Allure of Salted Caramel
The salted caramel trend has exploded in recent years, captivating dessert lovers across the globe. This flavor combination has transcended traditional boundaries, appearing in everything from ice cream and brownies to lattes and pastries. But what makes salted caramel so appealing? The science behind this beloved pairing lies in its ability to engage our taste buds in a unique way.
At its core, the allure of salted caramel stems from the contrast between sweet and salty flavors. The sweetness of the caramel satisfies our innate craving for sugar, while the salt acts as a counterbalance that enhances the overall taste. This interplay activates different taste receptors on our tongues, creating a more complex and satisfying flavor profile. Furthermore, salt can heighten the sweetness of sugars, making the caramel taste even richer and more indulgent.
To achieve the best results in your salted caramel butter bars, it’s crucial to use high-quality ingredients. Fresh, unsalted butter adds a creamy richness, while pure vanilla extract contributes depth and warmth to the flavor. When it comes to caramel, whether you opt for homemade or store-bought, choosing a quality product will significantly impact the outcome of your dessert. High-quality ingredients not only enhance the taste but also ensure that each bite is bursting with flavor.
Ingredient Breakdown
To successfully create Decadent Salted Caramel Butter Bars, you’ll need to gather a selection of key ingredients. Each component plays a vital role in achieving the perfect texture and flavor balance.
Unsalted Butter
Butter is the star ingredient in these bars, providing both flavor and texture. Using unsalted butter allows you to control the saltiness of the final product, ensuring the perfect balance of flavors. Softened butter is essential for achieving a creamy consistency when creaming with sugars, which ultimately contributes to the tender texture of the bars.
Granulated and Brown Sugar
Both granulated and brown sugars are utilized in this recipe, each contributing unique characteristics to the final product. Granulated sugar adds sweetness and structure, while brown sugar, with its molasses content, brings moisture and a deeper flavor. This combination results in a rich and chewy texture that is oh-so-satisfying.
Eggs
Eggs are crucial in binding the ingredients together and providing moisture. They also contribute to the overall structure of the bars, ensuring they hold their shape once baked. For the best results, it’s recommended to use room temperature eggs, as they incorporate more easily into the mixture.
Vanilla Extract
Vanilla extract is a flavor enhancer that adds warmth and depth to the bars. It complements the sweetness of the caramel and the richness of the butter, rounding out the overall flavor profile. Opting for pure vanilla extract, rather than imitation, will yield a more authentic and robust flavor.
All-Purpose Flour
All-purpose flour serves as the backbone of the bars, providing structure and stability. The flour helps absorb moisture from the other ingredients, allowing the bars to bake evenly and achieve the desired texture. When measuring flour, be sure to spoon it into the measuring cup and level it off to avoid using too much.
Baking Powder
Baking powder acts as a leavening agent, helping the bars rise slightly as they bake. This results in a lighter texture, preventing the bars from becoming overly dense. Be sure to check the expiration date on your baking powder to ensure optimal effectiveness.
Salt
While it may seem counterintuitive to add salt to a sweet dessert, it plays a crucial role in enhancing the overall flavor. A small amount of salt in the dough helps to balance the sweetness of the sugars and caramel and can even amplify the flavors present in the bars. The addition of sea salt flakes as a finishing touch adds a delightful crunch and enhances the salted caramel experience.
Caramel Sauce
The star of the show is undoubtedly the caramel sauce. You have the option to make your own from scratch or use a high-quality store-bought version. If you choose to make your own, ensure that you achieve the perfect consistency—smooth and gooey, but not too runny. When selecting store-bought options, look for products that contain simple ingredients and avoid those with artificial additives.
Sea Salt Flakes
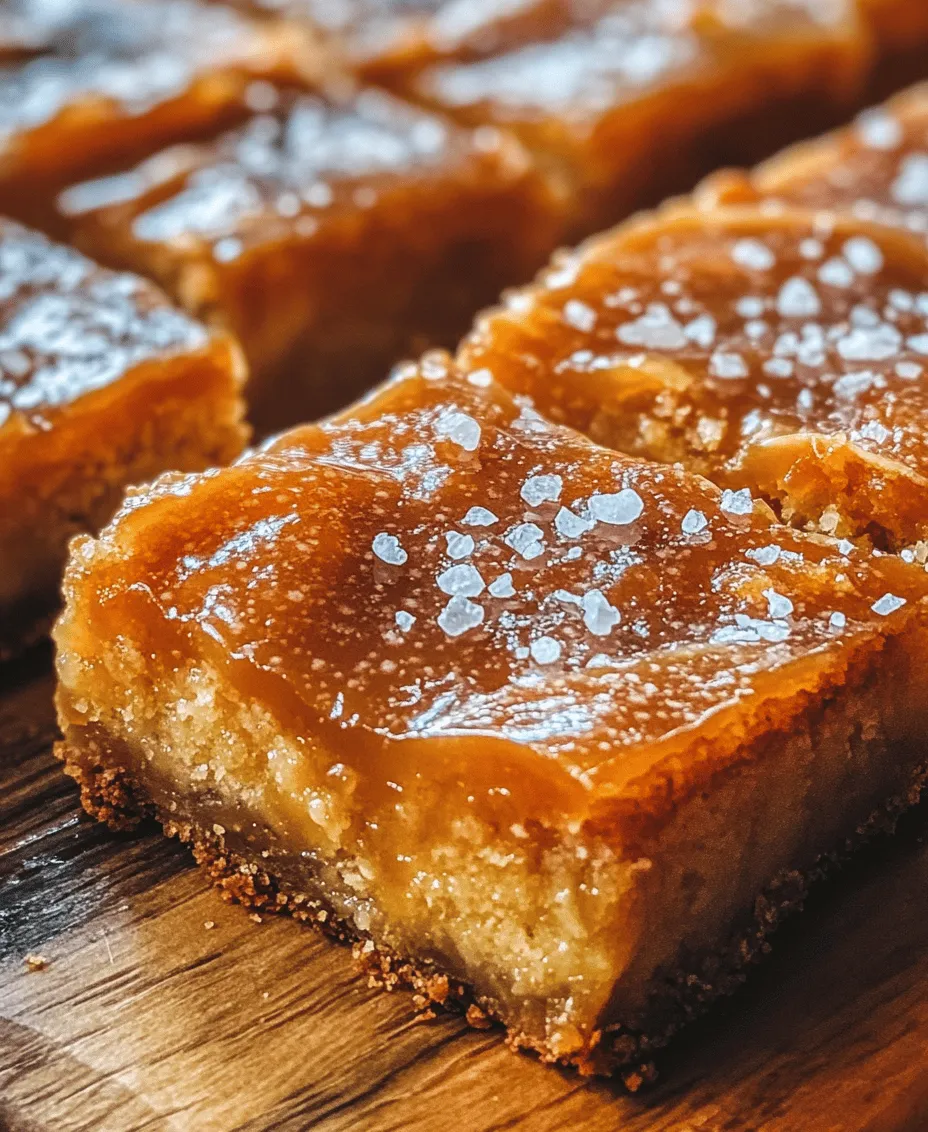
As a final flourish, a sprinkle of sea salt flakes adds not only a burst of flavor but also a beautiful presentation. The contrast of the flaky salt against the glossy caramel creates an appealing appearance and heightens the taste experience, making each bite an indulgent delight.
Step-by-Step Preparation
Now that you have a solid understanding of the ingredients, it’s time to dive into the preparation of your Decadent Salted Caramel Butter Bars. Follow these detailed instructions to ensure perfect results.
Prepping the Baking Dish
Start by preheating your oven to 350°F (175°C). While the oven heats, prepare your baking dish. Line a 9×9-inch square baking pan with parchment paper, allowing some overhang for easy removal of the bars later. This will ensure that your bars don’t stick and make for easy cleanup.
Creaming the Butter and Sugars
In a large mixing bowl, add the softened unsalted butter, granulated sugar, and brown sugar. Using an electric mixer, cream the butter and sugars together on medium speed until the mixture is light and fluffy. This process typically takes about 2-3 minutes. Properly creaming the butter and sugars is essential for achieving the right texture in your bars, as it incorporates air into the mixture, contributing to a tender crumb.
Once the mixture is fluffy, add in the eggs, one at a time, mixing well after each addition. Follow with the vanilla extract, and continue to mix until everything is well combined. The resulting batter should be smooth and creamy, with no lumps.
Combining Dry Ingredients
In a separate bowl, whisk together the all-purpose flour, baking powder, and salt. This step is vital to ensure that the leavening agent is evenly distributed throughout the flour mixture. Gradually add the dry ingredients to the wet mixture, mixing on low speed until just combined. Be careful not to overmix, as this can lead to dense bars.
Once combined, the batter will be thick and slightly sticky. Spread half of the batter evenly into the prepared baking dish, smoothing it out with a spatula to create an even layer. This will serve as the base for your salted caramel butter bars.
Creating the Caramel Layer
Next, drizzle your caramel sauce over the batter, spreading it gently to create an even layer. If you’re using homemade caramel, allow it to cool slightly before pouring it onto the bars to prevent it from melting the batter underneath.
Following the caramel layer, drop spoonfuls of the remaining batter over the top. Use a spatula or the back of a spoon to gently spread the batter, leaving some areas of caramel exposed for that delightful contrast.
Baking the Bars
Place the baking dish in the preheated oven and bake for about 25-30 minutes, or until the top is golden brown and a toothpick inserted in the center comes out clean. Be sure to keep a close eye on the bars during the last few minutes of baking to avoid overcooking, as they can quickly go from perfect to dry.
Once baked, remove the bars from the oven and allow them to cool in the pan for about 10 minutes. Then, use the parchment overhang to lift the bars out of the pan and transfer them to a wire rack to cool completely.
As they cool, this is the perfect time to prepare the finishing touch: a sprinkle of sea salt flakes over the top. This adds a beautiful presentation and enhances the overall flavor profile of your Decadent Salted Caramel Butter Bars.
Stay tuned for the next part of this article, where we’ll delve into serving suggestions, storage tips, and answers to common questions about these delightful treats. Your journey to creating the perfect salted caramel butter bars is just beginning!
Incorporating Eggs and Vanilla: The Importance of Mixing Techniques
When it comes to baking, the way you incorporate eggs and vanilla into your mixture can significantly affect the texture and flavor of your Decadent Salted Caramel Butter Bars. Begin by ensuring that your eggs are at room temperature; this allows for better emulsification and results in a smoother batter. Crack the eggs into a separate bowl and whisk them lightly before adding them to your butter and sugar mixture. This step not only helps to evenly distribute the eggs but also prevents any lumps from forming.
Add the eggs one at a time, mixing well after each addition. This gradual incorporation allows the mixture to aerate, leading to a lighter texture in your bars. Once the eggs are fully mixed in, add the vanilla extract, stirring just until combined. The aromatic essence of vanilla elevates the flavor profile, making your dessert even more irresistible.
Combining Dry Ingredients: Tips for Avoiding Lumps and Achieving a Smooth Batter
Next, it’s time to combine your dry ingredients. This step is crucial for achieving a smooth, lump-free batter. In a separate bowl, sift together all-purpose flour, baking powder, and salt. Sifting not only breaks up any clumps of flour but also aerates the mixture, resulting in a lighter and fluffier bar. If you prefer not to sift, whisk the dry ingredients thoroughly with a fork to ensure they are well combined.
When adding the dry mixture to the wet ingredients, do so in increments. Start by adding one-third of the dry mixture to the wet ingredients and gently fold it in using a rubber spatula or wooden spoon. This technique is essential to avoid overmixing, which can lead to tough bars. Continue alternating between adding the dry ingredients and folding them in until just combined. The batter should be smooth and slightly thick, ready to cradle your luscious caramel filling.
Layering the Batter and Caramel: Techniques for Even Spreading and Presentation
With your batter ready, it’s time to layer it with the caramel. Begin by pouring half of the prepared batter into a greased and lined baking pan. Using a spatula, spread it evenly to create a solid base. The key here is to ensure the base is thick enough to hold the caramel without it seeping through.
Next, drizzle your homemade or store-bought salted caramel sauce over the batter. Use a spoon or spatula to spread the caramel gently, ensuring even coverage. Avoid over-mixing the layers; you want distinct layers of batter and caramel for a beautiful presentation.
Finally, pour the remaining batter over the caramel layer. To achieve an even spread, dollop the batter in several places across the caramel layer. Then, carefully spread it out, ensuring the caramel is mostly covered. If desired, you can create a swirled effect by gently swirling a knife through the top layer and caramel, but be cautious not to disturb the layers too much.
Adding Sea Salt: Importance of the Final Touch
Before placing your bars in the oven, sprinkle a generous pinch of flaky sea salt over the top layer of batter. This final touch is crucial as it enhances the flavor of the caramel and balances the sweetness of the bars. The contrast between the rich, sweet caramel and the savory sea salt creates a sophisticated flavor profile that will leave a lasting impression on anyone lucky enough to taste them.
Baking Process and Tips for Success
Ideal Baking Time and Temperature
Preheat your oven to 350°F (175°C) and prepare for baking the salted caramel butter bars. The ideal baking time is approximately 25-30 minutes. However, ovens can vary, so it’s essential to keep an eye on your bars as they approach the end of the baking time.
How to Check for Doneness
To determine if your bars are done, look for a few key indicators. The edges should appear set and slightly golden, while the center may still look a bit soft. A toothpick inserted into the center should come out with a few moist crumbs attached, indicating that the bars are baked but still moist. Remember, they will continue to cook slightly as they cool.
Cooling and Cutting the Bars: Best Practices for Achieving Clean Edges
Once out of the oven, allow your bars to cool in the pan on a wire rack for about 15-20 minutes. This cooling period helps them set further and makes cutting easier. When ready to cut, lift the bars out of the pan using the parchment paper as handles.
For clean, even cuts, use a sharp knife and wipe it clean between cuts to prevent the caramel from sticking and pulling at the edges. Aim for squares or rectangles of your preferred size, and enjoy the beautiful layers of caramel and buttery batter.
Flavor Variations and Customizations
Adding Nuts for Crunch
For those who enjoy a little crunch, consider adding chopped nuts to your batter. Pecans or walnuts work wonderfully, adding a delightful texture that complements the creamy caramel. Simply fold in about half a cup of your chosen nuts when mixing the dry ingredients for a nutty twist.
Incorporating Chocolate Chips for Extra Richness
If chocolate is your weakness, you can incorporate chocolate chips into the batter for an extra layer of richness. Dark chocolate chips are particularly delightful, offering a contrast to the sweetness of the caramel. Add about half a cup of chocolate chips to the batter just before layering it over the caramel.
Experimenting with Different Caramel Sauces or Flavor Extracts
Feel free to personalize the caramel flavor by experimenting with different sauces. Try using homemade vanilla or espresso caramel for a unique twist. Additionally, you can infuse the batter with different flavor extracts, such as almond or hazelnut, to create a distinct taste profile that reflects your preferences.
Serving Suggestions and Pairings
Perfect Accompaniments
These Decadent Salted Caramel Butter Bars are incredibly versatile and can be served in various delightful ways. Pair them with a rich cup of coffee or espresso for a perfect afternoon treat. The bitterness of the coffee beautifully balances the sweetness of the bars.
For a more indulgent experience, serve the bars warm with a scoop of vanilla ice cream or a dollop of whipped cream. The creamy texture of the ice cream, combined with the buttery bars and luscious caramel, creates a heavenly dessert experience.
Presentation Ideas for Special Occasions or Gatherings
If you’re serving these bars at a gathering or special occasion, consider presenting them on a beautiful dessert platter. Dust the top with powdered sugar or cocoa powder for an elegant touch. You can also garnish them with fresh berries or a drizzle of extra caramel sauce for a stunning presentation that will impress your guests.
Storage and Shelf Life
Best Practices for Storing the Bars
To maintain the freshness of your salted caramel butter bars, store them in an airtight container at room temperature for up to a week. If you live in a particularly humid climate, consider refrigerating them to prevent the caramel from becoming too sticky.
Discussion on Freezing Options for Long-Term Storage
For long-term storage, these bars freeze exceptionally well. Wrap them tightly in plastic wrap and then place them in a freezer-safe container. They can be stored in the freezer for up to three months. When ready to enjoy, simply thaw them at room temperature for a few hours or overnight in the refrigerator.
Conclusion
In conclusion, Decadent Salted Caramel Butter Bars are a delightful indulgence that perfectly balances rich, buttery flavors with the lusciousness of salted caramel. Their versatility allows for various flavor and texture customizations, making them suitable for any occasion. Whether you savor them with coffee, ice cream, or on their own, these bars are sure to impress.
We encourage you to try this recipe and experience the joy of baking your own decadent dessert bars. With their charming appeal and rich flavors, salted caramel butter bars are sure to become a favorite in your baking repertoire. Embrace the pleasure of home baking and treat yourself and loved ones to this irresistible treat.