
Introduction
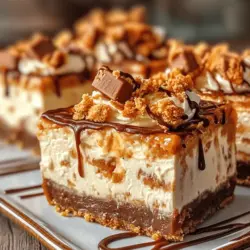
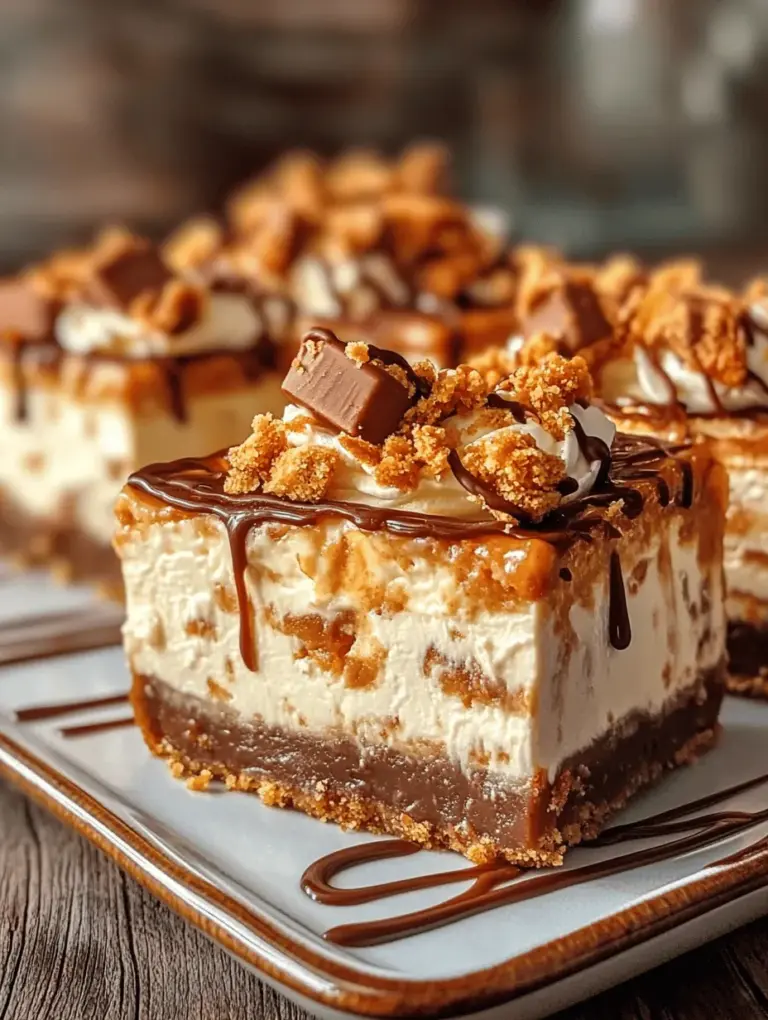
Cheesecake bars have carved out a niche for themselves as a beloved dessert option, effortlessly combining the rich, creamy goodness of cheesecake with the convenience of handheld treats. These bars are perfect for gatherings, potlucks, or even a cozy night in when you’re craving something sweet. Among the myriad of flavors available, Reese’s Butterfinger Cheesecake Bars stand out for their indulgent combination of flavors. With layers of creamy cheesecake, crunchy Butterfinger candy, and a buttery graham cracker crust, these bars cater to chocolate and peanut butter lovers alike, creating an explosion of deliciousness in every bite.
In this article, we will provide you with a detailed, step-by-step guide to making these delightful Reese’s Butterfinger Cheesecake Bars right in your own kitchen. Whether you’re a seasoned baker or a beginner, you’ll find the instructions clear and achievable, allowing you to impress your friends and family with this decadent dessert.
Understanding the Ingredients
Before we dive into the steps of creating these delectable cheesecake bars, it’s essential to understand the key ingredients that contribute to their rich flavor and texture. Each component plays a vital role in the final product, and using quality ingredients will ensure that your cheesecake bars are not just good, but outstanding.
Key Ingredients and Their Roles
1. Graham Crackers: The foundation of our cheesecake bars, graham crackers are crushed to create a crust that adds a sweet, crunchy texture. They provide the perfect balance to the creamy filling.
2. Unsalted Butter: Melted and mixed with the graham cracker crumbs, butter binds the crust together and adds richness. Using unsalted butter allows you to control the saltiness of the dish.
3. Cream Cheese: The star of the cheesecake layer, cream cheese gives the bars their signature creamy texture. It’s important to use full-fat cream cheese for a rich flavor and smooth consistency.
4. Granulated Sugar: Sweetening the cheesecake mixture, granulated sugar balances the tanginess of the cream cheese.
5. Eggs: Eggs provide structure and stability to the cheesecake, helping it to set properly as it bakes.
6. Vanilla Extract: A splash of vanilla enhances the overall flavor profile, adding a warm, aromatic quality to the cheesecake.
7. Peanut Butter: Peanut butter infuses the cheesecake layer with its signature nutty flavor and creamy texture. Opting for a natural peanut butter can bring a more authentic taste.
8. Butterfinger Candy Bars: Crushed Butterfinger bars add a delightful crunch and a sweet, buttery flavor that complements the peanut butter and chocolate notes in the recipe.
Variations and Substitutions
Understanding your audience is key, and that includes accommodating various dietary preferences. Here are a few variations and substitutions you can consider:
– Gluten-Free: Substitute traditional graham crackers with gluten-free graham crackers or crushed gluten-free cookies to create a delicious crust without gluten.
– Dairy-Free: For a dairy-free version, look for dairy-free cream cheese and use coconut oil in place of butter.
– Nut Allergies: If peanut butter is a concern, you can substitute it with sunflower seed butter or leave it out entirely for a non-nut version.
Using quality ingredients not only enhances the taste but also contributes to the texture and overall success of the dessert, making it all the more enjoyable for everyone.
Preparing the Crust
The crust is the bedrock of any cheesecake bar, providing a sturdy base that balances the creaminess of the filling. Here’s a step-by-step guide to preparing the perfect graham cracker crust for your Reese’s Butterfinger Cheesecake Bars.
Ingredients for the Crust
– 1 ½ cups graham cracker crumbs
– ½ cup unsalted butter, melted
– ¼ cup granulated sugar
Instructions
1. Preheat the Oven: Start by preheating your oven to 325°F (162°C). This temperature is ideal for baking the crust without burning it.
2. Prepare the Baking Pan: Line a 9×9 inch baking pan with parchment paper, leaving some overhang on the sides. This will make it easier to lift the cheesecake bars out of the pan once they are set.
3. Combine the Ingredients: In a medium mixing bowl, combine the graham cracker crumbs, melted butter, and granulated sugar. Stir the mixture until everything is evenly moistened. The crumbs should resemble wet sand and hold together when pressed.
4. Press the Crust Firmly: Pour the graham cracker mixture into the prepared baking pan. Using the bottom of a measuring cup or your hands, press the crumbs firmly and evenly into the bottom of the pan. This step is crucial as it ensures that the crust holds together when baked and provides a solid foundation for the cheesecake layer.
5. Bake the Crust: Place the crust in the preheated oven and bake for 8-10 minutes, until it’s lightly golden and fragrant. Keep an eye on it to avoid overbaking, as a burnt crust can detract from the overall flavor.
6. Cool the Crust: Once baked, remove the crust from the oven and allow it to cool completely in the pan. This step is important as it prevents the cheesecake layer from becoming too warm when added.
Tips for a Perfectly Baked Crust
– Make sure to press the crust into the pan evenly; uneven crust can lead to different baking times and a crumbly texture.
– If you prefer a firmer crust, you can bake it for an additional minute or two, but be careful not to let it brown too much.
– Allowing the crust to cool completely before adding the cheesecake layer is crucial for preventing the layers from mixing together.
The crust is now ready, and you’re one step closer to creating these rich and delightful Reese’s Butterfinger Cheesecake Bars!
Creating the Cheesecake Layer
Now that we have the crust prepared, it’s time to dive into the heart of this recipe: the cheesecake layer. This layer is what makes cheesecake bars so irresistible, and it’s essential to follow the steps carefully to achieve the perfect creamy texture.
Ingredients for the Cheesecake Layer
– 16 oz (2 packages) cream cheese, softened
– ¾ cup granulated sugar
– 2 large eggs
– 1 teaspoon vanilla extract
– ½ cup creamy peanut butter
– 1 cup crushed Butterfinger candy bars
Instructions
1. Prepare the Cream Cheese: Start by ensuring your cream cheese is at room temperature. This is crucial for achieving a smooth and creamy filling. If you forget to take it out in advance, you can microwave it for about 15-20 seconds to soften it quickly, but be careful not to melt it.
2. Beat the Cream Cheese: In a large mixing bowl, use an electric mixer to beat the softened cream cheese until it’s smooth and creamy, about 2-3 minutes. Scrape down the sides of the bowl to ensure everything is well incorporated.
3. Add Sugar: Gradually add the granulated sugar to the cream cheese, continuing to mix until fully combined. This step is important for sweetening the filling without creating a grainy texture.
4. Incorporate Eggs: Add the eggs, one at a time, mixing just until combined after each addition. Be careful not to overmix at this stage, as this can introduce too much air into the batter, leading to cracks in your cheesecake layer.
5. Mix in Additional Ingredients: Add the vanilla extract and creamy peanut butter, mixing on low speed until everything is just combined. The peanut butter will add a lovely flavor and creaminess to the filling.
6. Fold in Butterfinger: Gently fold in the crushed Butterfinger candy bars with a spatula. This will distribute the crunchy bits throughout the cheesecake layer, creating pockets of deliciousness.
Importance of Mixing Techniques
Achieving the right texture for your cheesecake layer is vital. Overmixing can lead to a dense filling, while undermixing can result in lumps. Here are some tips to ensure a smooth cheesecake mixture:
– Always beat the cream cheese first to break it down before introducing other ingredients.
– Add eggs one at a time and mix on low speed to maintain a creamy texture.
– Use a spatula to fold in any add-ins like crushed candy bars instead of using a mixer, which can break down the ingredients too much.
With the cheesecake layer prepared, you’re ready to move on to the baking process, where all the flavors will come together to create an unforgettable dessert. Each step is crucial, and by following these detailed instructions, you’ll be well on your way to mastering Reese’s Butterfinger Cheesecake Bars that are sure to impress.
Instructions for Baking the Cheesecake Layer
To create the perfect Reese’s Butterfinger Cheesecake Bars, it’s crucial to bake the cheesecake layer with precision. Follow these steps carefully to achieve a creamy, dense texture that complements the crunchy base and toppings beautifully.
1. Preheat the Oven: Start by preheating your oven to 325°F (160°C). This temperature is ideal for baking cheesecake, ensuring that it sets properly without browning excessively.
2. Prepare the Cheesecake Mixture: In a large mixing bowl, combine softened cream cheese and granulated sugar. Beat these ingredients together using an electric mixer on medium speed until the mixture is smooth and creamy, with no lumps remaining.
3. Incorporate Flavorings: Add in the vanilla extract and eggs, one at a time. Mix on low speed just until combined; overmixing can incorporate too much air, leading to cracks during baking.
4. Pour the Mixture Over the Crust: Once the cheesecake mixture is ready, pour it over the cooled crust layer. Use a spatula to spread it evenly, making sure to reach the edges.
5. Bake: Place the pan in the preheated oven and bake for about 30 to 35 minutes. The key visual cue for determining doneness is a slight jiggle in the center of the cheesecake. It should appear set around the edges but still have a soft, wobbly center. This indicates that it will firm up as it cools.
6. Cool Gradually: After baking, turn off the oven and crack the door open. Let the cheesecake sit in the oven for an additional 30 minutes. This gradual cooling process helps prevent cracks from forming on the surface.
7. Chill in the Refrigerator: Once the cheesecake has cooled to room temperature, cover it loosely with plastic wrap and refrigerate for at least 4 hours, or preferably overnight. This chilling period is essential for achieving the creamy texture that makes cheesecake so delightful.
Adding the Toppings
Now that your cheesecake layer has cooled and set perfectly, it’s time to add the toppings that will elevate these bars to a whole new level of indulgence.
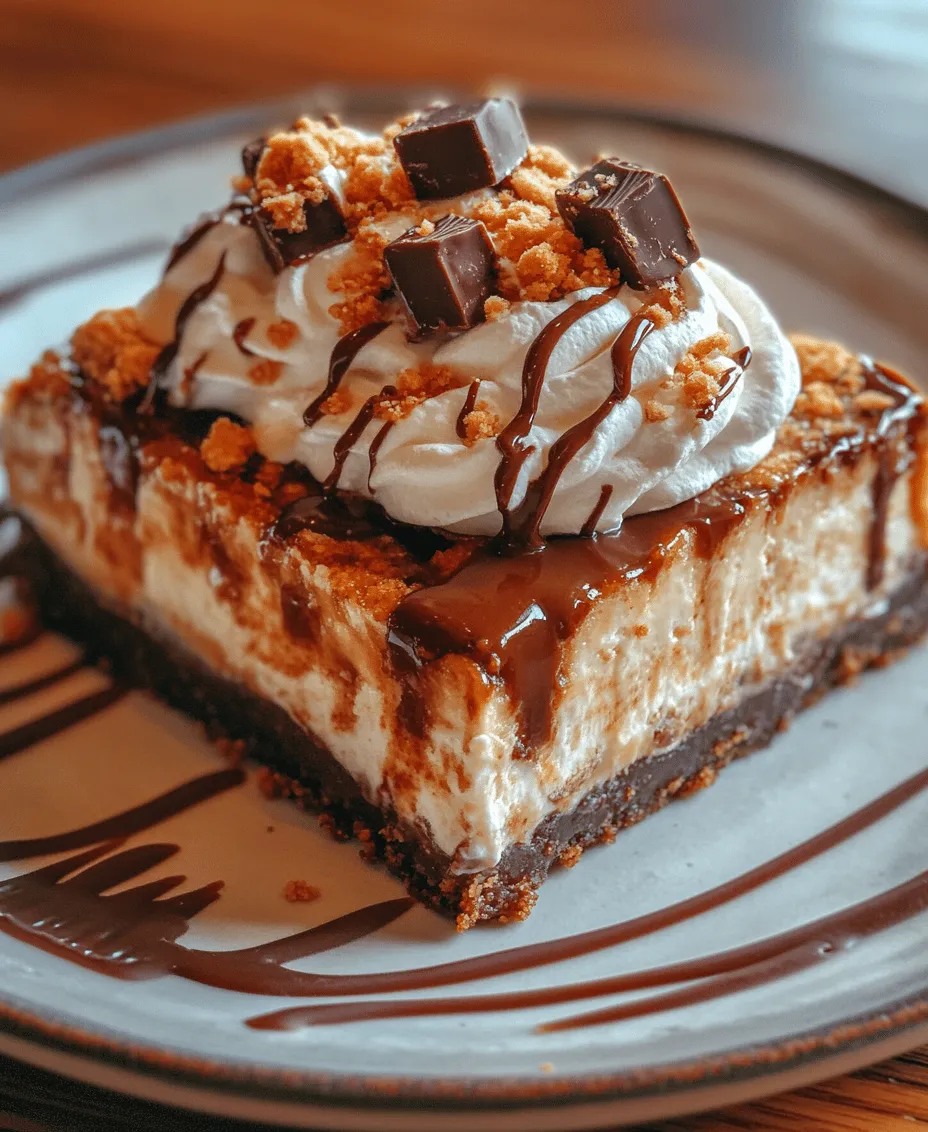
How to Make and Apply the Whipped Cream Topping
1. Prepare the Whipped Cream: In a chilled mixing bowl, add heavy whipping cream and powdered sugar. Using an electric mixer, whip on high speed until stiff peaks form. This usually takes about 3-5 minutes.
2. Spread the Whipped Cream: Once your cheesecake is fully set and chilled, carefully spread the whipped cream topping over the cheesecake layer using an offset spatula for a smooth finish. Be gentle to avoid disturbing the cheesecake layer beneath.
Creative Garnishing Ideas
To make your Reese’s Butterfinger Cheesecake Bars even more enticing, consider the following garnishing ideas:
– Chop and Scatter: Coarsely chop Reese’s Peanut Butter Cups and Butterfinger bars and sprinkle them generously over the whipped cream topping. This adds texture and enhances the flavor profile, giving each bite a delightful crunch.
– Drizzle with Chocolate Sauce: Melt some chocolate chips and drizzle the warm chocolate sauce over the whipped cream and toppings. This not only adds a rich chocolate flavor but also creates an eye-catching visual contrast.
– Peanut Butter Drizzle: For an extra touch of decadence, melt some peanut butter and drizzle it over the top. This extra layer of flavor will be a hit with peanut butter lovers.
Tips for Drizzling Chocolate Sauce Artistically
To achieve a beautiful, artistic drizzle, follow these tips:
– Use a Squeeze Bottle: Pour the melted chocolate into a squeeze bottle for better control when drizzling. This allows for finer lines and more intricate designs.
– Create Patterns: Start by drizzling in one direction (e.g., horizontally) and then switch to a contrasting direction (e.g., vertically) to create a crisscross pattern.
– Use a Spoon for Larger Drizzles: If you prefer larger, more dramatic drizzles, use a spoon to flick the chocolate in various patterns across the top.
Serving Suggestions
Cutting and serving your cheesecake bars beautifully can enhance the overall enjoyment of this delightful dessert.
Best Practices for Cutting and Serving
1. Use a Sharp Knife: For clean cuts, use a sharp knife dipped in hot water. Wipe the knife clean between cuts to maintain neat edges.
2. Portion Size: Aim for small squares or rectangles, as the cheesecake bars are rich and indulgent. A 2-inch square is often a perfect serving size.
3. Presentation: Serve cheesecake bars on a decorative platter or individual dessert plates. Garnish each plate with a dollop of extra whipped cream and a sprinkle of chopped Reese’s and Butterfinger for a polished look.
Beverage Pairing Recommendations
To elevate your dessert experience, consider pairing these cheesecake bars with:
– Coffee: A rich cup of coffee complements the sweetness of the cheesecake and cuts through its richness. Espresso or dark roast coffee works particularly well.
– Milk: A classic pairing, milk balances the flavors and richness of the bars, making it a perfect accompaniment for kids and adults alike.
– Dessert Wine: A light dessert wine, such as a Moscato or a late-harvest Riesling, can add a delightful fruity contrast to the rich, chocolatey flavors of the cheesecake.
Storage and Freshness
Proper storage is essential to maintain the quality and freshness of your Reese’s Butterfinger Cheesecake Bars.
Guidelines for Storing Leftovers
1. Refrigeration: Store any leftover cheesecake bars in an airtight container in the refrigerator. They will stay fresh for up to 5 days.
2. Avoid Sogginess: To prevent the crust from becoming soggy, it’s best to store the cheesecake bars without the whipped cream topping. You can prepare the whipped topping fresh when you’re ready to serve.
Freezing for Longer Storage
If you want to keep these bars for longer, freezing is a great option.
1. Wrap Properly: Cut the cheesecake into individual bars and wrap each piece tightly in plastic wrap. Then place the wrapped bars in a freezer-safe container or freezer bag.
2. Freezing Duration: The cheesecake bars can be frozen for up to 2 months without losing flavor or texture.
3. Defrosting: To defrost, remove the desired number of bars from the freezer and place them in the refrigerator for several hours or overnight. This slow thawing method helps maintain the creamy texture.
Nutritional Information
Understanding the nutritional content of your delicious dessert can help you enjoy it responsibly.
Nutritional Overview
On average, a single serving (2-inch square) of Reese’s Butterfinger Cheesecake Bars contains approximately:
– Calories: 350-400
– Fat: 25g (with a mix of saturated and unsaturated fats)
– Sugar: 22g
– Protein: 6g
Portion Sizes and Recommendations
Given the richness of these cheesecake bars, it’s best to indulge in moderation. One serving is typically enough to satisfy your sweet tooth, but you can always enjoy a second piece after a meal or during a special occasion.
Conclusion
Reese’s Butterfinger Cheesecake Bars are truly a delightful dessert that brings together the beloved flavors of chocolate, peanut butter, and crunchy candy. With their creamy texture, sweet toppings, and satisfying crunch, these bars are perfect for gatherings, celebrations, or simply as a treat for yourself. Homemade desserts like these not only showcase your culinary skills but also create lasting memories when shared with family and friends.
So, gather your ingredients, follow these detailed steps, and embark on a delicious baking adventure. You’ll be rewarded with a dessert that’s sure to impress, satisfy, and bring joy to everyone who tries it. Enjoy the process, and happy baking!