Introduction
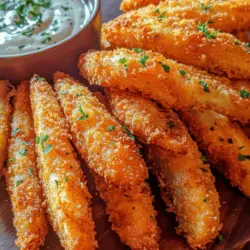
Fried pickles have become a beloved snack and appetizer, captivating food enthusiasts across the United States and beyond. Their crispy exterior and tangy, juicy interior create an irresistible contrast, making them a popular choice at parties, bars, and family gatherings. Among the various interpretations of this classic dish, the Crunchy Dill Delight Fried Pickles stand out with their unique flavor profile that combines the zesty notes of dill with the satisfying crunch of a perfectly fried coating.
This recipe is not only delicious but also remarkably simple, making it accessible for both novice and experienced cooks alike. With just a handful of ingredients and straightforward steps, you can whip up a batch of these delightful fried pickles that are sure to impress your friends and family. Whether served as a game day snack or an appetizer at your next dinner party, they are bound to be a hit.
The Allure of Fried Pickles
Fried pickles have a rich history in American cuisine, with origins that can be traced back to the Southern United States. While the exact inception of fried pickles is a matter of debate, many believe they were first popularized in the 1960s at a restaurant in Atkins, Arkansas. Since then, fried pickles have become synonymous with Southern cooking, appearing on menus in diners, bars, and restaurants across the region.
The appeal of fried pickles extends beyond the South, however. As they gained popularity, variations of this delightful snack began to emerge in different cultures and regions. From dill pickle spears to chips, and even spicy versions featuring jalapeños, the possibilities for fried pickles are endless. Each variation showcases the versatility of pickles as an ingredient, allowing cooks to experiment with flavors and textures.
Key Ingredients for Crunchy Dill Delight Fried Pickles
To create the perfect batch of Crunchy Dill Delight Fried Pickles, it’s essential to gather the right ingredients. This recipe focuses on a few key components that contribute to the overall flavor and texture of the dish.
Dill Pickles
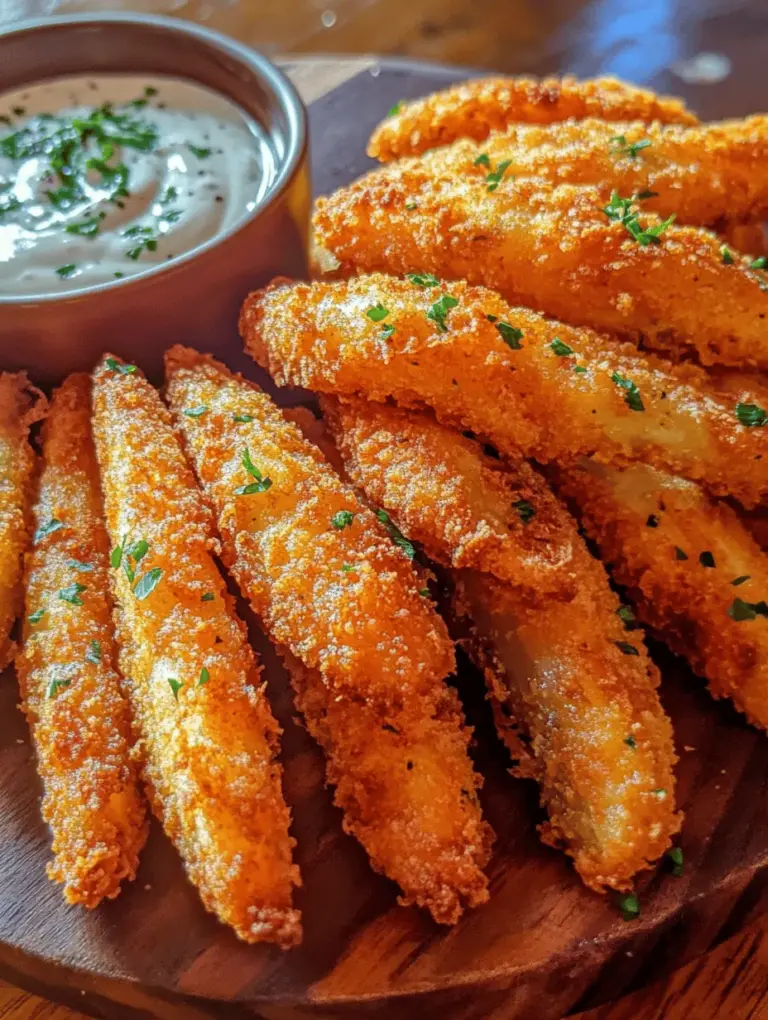
At the heart of this recipe are the dill pickles themselves. Their tangy, salty flavor is the star of the show, providing a refreshing contrast to the rich, crispy coating. When selecting dill pickles for frying, opt for whole pickles or spears rather than slices, as they hold up better during the frying process and create a more satisfying bite.
Seasoning
The seasoning blend is crucial in elevating the flavor profile of the fried pickles. This recipe calls for garlic powder, onion powder, cayenne pepper, smoked paprika, salt, and black pepper. Each of these ingredients plays a specific role:
– Garlic Powder and Onion Powder: Add depth and savory flavor to the coating.
– Cayenne Pepper: Introduces a subtle kick that enhances the overall taste without overwhelming the palate.
– Smoked Paprika: Provides a hint of smokiness, adding complexity to the dish.
– Salt and Black Pepper: Essential for balancing flavors and enhancing the natural taste of the pickles.
Buttermilk
Buttermilk is a key ingredient in this recipe, as it not only helps to tenderize the pickles but also creates a deliciously thick coating that adheres well during frying. The acidity of buttermilk enhances the flavor and contributes to the overall crispy texture of the fried pickles.
Cornmeal
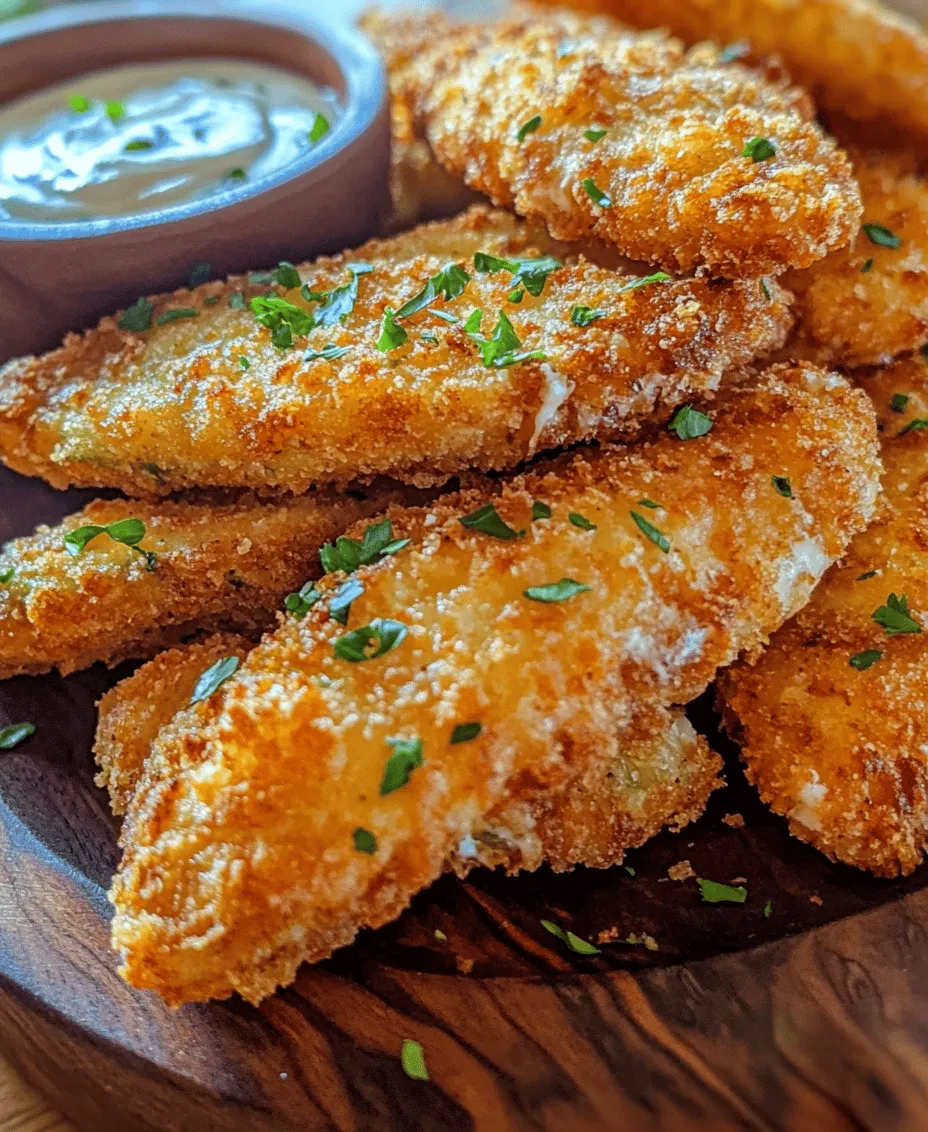
For that signature crunch, cornmeal is an indispensable ingredient in the coating mixture. It adds a delightful texture that complements the pickles while providing a golden-brown color when fried. Combining cornmeal with all-purpose flour creates the perfect balance between crunch and tenderness.
Vegetable Oil
Finally, the choice of vegetable oil for frying is important. Look for oils with a high smoke point, such as canola oil or peanut oil, which will allow for even cooking and prevent the coating from burning. The right oil ensures that your fried pickles are crispy on the outside and tender on the inside, delivering the ultimate fried pickle experience.
Step-by-Step Guide to Making Crunchy Dill Delight Fried Pickles
Now that you have a clear understanding of the key ingredients, it’s time to dive into the step-by-step process of making Crunchy Dill Delight Fried Pickles. Follow these simple instructions to achieve the perfect batch of crispy, flavorful pickles.
Step 1: Prepare the Pickles
Start by draining the dill pickles from their brine. For optimal results, allow them to sit on paper towels for at least 15 minutes to remove excess moisture. This step is crucial, as excess moisture can lead to a soggy coating during frying.
Step 2: Create the Coating Mixture
In a large mixing bowl, combine the all-purpose flour, cornmeal, garlic powder, onion powder, cayenne pepper, smoked paprika, salt, and black pepper. Whisk together until well combined, ensuring that the seasonings are evenly distributed throughout the dry ingredients.
Step 3: Set Up the Buttermilk Bath
In a separate bowl, pour in the buttermilk. This will serve as the binding agent for the coating. Dip each pickle into the buttermilk, making sure it’s fully coated before transferring it to the dry coating mixture.
Step 4: Coat the Pickles
Once the pickles are dipped in buttermilk, take them one at a time and place them into the coating mixture. Gently toss or press the pickles into the mixture, ensuring they are evenly coated on all sides. This step is essential for achieving that crunchy exterior.
Step 5: Heat the Oil
In a deep frying pan or Dutch oven, heat your chosen vegetable oil over medium-high heat until it reaches 350°F (175°C). Use a thermometer to monitor the temperature, as frying at the right heat is crucial for ensuring the pickles cook evenly and become crispy without absorbing excess oil.
Step 6: Fry the Pickles
Carefully place a few coated pickles into the hot oil, being careful not to overcrowd the pan. Fry for about 3-4 minutes or until they are golden brown and crispy. Use a slotted spoon to turn them occasionally for even cooking. Once they’re done, transfer the fried pickles to a plate lined with paper towels to drain any excess oil.
Step 7: Serve and Enjoy
After frying all the pickles, serve them warm with your favorite dipping sauce—ranch dressing, spicy mayo, or even a tangy aioli are perfect accompaniments. The combination of flavors and textures will surely delight your taste buds, making these Crunchy Dill Delight Fried Pickles a snack to remember.
By following these steps, you’ll be well on your way to creating a delicious treat that is perfect for sharing or enjoying solo. Stay tuned for more tips and variations on this classic recipe!
Crunchy Dill Delight Fried Pickles: A Complete Guide
Detailed Preparation of the Pickles
To achieve the perfect Crunchy Dill Delight Fried Pickles, the preparation of the pickles is crucial. Begin by selecting high-quality dill pickles, as the flavor of the pickles will significantly influence the overall taste of the dish.
1. Draining: Start by removing the pickles from their jar. Place them in a colander to drain any excess brine. Allow the pickles to sit for about 10-15 minutes. This step is essential because excess moisture can lead to soggy fried pickles.
2. Drying: After draining, pat the pickles dry with paper towels. This will further reduce moisture and help achieve that desired crispiness. It’s imperative to ensure that the pickles are as dry as possible because any water can make the breading soggy during frying.
Creating the Breading Station
A well-organized breading station is essential for achieving the perfect coating on your fried pickles.
1. Mixing Dry Ingredients: In one shallow bowl, combine the following dry ingredients:
– 1 cup all-purpose flour
– 1/2 cup cornmeal
– 1 teaspoon garlic powder
– 1 teaspoon onion powder
– 1 teaspoon paprika
– Salt and pepper to taste
Whisk the mixture until well combined. The cornmeal will provide a delightful crunch, while the spices add depth to the flavor.
2. Preparing Wet Ingredients: In another shallow bowl, whisk together:
– 1 large egg
– 1/2 cup buttermilk (or milk of choice)
This wet mixture will help the dry ingredients adhere to the pickles, creating that perfect crisp coating.
The Dredging Process
Now that your breading station is set up, it’s time to dredge the pickles for maximum flavor and texture.
1. Coating the Pickles: Take each pickle slice and dip it into the wet mixture, ensuring it is fully coated.
2. Shaking Off Excess: Allow any excess wet mixture to drip off before moving to the next step.
3. Coating in Dry Mixture: Next, transfer the wet-coated pickle to the dry mixture. Use your other hand to sprinkle the dry mixture over the pickle slice while pressing gently to ensure an even coating.
4. Repeat: Continue this process with all the pickle slices until they are fully coated. It’s important to maintain the integrity of the pickle slices as you coat them, so handle them gently.
Tips for Heating Oil to the Perfect Frying Temperature
The right frying temperature is key to achieving crispy fried pickles.
1. Choosing the Right Oil: Use an oil with a high smoke point, such as canola oil or peanut oil. These oils can withstand high temperatures without burning.
2. Heating the Oil: In a large, deep skillet or Dutch oven, pour in enough oil to cover the bottom by at least an inch. Heat the oil over medium-high heat until it reaches 350°F (175°C).
3. Safety Measures: Use a candy thermometer or a deep-fry thermometer to monitor the oil temperature. If you don’t have one, you can drop a small piece of bread into the oil; if it bubbles and browns in about 60 seconds, the oil is ready.
The Frying Technique
Frying pickles can be straightforward if done correctly.
1. Frying in Batches: Carefully add a few coated pickle slices to the hot oil, ensuring not to overcrowd the pan. Overcrowding can lower the oil temperature, resulting in greasy pickles.
2. Cooking Time: Fry the pickles for about 2-3 minutes on each side, or until they achieve a golden brown color.
3. Flipping: Use a slotted spoon to gently flip the pickles halfway through cooking to ensure even browning.
4. Removing from Oil: Once cooked, use the slotted spoon to remove the fried pickles from the oil and transfer them to a plate lined with paper towels to absorb excess oil.
Draining Excess Oil
This step is crucial for ensuring that your fried pickles are not greasy.
1. Importance of Draining: Allow the pickles to sit on the paper towels for a few minutes. This will help remove any lingering oil, leaving you with perfectly crispy fried pickles.
Serving Suggestions and Pairings
Fried pickles are delicious on their own, but they shine even brighter with the right accompaniments.
1. Dipping Sauces: Classic ranch dressing is a favorite pairing, but feel free to explore variations:
– Spicy sriracha ranch
– Creamy dill dip
– Garlic aioli
– Honey mustard sauce
2. Ideas for Serving: Fried pickles can serve multiple purposes:
– As an appetizer at parties or gatherings
– As a side dish to accompany burgers or sandwiches
– As a snack for movie nights or casual get-togethers
3. Creative Serving Ideas: Elevate your presentation by:
– Garnishing with fresh herbs, such as parsley or dill
– Serving on a rustic wooden board
– Accompanying with a variety of dipping sauces in small bowls
Nutritional Information
Understanding the nutritional profile of your homemade fried pickles can help you make informed choices.
1. Overview of Nutritional Profile: A serving of fried pickles (about 5 pieces) contains approximately:
– Calories: 220
– Fat: 12g
– Carbohydrates: 25g
– Protein: 3g
2. Portion Sizes and Dietary Needs: Adjust your portion sizes based on your dietary requirements. Fried pickles can be part of a balanced diet when consumed in moderation.
3. Comparisons to Store-Bought Options: Homemade fried pickles often contain fewer preservatives and additives than store-bought varieties. You have control over the ingredients, making them a healthier choice.
Conclusion
Crunchy Dill Delight Fried Pickles bring a delightful combination of flavors and textures that can satisfy any craving. The crispy exterior encases the tangy pickle, making for an irresistible snack or appetizer. Making this recipe at home provides an opportunity for culinary creativity and enjoyment. Gather your friends and family, whip up a batch of fried pickles, and relish the delightful experience of sharing good food. The joy of cooking and the satisfaction of creating something delicious from scratch will enhance your mealtime gatherings and create lasting memories. Try making this recipe at home today for a fun and tasty experience that everyone will love.