Introduction
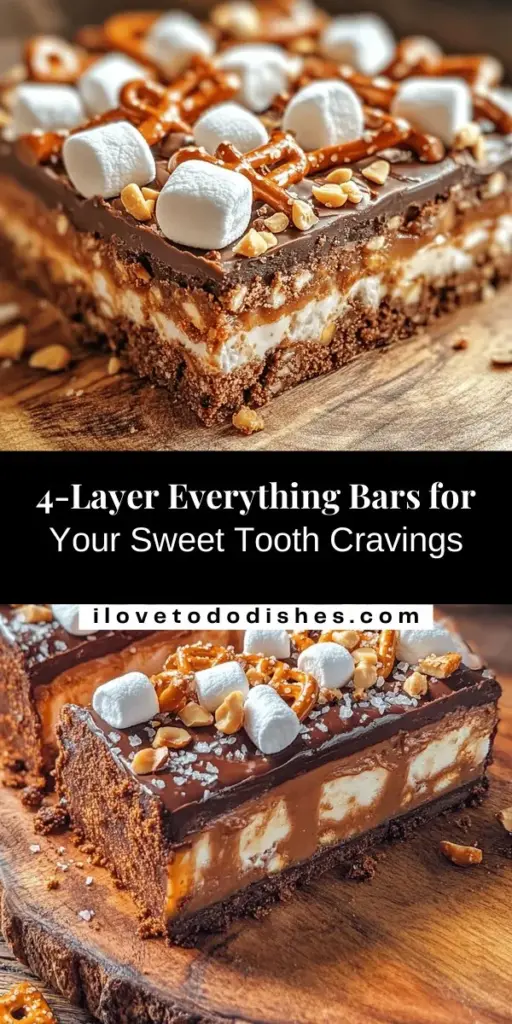
Dessert bars have taken the culinary world by storm, offering a delightful combination of flavors and textures that are both easy to prepare and utterly satisfying. Their popularity can be attributed to their versatility, portability, and the sheer variety of ingredients that can be used to create unique flavor profiles. Among the most enticing options available, the “4-Layer Everything Bars” stand out as a tantalizing treat that promises to appeal to dessert lovers of all ages.
But what exactly are 4-Layer Everything Bars? As the name suggests, these bars boast four distinct layers, each contributing its own unique taste and texture to the overall experience. The beauty of these bars lies in their ability to harmoniously blend flavors, from the rich, chocolatey crumb base to the creamy peanut butter layer and the luscious chocolate topping. Each bite is a delightful journey through contrasting yet complementary flavors, making them a must-try for anyone looking to indulge their sweet tooth.
In this article, we will delve into the creation of these bars, breaking down the recipe into manageable sections that highlight each component’s importance. By the end, you will have a thorough understanding of how to craft your own 4-Layer Everything Bars, perfect for parties, family gatherings, or simply as a sweet treat to enjoy at home.
Understanding the Layers of 4-Layer Everything Bars
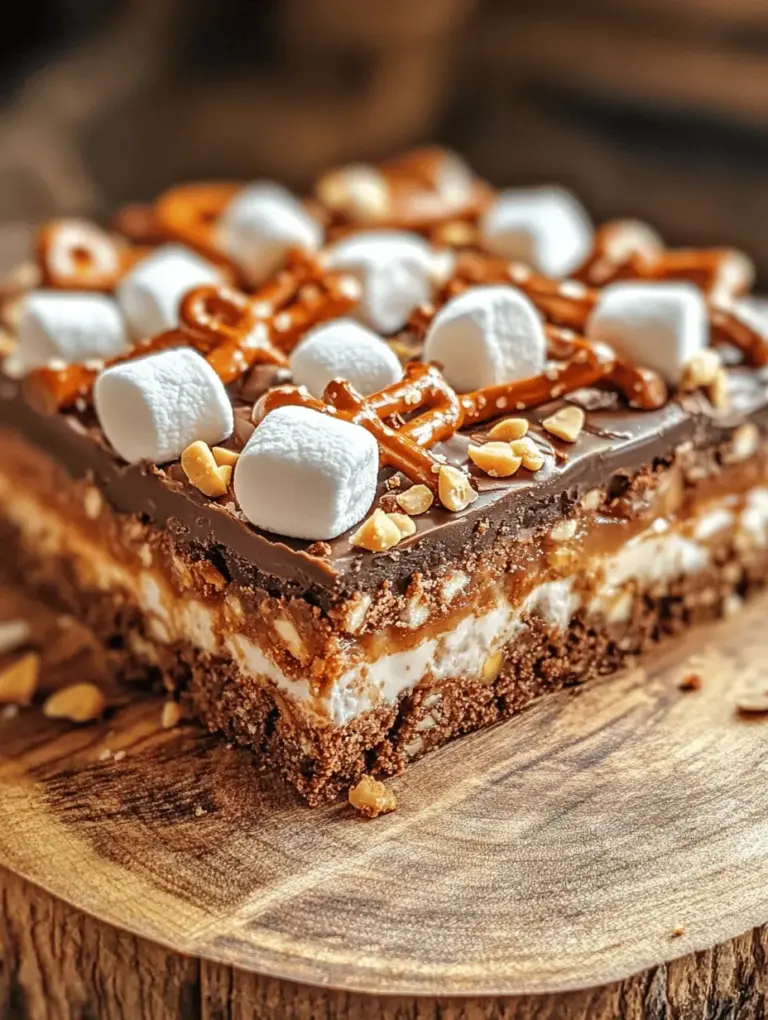
The magic of 4-Layer Everything Bars lies in their multi-layered approach, which offers a complex yet satisfying taste experience. Each layer plays a crucial role in contributing to the overall flavor profile and texture of the bars, creating a delightful contrast that keeps you coming back for more.
1. The Crumb Base: This foundational layer provides a sturdy yet crumbly texture that contrasts beautifully with the creaminess of the layers above. Made primarily from graham cracker crumbs and cocoa powder, it offers a slightly sweet and chocolatey flavor that sets the stage for the richer layers to follow.
2. The Peanut Butter Layer: This layer introduces a creamy, nutty element that is both indulgent and satisfying. The choice between creamy and crunchy peanut butter allows you to customize the bars according to your preference, adding a delightful richness that complements the other flavors.
3. The Chocolate Layer: The crowning glory of these bars, the chocolate layer is a decadent touch that elevates the entire dessert. Made with high-quality chocolate and heavy cream, it brings a rich, velvety texture that perfectly balances the sweetness of the other layers.
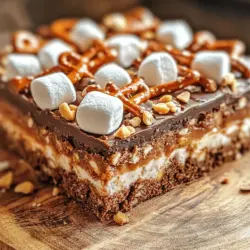
4. The Topping: Often a combination of chocolate chips, nuts, or even a drizzle of caramel, this final layer adds visual appeal and an extra crunch that enhances the overall experience.
Together, these layers create a dessert that is not only visually stunning but also an explosion of flavors. Each bite reveals a new combination of textures and tastes, making 4-Layer Everything Bars a show-stopping addition to any dessert table.
The Crumb Base: A Solid Foundation
Before diving into the layers of creamy peanut butter and rich chocolate, we must first establish a solid foundation: the crumb base. This essential component is what holds the bars together while providing a delightful crunch that contrasts with the softer layers above.
Ingredients for the Crumb Base
To create the perfect crumb base, you will need the following ingredients:
– Graham cracker crumbs: The primary ingredient that provides a sweet, slightly nutty flavor and a crumbly texture.
– Cocoa powder: This ingredient adds a rich chocolate flavor, enhancing the overall taste of the bars.
– Granulated sugar: For added sweetness and to balance the flavors.
– Melted butter: This binds the dry ingredients together and adds richness to the base.
Importance of Graham Cracker Crumbs and Cocoa Powder
Graham cracker crumbs are a classic ingredient in many dessert recipes, particularly in no-bake desserts and bars. They provide a naturally sweet flavor and a delightful crunch, which is essential for creating a sturdy base. The addition of cocoa powder elevates the flavor profile, giving the bars a chocolatey undertone that pairs beautifully with the peanut butter and chocolate layers.
Step-by-Step Guide to Preparing the Crumb Base
1. Preheat your oven: Start by preheating your oven to 350°F (175°C). This will ensure that the crumb base bakes evenly and develops a nice golden color.
2. Mix dry ingredients: In a large mixing bowl, combine 1 ½ cups of graham cracker crumbs, ½ cup of cocoa powder, and ¼ cup of granulated sugar. Whisk together until well combined, making sure there are no clumps.
3. Add melted butter: Pour in ½ cup of melted butter and mix with a spatula or your hands until the mixture resembles wet sand. The butter will help bind the dry ingredients together, creating a cohesive base.
4. Press into the pan: Line an 8×8 inch baking dish with parchment paper for easy removal. Pour the crumb mixture into the prepared pan and press it down firmly using the back of a measuring cup or your hands. Be sure to create an even layer, as this will help the bars hold their shape once baked.
5. Bake the base: Place the pan in the preheated oven and bake for 10-12 minutes or until the edges are slightly crisp and the center looks set. Baking the base helps to develop its flavor and provides a sturdy foundation for the layers above.
Baking Tips for Achieving the Perfect Crust
– Don’t overbake: Keep a close eye on the crumb base while it bakes. Overbaking can lead to a dry texture, so remove it from the oven as soon as it’s set and lightly golden.
– Let it cool: Once baked, allow the crumb base to cool completely in the pan before adding the next layer. This will help maintain the texture and prevent the layers from sliding off.
With a perfectly baked crumb base ready, you are now prepared to move on to the next delicious layer: the creamy peanut butter layer that will elevate your 4-Layer Everything Bars to new heights.
Crafting the Peanut Butter Layer: Creamy Indulgence
The peanut butter layer is where the magic truly begins. This rich, creamy layer adds a decadent touch that perfectly complements the chocolatey crumb base and the luscious chocolate topping.
Overview of the Peanut Butter Layer’s Role
In the context of 4-Layer Everything Bars, the peanut butter layer serves not only as a delicious filling but also as a bridge between the crunchy base and the smooth chocolate topping. Its creaminess balances out the other textures and flavors, creating a harmonious blend that is sure to please.
Discussion of Ingredient Choices
When it comes to peanut butter, the choice between creamy and crunchy can make a significant difference in the final texture of the bars.
– Creamy peanut butter: This will yield a smooth, velvety layer that spreads easily and blends seamlessly with the other ingredients.
– Crunchy peanut butter: Opting for this variety will add delightful texture and little bursts of peanut flavor, making for a more interesting bite.
Feel free to choose the type that best suits your taste preferences!
Detailed Instructions for Making the Peanut Butter Layer
1. Gather ingredients: For the peanut butter layer, you will need:
– 1 cup of creamy or crunchy peanut butter
– ½ cup of powdered sugar
– ½ cup of softened cream cheese (for added richness)
– 1 teaspoon of vanilla extract
2. Mix the ingredients: In a medium mixing bowl, combine the peanut butter, powdered sugar, cream cheese, and vanilla extract. Using an electric mixer, beat the mixture on medium speed until smooth and creamy, about 2-3 minutes. Be sure to scrape down the sides of the bowl occasionally to ensure even mixing.
3. Spread on the crust: Once the crumb base has cooled completely, carefully spread the peanut butter mixture evenly over the crust using a spatula. Be gentle to avoid disturbing the base.
4. Chill the layer: Place the pan in the refrigerator for about 30 minutes to allow the peanut butter layer to set. This step is crucial for achieving the right texture when the bars are cut.
Importance of Chilling for the Right Texture
Chilling the peanut butter layer not only helps it firm up but also allows the flavors to meld together, resulting in a more cohesive and rich taste. Skipping this step can lead to a layer that is too soft and difficult to cut cleanly, so be patient and give it the time it deserves.
As we continue our culinary journey, the next step involves crafting the decadent chocolate layer that will crown our 4-Layer Everything Bars. The richness of this layer is essential to the overall dessert, providing a luxurious finish that is sure to impress.
Melting the Chocolate Layer: A Decadent Touch
The chocolate layer acts as the finishing touch to the 4-Layer Everything Bars, adding both richness and visual appeal. It creates a stunning contrast against the creamy peanut butter layer and provides a satisfying snap when bitten into.
The Significance of the Chocolate Layer
This layer is essential not just for its flavor but also for its texture. A properly prepared chocolate layer should be smooth, glossy, and easy to slice, enhancing the overall experience of the bars. The combination of chocolate and heavy cream creates a ganache-like consistency that is both indulgent and satisfying.
Explanation of Chocolate Chip Selection and Heavy Cream Pairing
Choosing the right chocolate chips is crucial for achieving the desired flavor and texture. Here are some options:
– Semi-sweet chocolate chips: These are a popular choice and provide a balanced sweetness that pairs well with the other layers.
– Dark chocolate chips: For a more intense chocolate flavor, consider using dark chocolate. This will enhance the richness of the bars.
– Milk chocolate chips: If you prefer a sweeter, creamier profile, milk chocolate chips can be used.
Regardless of your choice, ensure you are using high-quality chocolate for the best results.
Step-by-Step Instructions for Creating a Smooth Chocolate Layer
1. Gather ingredients: For the chocolate layer, you will need:
– 1 cup of chocolate chips (choose your preferred type)
– ½ cup of heavy cream
2. Heat the cream: In a small saucepan over medium heat, warm the heavy cream until it begins to simmer. Avoid boiling.
3. Melt the chocolate: Once the cream is hot, remove it from the heat and pour it over the chocolate chips in a heatproof bowl. Let it sit for about 1-2 minutes to allow the chocolate to soften.
4. Stir to combine: After the resting time, use a whisk or spatula to gently stir the mixture until smooth and glossy. If needed, you can place the bowl over a pot of simmering water (double boiler method) to help melt the chocolate fully.
5. Pour over the peanut butter layer: Once the chocolate layer is smooth, carefully pour it over the chilled peanut butter layer. Use a spatula to spread it evenly, ensuring it covers the entire surface.
6. Chill again: Return the pan to the refrigerator for at least 1 hour to allow the chocolate layer to set completely. This will ensure clean slices when you cut the bars.
With all four layers now prepared, you are well on your way to creating a stunning dessert that will impress family and friends alike. The 4-Layer Everything Bars are not only a treat for your taste buds but also a feast for the eyes, showcasing the beautiful layers of texture and flavor that make them truly special.
Stay tuned for the next part of this article, where we will explore expert tips for achieving the best results and answer some common questions about making these delicious bars.
Tips for Melting Chocolate Safely and Effectively
Melting chocolate is a crucial step in creating the perfect 4-Layer Everything Bars. Here are some tips to ensure you melt your chocolate safely and effectively while achieving that smooth, glossy finish:
1. Use a Double Boiler: This method allows for gentle heating. Place a heatproof bowl over a pot of simmering water, ensuring the bowl doesn’t touch the water. Stir the chocolate frequently until it melts evenly.
2. Microwave Method: If you prefer speed, use the microwave. Place chopped chocolate in a microwave-safe bowl and heat in 20 to 30-second intervals, stirring in between to avoid burning. Stop when there are still a few lumps; the residual heat will melt them.
3. Avoid Water: Ensure that no water gets into your chocolate. Even a tiny drop can cause chocolate to seize and become grainy.
4. Use Quality Chocolate: For the best results, opt for high-quality chocolate bars or chips. They melt better and offer superior flavor.
Importance of Cooling for Setting the Layer
Cooling is essential in layered desserts. After melting your chocolate and pouring it over the crust, allow it to cool and set properly before adding the next layer. This prevents the layers from mixing and ensures your bars maintain distinct flavors and textures. Ideally, allow the chocolate layer to set at room temperature for about 30 minutes before moving it to the refrigerator for an additional 1-2 hours. This helps solidify the layers thoroughly, making the final product easier to cut and serve.
Creative Toppings: Enhancing Flavor and Texture
Toppings are what truly elevate the 4-Layer Everything Bars, adding a delightful mix of flavors and textures. Each topping serves a unique purpose, enhancing the overall dessert experience.
Mini Marshmallows: Sweetness and Texture
Mini marshmallows introduce a light, fluffy sweetness that contrasts beautifully with the richer layers. Their chewy texture provides a delightful bite, making each mouthful enjoyable. To add them effectively, sprinkle a generous amount over the melted chocolate layer while it’s still warm, allowing them to slightly adhere.
Crushed Pretzels: A Salty Crunch
Crushed pretzels add a salty crunch that balances the sweetness of the bars. The combination of sweet and salty is irresistible. To incorporate, crush pretzels into small pieces and scatter them evenly over the marshmallows. This step not only improves texture but also adds a savory element that enhances flavor complexity.
Chopped Nuts: Added Richness and Flavor Depth
Nuts such as almonds, pecans, or walnuts bring richness and a satisfying crunch. They also contribute healthy fats and protein, making the bars more filling. Chop your chosen nuts roughly and sprinkle them on top after the pretzels. This creates a layered effect and ensures every bite is packed with flavor.
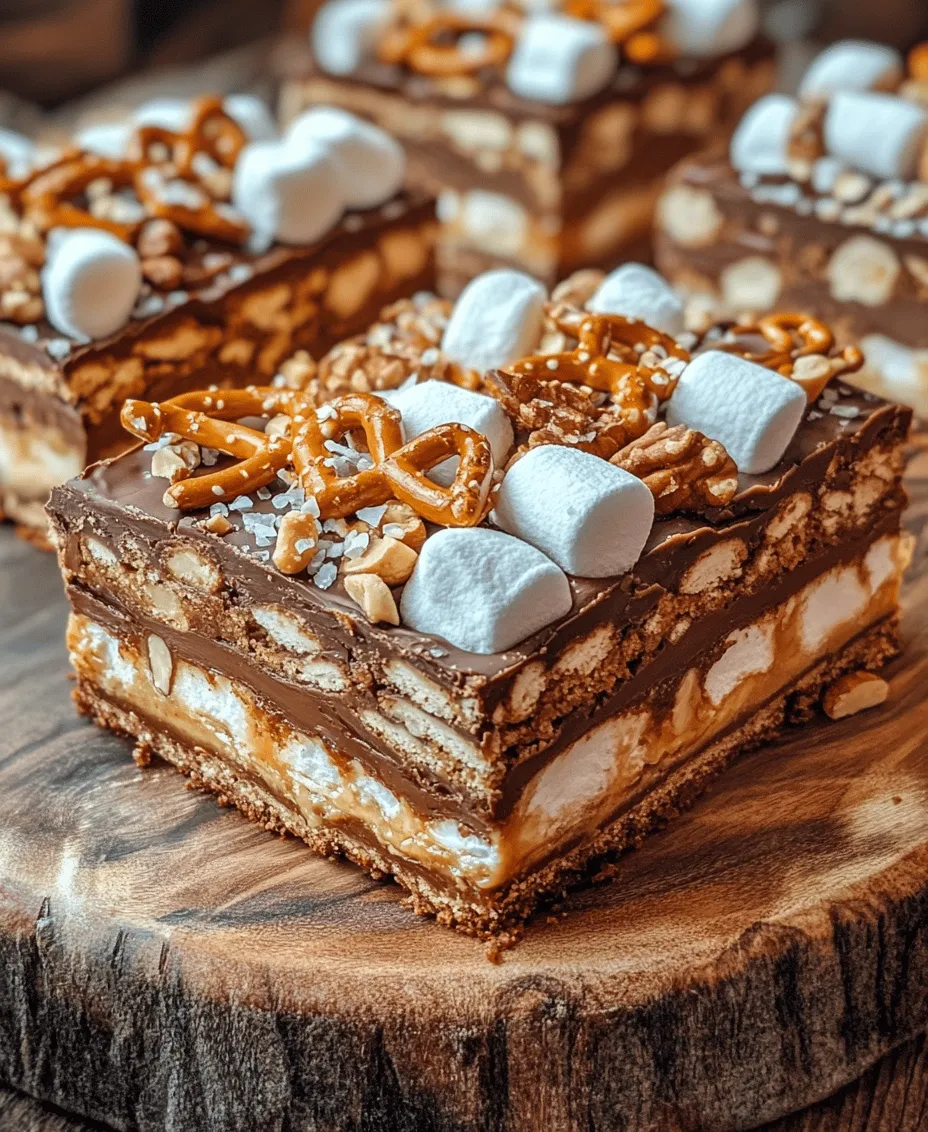
Flaky Sea Salt: Balancing Sweetness with Saltiness
A sprinkle of flaky sea salt enhances the overall flavor profile by cutting through the sweetness. It adds a gourmet touch to your bars, making them taste even more indulgent. Just a pinch on top of the assembled layers will do the trick, ensuring the sweetness of the chocolate and the depth of the nuts and pretzels shine through.
Instructions for Adding Toppings Effectively
When adding toppings, timing is important. Follow these steps for optimal results:
1. Layer Order: After pouring the melted chocolate over the crust, let it sit for a few minutes until it starts to thicken.
2. Sprinkle Toppings: Evenly distribute mini marshmallows, crushed pretzels, and chopped nuts over the chocolate layer while it’s still warm. This ensures they stick and become part of the bar.
3. Finish with Sea Salt: Finally, sprinkle flaky sea salt over the entire surface. The salt not only enhances the flavor but also adds visual appeal.
Final Assembly: Bringing It All Together
Once all your layers and toppings are applied, it’s time to bring everything together.
Importance of Chilling the Assembled Bars Before Serving
Chilling is crucial for achieving the perfect texture and ensuring the layers hold together. After adding the toppings, cover the dish with plastic wrap and chill in the refrigerator for at least two hours. This allows the layers to firm up, making cutting easier and ensuring a clean presentation.
Visual Presentation Tips for Serving the Bars
When it’s time to serve, presentation matters. Here are a few tips to make your bars visually appealing:
– Serve on a Platter: Arrange the bars on a decorative platter for a beautiful display.
– Garnish: Consider garnishing with additional crushed pretzels or a sprinkle of sea salt just before serving for a polished look.
– Use Colorful Plates: Serving on contrasting colored plates can enhance the visual appeal of your dessert.
Explanation of Cutting Techniques for Clean Edges
To achieve clean edges when cutting your bars:
1. Use a Sharp Knife: A sharp knife is essential. A dull knife can squish the layers instead of cutting through them cleanly.
2. Warm the Knife: For an even cleaner cut, warm the knife under hot water, dry it, and then slice through the bars. This helps glide through the layers without sticking.
3. Cut into Uniform Portions: Aim for uniform square or rectangular pieces for a professional look.
Storage and Serving Suggestions
Proper storage will ensure your 4-Layer Everything Bars stay fresh and delicious.
Best Practices for Storing 4-Layer Everything Bars
Store the bars in an airtight container to keep them moist. Layer parchment paper between the bars to prevent them from sticking together. They can be kept at room temperature for up to 3 days, or in the refrigerator for up to a week.
Discussion on How Long They Can Be Kept and Their Ideal Serving Temperature
While the bars are best enjoyed fresh, they can last in the refrigerator for about a week. For the best flavor and texture, allow them to come to room temperature for about 15 minutes before serving. This enhances the flavors and makes them easier to chew.
Suggestions for Occasions to Serve These Bars
These bars are perfect for various occasions, including:
– Parties: Their eye-catching layers and variety of flavors make them a crowd-pleaser at any gathering.
– Holidays: Customize the toppings for festive occasions, such as using red and green sprinkles for Christmas or pastel colors for Easter.
– Picnics: They are easy to transport and serve, making them ideal for outdoor gatherings.
Nutritional Overview
While these 4-Layer Everything Bars are undeniably indulgent, they can also be enjoyed mindfully.
Brief Discussion on the Nutritional Aspects of the Ingredients Used
Each layer of the bars offers unique nutritional benefits:
– Oats: Provide fiber and can aid in digestion.
– Nut Butters: Offer healthy fats and protein.
– Chocolate: Dark chocolate, in moderation, can be heart-healthy due to its antioxidants.
– Nuts: Packed with nutrients, including vitamins, minerals, and healthy fats.
Balancing Indulgence with Moderation in Dessert Consumption
Dessert doesn’t have to be guilt-inducing. Enjoy these bars as an occasional treat, balancing them with healthy meals and regular physical activity. Remember, indulging in moderation can lead to a more satisfying experience.
Conclusion
Creating and enjoying 4-Layer Everything Bars is a delightful experience that combines various flavors and textures into one irresistible dessert. The joy of layering delicious ingredients and watching them come together is matched only by the satisfaction of sharing them with friends and family.
We encourage you to try this recipe and explore the endless possibilities for customization. Whether you stick to the classic toppings or experiment with your favorites, these bars are sure to impress. Their versatility makes them a staple in home baking, perfect for any occasion or simply as a sweet treat to enjoy at home. So gather your ingredients, get creative, and savor the delightful experience of making your very own 4-Layer Everything Bars!