Introduction
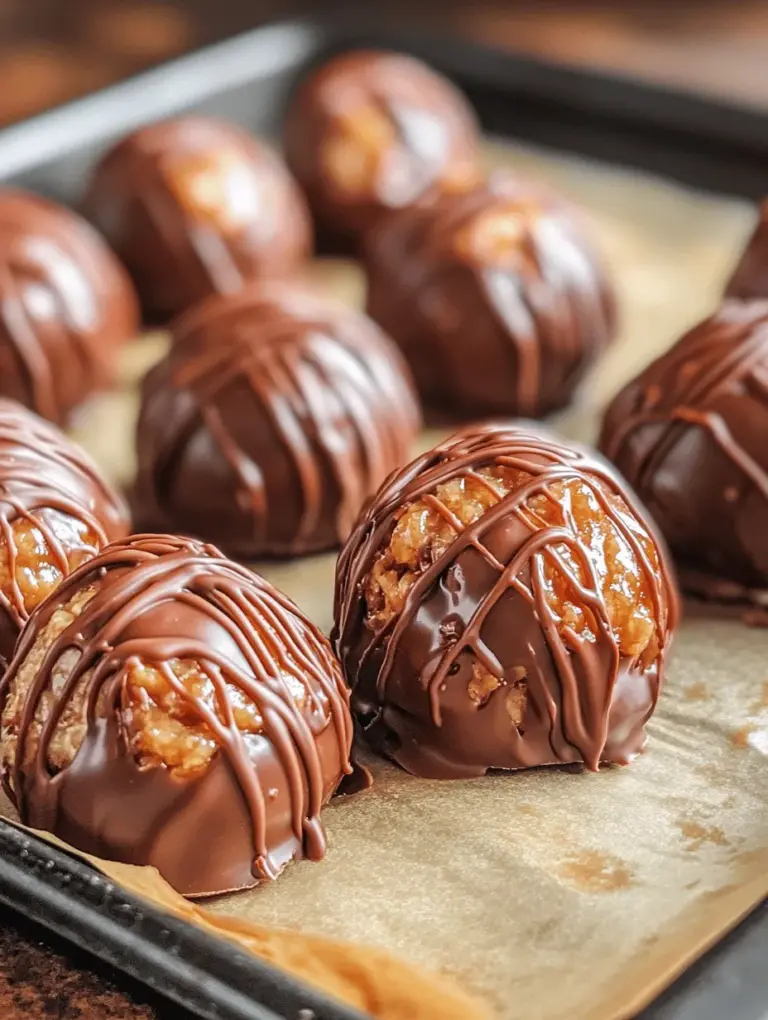
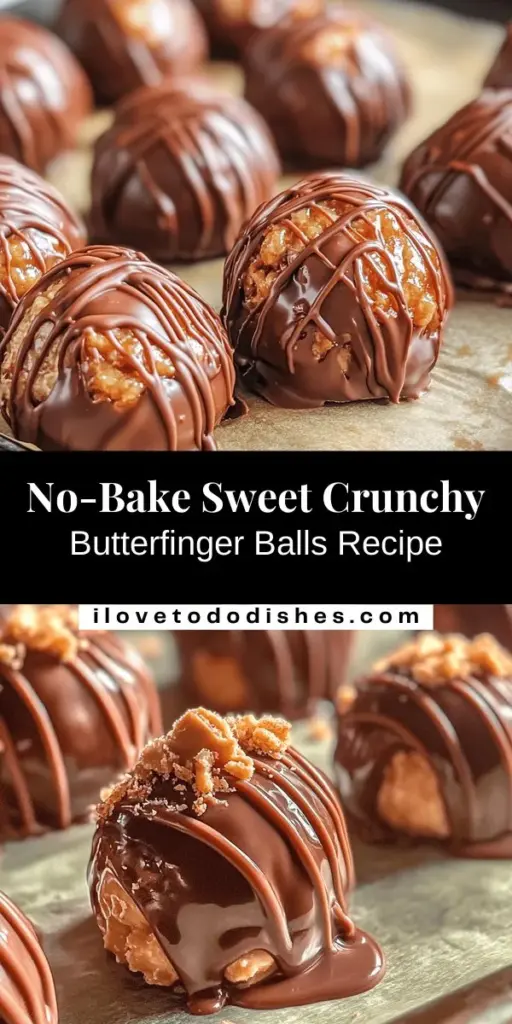
If you’re searching for a delightful homemade treat that combines nostalgia with a modern twist, look no further than Sweet Crunchy Butterfinger Balls. This indulgent dessert is not just a feast for the eyes; it offers a symphony of flavors and textures that will satisfy any sweet tooth. The allure of these bite-sized treats lies in their rich, peanut buttery goodness, perfectly balanced with the distinct crunch of crushed Butterfinger candy.
Homemade treats have always held a special place in our hearts. They evoke memories of family gatherings, celebrations, and the simple joy of baking alongside loved ones. The process of creating something from scratch brings a sense of accomplishment and warmth that store-bought sweets simply cannot replicate. When you make Butterfinger Balls at home, you gain the satisfaction of knowing exactly what goes into each delicious morsel, ensuring a quality treat that your family and friends will love.
What sets Butterfinger Balls apart from other desserts is the unique combination of flavors and textures. The rich creaminess of peanut butter melds seamlessly with the crunchy, chocolatey notes of Butterfinger bars, creating a snack that is both satisfying and addictive. Each bite is a delicious reminder of childhood favorites, yet presented in a fun and creative way.
The Inspiration Behind Butterfinger Balls
To fully appreciate the Sweet Crunchy Butterfinger Balls, we must first delve into the history of the iconic Butterfinger candy. First introduced in 1923, Butterfinger bars quickly became a favorite for their unique combination of a crispy, crunchy layer of peanut butter covered in rich chocolate. Over the years, this beloved candy has inspired countless recipes, from ice creams to cakes, but the creation of Butterfinger Balls brings a new level of creativity to the table.
In recent years, no-bake desserts have surged in popularity, appealing to home bakers seeking quick, easy, and delicious recipes. With minimal ingredients and fuss, no-bake treats allow for a seamless baking experience without the fear of turning on the oven. Given the rich flavor and appealing texture of Butterfinger Balls, it’s no wonder they fit perfectly into the no-bake trend. The simplicity of combining a few pantry staples to create a show-stopping dessert is truly inspiring.
My journey with Butterfinger Balls began during a family gathering where we were reminiscing about our favorite childhood snacks. As we shared stories of sneaking Butterfinger bars from the candy aisle, I was inspired to create a recipe that would encapsulate those cherished memories. With a few trial runs and adjustments, I developed a no-bake recipe that not only captured the essence of Butterfinger but also brought a sense of joy to everyone who tried them.
Ingredients Breakdown
Before diving into the step-by-step instructions for creating these delightful treats, it’s important to understand the key ingredients that make Sweet Crunchy Butterfinger Balls so irresistible. Each component plays a crucial role in achieving the perfect balance of flavor and texture.
– Crushed Butterfinger Candy Bars: The star of the show, crushed Butterfinger bars provide the signature flavor and crunch that sets these treats apart. Their combination of creamy peanut butter and crispy layers adds a delightful texture that enhances each bite.
– Creamy Peanut Butter: As a binding agent, creamy peanut butter is essential for holding the ingredients together while also adding richness and depth of flavor. The creaminess of the peanut butter complements the crunchy Butterfinger, creating a harmonious blend of tastes.
– Powdered Sugar: For sweetness and consistency, powdered sugar is a must. It helps to sweeten the mixture without the graininess that granulated sugar might introduce. Additionally, it aids in achieving the desired dough-like consistency that forms the base of the balls.
– Vanilla Extract: A splash of vanilla extract elevates the overall flavor profile and adds a touch of warmth to the treats. It enhances the sweetness of the peanut butter and complements the chocolate coating.
– Chocolate Chips: To coat the Butterfinger balls, chocolate chips are a decadent choice. They not only add indulgent richness but also provide a beautiful, glossy finish that makes the treats visually appealing.
– Coconut Oil (optional): This ingredient can be added to the chocolate for a smoother melting process and to improve the coating’s texture. Coconut oil can make the chocolate coating more fluid and help it adhere better to the balls.
Step-by-Step Instructions for Making Butterfinger Balls
Now that we have a solid understanding of the ingredients, let’s dive into the step-by-step instructions for making Sweet Crunchy Butterfinger Balls. This no-bake dessert is perfect for any occasion, whether you’re hosting a party or simply treating yourself to something sweet.
Step 1: Prepare Your Ingredients
Before you begin, gather all your ingredients and tools. This includes:
– 2-3 full-sized Butterfinger candy bars, crushed
– 1 cup creamy peanut butter
– 1 cup powdered sugar
– 1 teaspoon vanilla extract
– 1 cup chocolate chips (for coating)
– 1 tablespoon coconut oil (optional)
Having everything ready will streamline the process and ensure you don’t miss any essential steps.
Step 2: Mix the Base
In a large mixing bowl, combine the crushed Butterfinger candy bars, creamy peanut butter, powdered sugar, and vanilla extract. Use a spatula or wooden spoon to mix the ingredients until they are well combined. The mixture should be thick and slightly sticky. If it feels too dry, you can add a little more peanut butter until it reaches the desired consistency.
Step 3: Form the Balls
Once the mixture is well combined, it’s time to form the balls. Using your hands, scoop out portions of the mixture—about one tablespoon each—and roll them into balls. Place each ball on a baking sheet lined with parchment paper. This will prevent them from sticking and make for easy cleanup later. Ensure they are evenly spaced apart to allow for the chocolate coating later on.
Step 4: Refrigerate the Balls
Refrigeration is key for setting the Butterfinger balls. Once you’ve formed all the balls, cover the baking sheet with plastic wrap or foil and place it in the refrigerator for at least 30 minutes. This step helps the balls firm up, making them easier to coat with chocolate.
Step 5: Melt the Chocolate
While the Butterfinger balls are chilling, you can prepare the chocolate coating. In a microwave-safe bowl, combine the chocolate chips and coconut oil (if using). Heat the mixture in the microwave in 30-second intervals, stirring in between, until the chocolate is melted and smooth. Be careful not to overheat, as this can cause the chocolate to seize.
Step 6: Coat the Balls
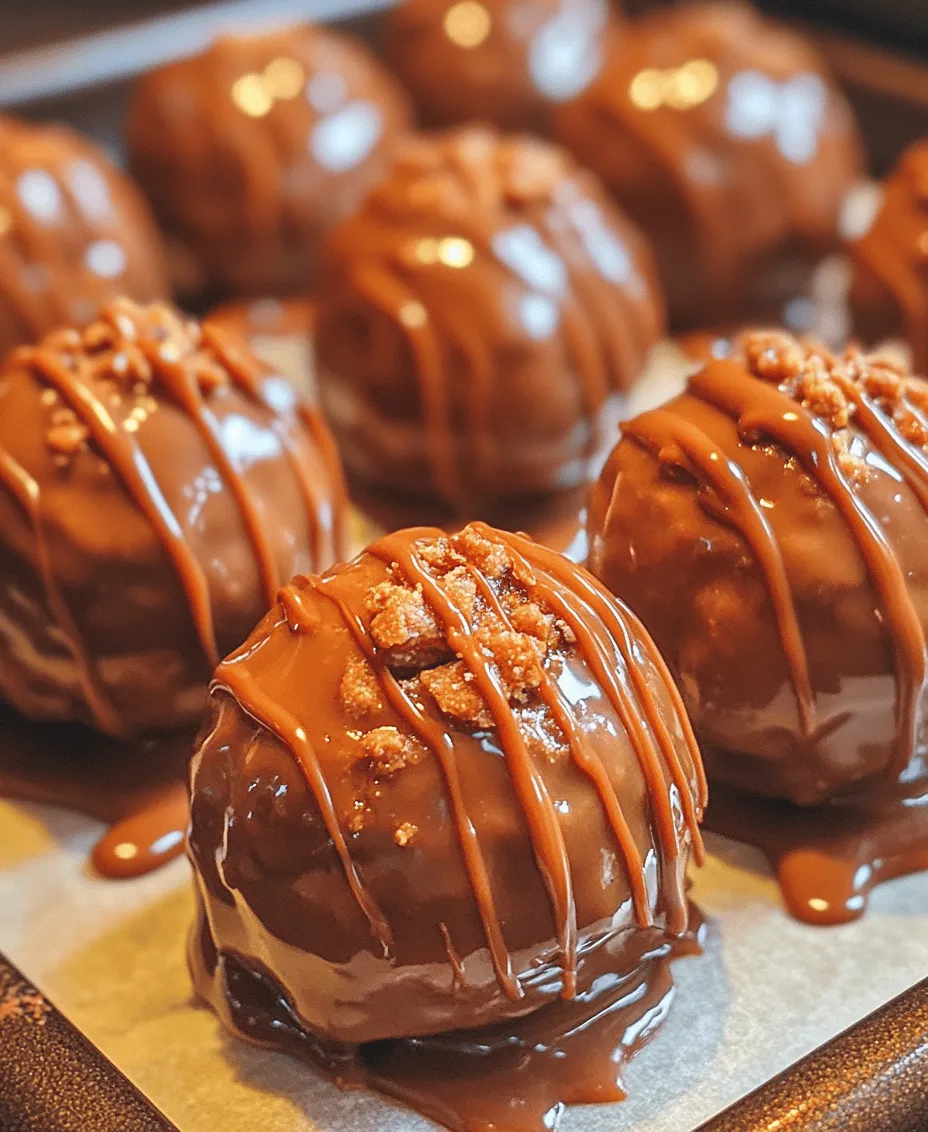
Once the chocolate is melted, remove the Butterfinger balls from the refrigerator. Using a fork or dipping tool, dip each ball into the melted chocolate, ensuring it is fully coated. Allow any excess chocolate to drip off before returning the coated balls to the parchment-lined baking sheet.
Step 7: Set the Coating
After all the balls are coated in chocolate, return the baking sheet to the refrigerator for another 15-20 minutes, or until the chocolate has fully set. This final chilling step is crucial for achieving that perfect bite when you’re ready to indulge.
By following these steps, you will create delicious Sweet Crunchy Butterfinger Balls that are sure to impress. The combination of flavors and textures is nothing short of delightful, making these treats a must-try for any dessert lover. In the next part of this article, we will explore additional tips for achieving the best results and techniques for melting chocolate successfully. Stay tuned!
Melting Process and Its Significance
Melting chocolate is a crucial step in the preparation of Sweet Crunchy Butterfinger Balls. When done correctly, it transforms solid chocolate into a silky, smooth coating that enhances both the texture and flavor of your treats. The key to achieving the perfect melt is to apply gentle heat, which allows the chocolate to liquefy without burning or seizing. This process is significant as it ensures that your Butterfinger Balls are coated evenly and beautifully, making them visually appealing while protecting the interior filling.
The Role of Coconut Oil in Achieving a Smooth Consistency
Coconut oil plays an essential role in achieving the desired smooth consistency when melting chocolate. By adding coconut oil to your chocolate, you can create a thinner coating that glides effortlessly over the Butterfinger Balls. This oil not only helps the chocolate achieve a glossy finish but also enhances its flavor with a subtle hint of coconut. It’s important to use refined coconut oil for this recipe to avoid an overpowering coconut taste. For every cup of chocolate, using about one tablespoon of coconut oil should suffice to create that perfect melt.
Alternatives to Melting Chocolate
While the microwave is a convenient method for melting chocolate, there are alternatives that might suit your kitchen setup better. The double boiler method is a classic technique used by many bakers. To use this method, fill a saucepan with a couple of inches of water and bring it to a gentle simmer. Place a heatproof bowl on top of the saucepan, ensuring it doesn’t touch the water. Add your chocolate and coconut oil mixture to the bowl, stirring frequently until fully melted. This method is particularly effective in preventing chocolate from overheating, as the steam from the simmering water provides gentle heat.
Troubleshooting Common Issues When Melting Chocolate
Even seasoned bakers can encounter problems when melting chocolate. Here are common issues and solutions:
1. Chocolate Seizing: This occurs when moisture comes into contact with melted chocolate, causing it to clump. To remedy this, try adding a teaspoon of coconut oil or vegetable oil to the seized chocolate and stir vigorously.
2. Burnt Chocolate: If the chocolate is left in the microwave for too long or overheated on the stovetop, it can burn, becoming thick and unusable. Always melt in short intervals, stirring frequently. If you suspect burning, remove it from the heat immediately and try to salvage it with a bit of coconut oil.
3. Grainy Texture: This texture can result from overheating or using low-quality chocolate. Use high-quality chocolate and avoid overheating to maintain a smooth consistency.
Coating the Butterfinger Balls
Once your chocolate is melted and ready, it’s time to coat the Butterfinger Balls effectively. Here are some techniques:
1. Dipping Technique: Using a fork or a toothpick, gently dip each Butterfinger Ball into the melted chocolate, ensuring it’s fully covered. Allow any excess chocolate to drip off before placing the coated ball on a parchment-lined baking sheet.
2. Batch Dipping: For efficiency, if you have multiple Butterfinger Balls, consider using a slotted spoon to dip several at once. This technique allows you to coat more treats in less time.
3. Decorative Finishes: After dipping, you can create decorative finishes using extra melted chocolate. Drizzle a contrasting color of chocolate over the coated balls for a beautiful effect. White chocolate is a popular choice for this purpose.
4. Toppings and Drizzles: For added texture and flavor, consider rolling the Butterfinger Balls in crushed nuts, sprinkles, or shredded coconut before the chocolate hardens. You can also add a drizzle of caramel or a sprinkle of sea salt for a gourmet touch.
Serving Suggestions and Pairings
Sweet Crunchy Butterfinger Balls are incredibly versatile and can be served on various occasions. Here are some ideas:
1. Best Occasions to Serve: These treats are perfect for birthdays, holiday gatherings, and casual get-togethers. They’re also great for movie nights or as a sweet snack after dinner.
2. Pairing Ideas with Beverages: Butterfinger Balls pair wonderfully with a range of beverages. Consider serving them with a hot cup of coffee or a chilled glass of milk. For a more sophisticated option, they can complement dessert wines or port.
3. Creative Presentation: To impress guests, consider presenting the Butterfinger Balls in decorative cupcake liners on a serving platter. You can also create a dessert table with various treats, including the Butterfinger Balls, to cater to diverse tastes.
Storage and Shelf Life
Proper storage is essential to maintaining the freshness and quality of your Butterfinger Balls.
1. Guidelines for Storing: Store the coated Butterfinger Balls in an airtight container to prevent them from drying out or absorbing moisture. If you have multiple layers, separate them with parchment paper to avoid sticking.
2. Recommended Containers: Glass or plastic containers with tight-fitting lids work best for storage. Avoid using paper bags, as these can allow air to seep in and compromise freshness.
3. Shelf Life: When stored properly, Butterfinger Balls can last up to two weeks at room temperature. For longer storage, consider refrigerating them, which can extend their shelf life by a few weeks.
Nutritional Information
Understanding the nutritional value of your Sweet Crunchy Butterfinger Balls is important for those mindful of their dietary intake.
1. Overview of Nutritional Value: On average, each Butterfinger Ball contains approximately 100 calories, 6g of fat, and 8g of sugar. The exact nutritional content may vary based on specific ingredients used.
2. Balancing Indulgence with Health Considerations: While these treats are undeniably indulgent, you can enjoy them as part of a balanced diet. Moderation is key, and pairing them with healthier options can help you satisfy your sweet tooth without overindulging.
3. Alternatives for Healthier Versions: If you’re looking to lighten the recipe, consider using dark chocolate, which contains less sugar than milk chocolate. You can also experiment with sugar substitutes or reduce the amount of sweetener in the Butterfinger filling for a healthier twist.
Conclusion
Sweet Crunchy Butterfinger Balls are a delightful treat that combines the nostalgia of candy bars with the fun of homemade sweets. Their simple preparation and delicious flavor make them an ideal addition to your dessert repertoire. Whether you’re making them for a special occasion or a casual snack, you’ll find joy in crafting these indulgent bites.
We encourage you to try this recipe and share your experiences with friends and family. Making these treats at home not only allows you to control the quality of ingredients used but also brings a sense of accomplishment and joy as you enjoy the fruits of your labor. So grab your ingredients, get creative, and savor the deliciousness of your homemade Butterfinger Balls!
